Encrypted HFS+ Ends in macOS 28: Convert Your Drives Now
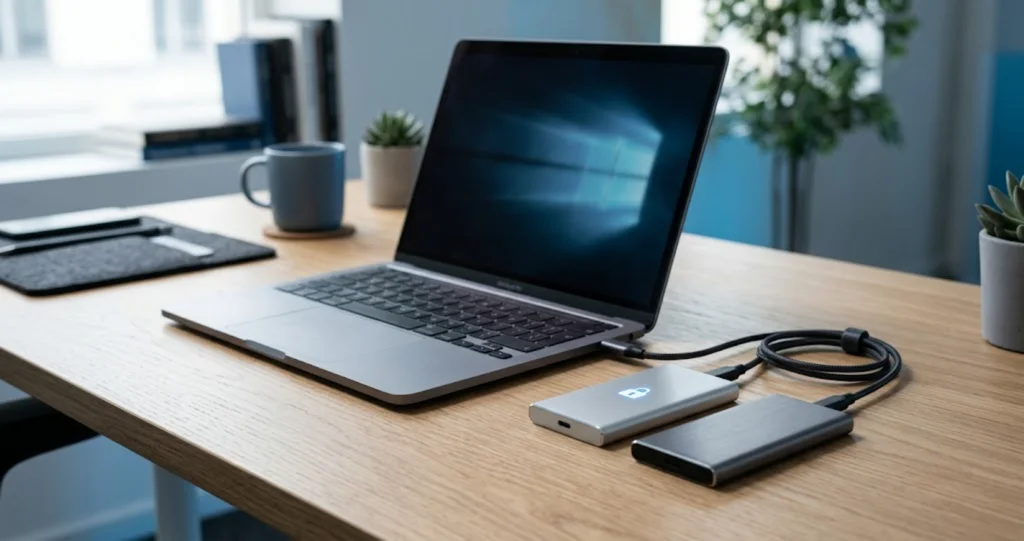
macOS 28 drops support for encrypted Mac OS Extended volumes. Here is how to find yours, convert them to APFS safely, and why Time Machine disks are different.
Most deadlines announce themselves. This one arrives quietly, in a support document, about drives that are almost certainly not plugged into your Mac right now. That is the whole problem. The volumes affected by this change are the ones living in a drawer, in a shoebox in a closet, in the bottom of a laptop bag you have not opened since you moved apartments -- old encrypted archive disks and old encrypted Time Machine drives that you set up carefully years ago and then, sensibly, stopped thinking about.
Apple has confirmed that in macOS 28, the Mac OS Extended file system format will be supported only for volumes that are not encrypted. That single sentence, from Apple's support document support.apple.com/en-us/125615 as reported by 9to5Mac in July 2026, is the entire change. Unencrypted HFS+ keeps working. Encrypted HFS+ does not. If a drive was encrypted using the old whole-volume encryption that Apple built for Mac OS Extended, you should not expect it to mount on a Mac running macOS 28.
Nothing happens today. Nothing happens next month. The consequence is delayed and therefore easy to ignore: at some point after macOS 28 ships -- expected roughly a year out from July 2026, so around fall 2027 according to independent analysis by Howard Oakley -- you buy a new Mac, or you update the one you have, and then one evening you go looking for a file from 2019, plug in the old drive, and it does not appear on the desktop. The files are still on the platter. Your Mac just no longer speaks the language they are stored in. This guide is about spending an hour now so that evening never happens.
Key Takeaways
- Only encrypted HFS+ is affected, not HFS+ itself: Mac OS Extended remains a supported format in macOS 28 for volumes that are not encrypted. What is being retired is the CoreStorage-based whole-volume encryption layer that sits underneath encrypted Mac OS Extended drives.
- Apple now offers a direct conversion path: Apple's revised guidance points to Disk Utility, then the Edit menu, then Convert to APFS -- taking an encrypted HFS+ volume straight to encrypted APFS without a decryption step first. The earlier version of Apple's advice told you to decrypt or reformat first, and Apple has since removed those instructions.
- Time Machine disks are explicitly excluded: Apple's own warning is that this solution does not apply to encrypted Time Machine backup disks. Howard Oakley, who documents macOS storage internals closely, explains why: HFS+ Time Machine backups depend on directory hard links that APFS does not implement the same way, so in-place conversion is high risk and unlikely to succeed.
- Encrypted disk images and APFS encryption are untouched: Encrypted
.dmgfiles never used CoreStorage, and their encryption is independent of the file system inside them. FileVault on an APFS startup disk and encrypted APFS external volumes are also unaffected. So are Intel Macs, which will never run macOS 28. - Audit now, convert on your own schedule: You likely have until around fall 2027. The right order is to find every affected drive first, convert the ones you actively use while you have a supported macOS in front of you, and make a deliberate decision about the archives rather than a rushed one.
What Is Actually Being Removed
The headline version of this story -- "Apple is killing HFS+" -- is wrong, and the difference matters enormously for deciding which of your drives you need to touch.
HFS+, which Apple brands as Mac OS Extended, is the file system Apple shipped in 1998 and used as the default on every Mac until APFS arrived in 2017. It is still readable and writable in current macOS, and according to Apple's support document it will still be readable and writable in macOS 28 -- provided the volume is not encrypted. A plain, unencrypted Mac OS Extended external drive full of photos from 2012 is not part of this story at all. You can leave it alone.
What is going away is the encryption. And to understand why the encryption is being retired separately from the file system, you have to know about a piece of macOS plumbing most people have never heard of.
CoreStorage: the layer nobody sees
HFS+ has no built-in encryption. It was designed in the 1990s, before whole-disk encryption was a consumer expectation, and it simply has no concept of an encrypted volume. So when Apple wanted to offer FileVault 2 -- full-volume encryption of your entire startup disk, introduced with OS X Lion in 2011 -- it could not just add a flag to HFS+. It needed something underneath.
That something is CoreStorage: a logical volume manager that sits between the physical partition on your disk and the file system on top of it. Instead of a partition containing an HFS+ file system directly, the partition contains a CoreStorage logical volume group, and inside that group lives a logical volume that contains the HFS+ file system. Because CoreStorage owns the block-level layer, it can encrypt and decrypt blocks transparently as they pass through. HFS+ above it has no idea anything unusual is happening; it just sees blocks.
This is the same machinery that made Fusion Drives possible. A Fusion Drive is a CoreStorage volume group that spans an SSD and a hard disk, presenting them to the file system as a single volume while CoreStorage quietly shuffles hot data onto the fast half. Same layer, different trick.
When you right-clicked an external Mac OS Extended drive in the Finder and chose Encrypt, macOS did not encrypt the HFS+ file system. It converted the volume to CoreStorage and encrypted it there. Howard Oakley's write-up of this change, published on eclecticlight.co in late July 2026, is explicit that what is being removed is support for encrypted HFS+ volumes that use CoreStorage. The deprecation is aimed at the volume manager, and encrypted HFS+ is collateral because CoreStorage is the only way encrypted HFS+ has ever worked.
Why APFS made CoreStorage redundant
APFS, shipped in 2017, was designed from the start with encryption as a native feature of the file system. It has multi-key encryption built into its own structures -- per-volume keys, per-file keys, metadata encryption -- with no intermediate layer required. When you encrypt an APFS volume, you are using a capability that lives inside APFS itself.
That leaves CoreStorage with nothing to do. Every Mac Apple currently sells uses APFS on its startup disk. FileVault on a modern Mac is APFS encryption, coordinated with the Secure Enclave, not CoreStorage. Fusion Drives were discontinued years ago. The only remaining consumers of CoreStorage are legacy encrypted HFS+ volumes and the Macs old enough to still have Fusion Drives -- which are Intel Macs, which will not be running macOS 28 anyway.
From Apple's side this is straightforward maintenance debt reduction: an entire subsystem with real complexity, real security surface, and a shrinking user base. From your side it is a chore with a deadline. Both things are true.
The practical upshot is worth stating plainly, because it determines how much work you have ahead of you:
| Volume state | Uses CoreStorage? | Affected by macOS 28? |
|---|---|---|
| HFS+, not encrypted | No | No -- keeps working |
| HFS+, encrypted | Yes | Yes -- this is the one |
| APFS, not encrypted | No | No |
| APFS, encrypted | No (APFS native) | No |
| Encrypted disk image (.dmg) | No | No |
What Is Not Affected
More people will worry about this change than are actually affected by it, and a surprising amount of the coverage has not been careful about the boundaries. Here is what you can stop thinking about immediately.
Encrypted disk images are not affected. This is the one that trips people up, because a .dmg and an encrypted volume feel like the same thing when you double-click them. They are not built the same way. Oakley puts it directly: encrypted disk images offer encryption as an option for most of their many different formats, and its availability and implementation is independent of the file system supported. Disk image encryption was never implemented through CoreStorage. If you keep sensitive documents in a 256-bit AES encrypted sparse bundle, that container is fine, regardless of whether the file system inside it is HFS+ or APFS, and regardless of where the .dmg file itself is stored.
APFS-encrypted volumes are not affected. If you formatted an external SSD as APFS (Encrypted) at any point, you are already on the far side of this transition. Nothing to do.
FileVault on an APFS startup disk is not affected. Every Apple silicon Mac and every reasonably modern Intel Mac boots from APFS, and FileVault on those machines is APFS encryption. This change does not touch your boot drive.
Unencrypted Mac OS Extended drives are not affected. As covered above, HFS+ itself survives. If you have old drives formatted as Mac OS Extended (Journaled) with no encryption, macOS 28 will still mount them. You may still want to move them to APFS for other reasons -- APFS handles snapshots, space sharing, and integrity checking far better, and it is where all of Apple's development effort goes -- but this deadline does not force your hand.
Intel Macs are not affected. macOS 28 will never run on an Intel Mac. Oakley's assessment is that this change will never affect Intel Macs, which means an Intel machine that stays on Tahoe will keep mounting encrypted HFS+ volumes for as long as that machine keeps running. That is genuinely useful as a fallback -- an old Intel Mac in a closet becomes a legitimate reader of last resort for legacy encrypted drives. It is also, obviously, not a long-term plan, because the machine itself will eventually stop getting security updates and eventually stop working. If you are trying to work out where your own hardware sits in Apple's transition, our breakdown of the final Intel Mac compatibility list covers which machines got cut and when.
Third-party encrypted containers are not affected. VeraCrypt volumes, encrypted archives, cloud-provider client-side encryption -- none of these route through CoreStorage.
If you have read this far and none of the affected categories apply to you, you are done. Genuinely. Close the tab.
How to Find Out Whether You Have Any Affected Drives
Assume you do not remember. Encryption was a checkbox you clicked once, possibly years ago, possibly on a drive you bought for a specific project and then repurposed. The point of an audit is to replace "I think all my drives are fine" with a list.
Step 1: gather the drives
This is the step people skip, and it is the one that matters most. Go find them. The drives at risk are, statistically, the ones not currently connected to your Mac: the 2TB spinning disk you used for Time Machine before you switched to a newer one, the portable drive holding a photo archive, the bus-powered disk you used for a video project in 2018. Physically collect everything and put it in a pile. If you cannot find a drive, note that too -- a drive you cannot locate is a different problem, but a real one.
Step 2: check each drive in Disk Utility
Open Disk Utility from Applications, then Utilities. Before you look at anything, go to the View menu and choose Show All Devices. This is important. In the default view, Disk Utility shows you volumes but hides the physical device and container structure above them, and with CoreStorage volumes the interesting details live in that hidden layer.
With All Devices showing, the sidebar gives you a hierarchy: the physical disk at the top, then whatever containers or volumes sit inside it. Click each volume and read the information panel. You are looking at the format line.
What you might see:
- "APFS" or "APFS (Encrypted)" -- modern, unaffected.
- "Mac OS Extended (Journaled)" -- HFS+, unencrypted, unaffected.
- "Mac OS Extended (Journaled, Encrypted)" -- this is the one. CoreStorage-backed encrypted HFS+.
- "Mac OS Extended (Case-sensitive, Journaled, Encrypted)" -- same thing, with case sensitivity. Also affected. Note the case-sensitivity flag, because if you convert you will want to preserve it.
A locked encrypted volume that you have not unlocked will show up greyed out in the sidebar with an eject-style icon, and Disk Utility will offer limited information until you mount it. You will need the password to go further, which is a good early test of whether you actually still have it.
Step 3: confirm from the command line
Disk Utility's presentation is fine but the command line is faster when you have several drives and unambiguous when you are not sure what you are reading. Open Terminal.
diskutil listThis gives you every disk and every volume, with identifiers like disk4s2, the type, the name, and the size. Read the TYPE column. Apple_APFS entries are APFS containers. Apple_HFS entries are HFS+ volumes. An entry showing Apple_CoreStorage is the interesting one -- that is a partition holding a CoreStorage volume group, which for an external drive almost always means encrypted HFS+.
diskutil cs listcs is short for CoreStorage. This is the most direct question you can ask. On a Mac with no CoreStorage volumes anywhere, this command returns essentially nothing -- no volume groups to report. If you do have CoreStorage in play, the output is a nested tree: a logical volume group at the top, then physical volumes, then logical volume families, then logical volumes. The fields worth reading are the volume group's name, and within the logical volume family, whether encryption is in use and whether the volume is currently unlocked. A drive that is formatted APFS shows nothing here at all, which makes this a clean yes/no test.
diskutil apfs listThe mirror image: this lists APFS containers and the volumes inside them, with roles and encryption state. Anything that shows up here is on the safe side of the change.
diskutil info /dev/disk4s2Replace the identifier with the one from diskutil list. This dumps detailed information for a single volume: the file system personality, the volume name, whether it is encrypted, whether it is a CoreStorage logical volume, mount point, and capacity. When you want a definitive answer about one specific drive, this is the command.
Step 4: write down what you found
Make an actual list -- drive name, capacity, current format, what is on it, and whether the contents exist anywhere else. That last column decides everything downstream. A drive whose contents are duplicated in a current backup is a low-stakes decision. A drive holding the only copy of something is a high-stakes decision, and it should be treated differently. If your broader backup picture is vague, this is a reasonable moment to read through a full Mac backup strategy and fix the underlying gap rather than just this one deadline.
Option 1: Convert in Place with Disk Utility
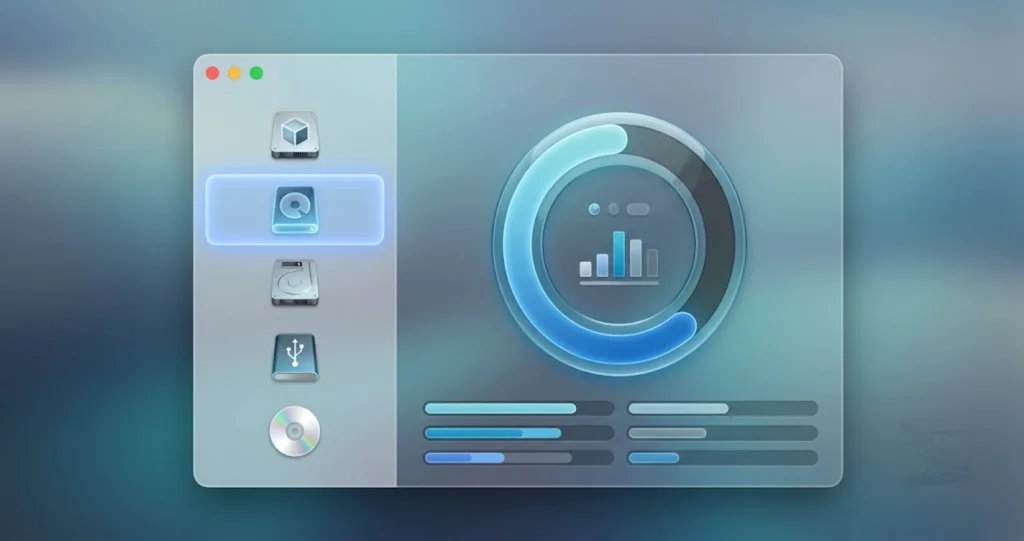
Apple's current recommendation, as reported by 9to5Mac from Apple's revised support document in July 2026, is a direct conversion. You select the encrypted HFS+ volume in Disk Utility and use Edit → Convert to APFS. The result is an encrypted APFS volume, with your files still on it, and no intermediate step where the data sits unencrypted.
This is a meaningful improvement over what Apple originally published. The earlier version of the guidance told users to decrypt the volume first, or reformat it entirely, and only then convert -- a slower path with a window of reduced protection in the middle. Apple removed those decryption-first instructions when it revised the page. Because Apple has already changed this document once, check support.apple.com/en-us/125615 yourself for Apple's current wording before you start; the steps below reflect the revised guidance as reported, but Apple owns the authoritative version.
Before you start
Make a backup copy. This is not boilerplate. Oakley's guidance is specific on the point: for archives of important files, in-place conversion should only be attempted after a backup copy has been made. In-place conversion rewrites the on-disk structure of a volume that currently contains all of your data. The track record is good -- Oakley describes it as exceedingly good on startup disks -- but "exceedingly good" is not "certain", and the failure mode is not a warning dialog, it is a volume in an intermediate state.
If the drive holds anything you cannot reproduce, copy it somewhere else first. Another external drive, a spare APFS volume, wherever. If you genuinely have no second location, that is worth pausing on: you have been keeping a single copy of irreplaceable data on an aging drive, and the file system deadline is the smaller of your two problems.
Also confirm before you begin:
- You can unlock the volume. Have the password in front of you.
- The Mac is on mains power, not battery.
- Sleep is disabled for the duration, or you are going to sit with it. System Settings, Lock Screen, and set the display and system sleep timers generously. On a laptop, closing the lid mid-conversion is exactly the wrong move.
- The drive is connected directly, not through a hub or a daisy chain if you can avoid it. Conversion is a sustained I/O workload and a flaky connection is the most common cause of trouble. If your drive has a history of dropping off the bus, deal with that first -- our guide to the "disk not ejected properly" problem on Tahoe covers the usual power and cable causes.
The steps
- Connect the drive and unlock it with its password so the volume mounts normally.
- Open Disk Utility. From the View menu, choose Show All Devices.
- In the sidebar, select the encrypted Mac OS Extended volume itself -- the volume, not the physical disk above it.
- Open the Edit menu and choose Convert to APFS.
- Confirm the prompt. Disk Utility will describe what it is about to do; read it rather than clicking through, particularly the volume name, so you know you have the right target selected.
- Wait. Do not unplug the drive, do not put the Mac to sleep, do not start a large file copy to the same drive.
- When it finishes, verify the result (see the verification section below) before you delete your backup copy.
How long it takes
There is no useful single number here, because the variable that dominates is the drive mechanism, not the amount of data.
On an external SSD over USB 3.2 or Thunderbolt, conversion of a few hundred gigabytes is typically a matter of minutes to tens of minutes. Random access is nearly free on flash, and the metadata rewriting that dominates conversion is exactly the workload SSDs are good at.
On a spinning hard disk, expect it to be dramatically slower -- plan for hours on a large, full drive, and be prepared for it to take much longer than the raw capacity would suggest. Conversion is heavily metadata-bound, which means a great deal of seeking, and seeking is the one thing a mechanical drive is worst at. A drive with millions of small files converts far more slowly than a drive with the same number of bytes in a few large video files.
The practical advice: start a spinning-disk conversion when you are done using the Mac for the day, not twenty minutes before you need to leave.
If it is interrupted
Power loss, an accidental unplug, a kernel panic. First rule: do not immediately try to fix it. Reconnect the drive, let macOS settle, and look at what state the volume is in with diskutil list and diskutil cs list. Disk Utility's First Aid, run against the volume, is the appropriate next step -- not reformatting, and not repeatedly retrying the conversion.
If the volume mounts and its contents look right, verify against your backup copy before continuing. If it does not mount, this is the moment your backup copy earns its existence: erase the drive, format it fresh as APFS (Encrypted), and restore. Trying increasingly aggressive recovery operations on a half-converted volume tends to make things worse, and every attempt writes to the disk.
Option 2: Decrypt First, Then Convert
The older path, and still a legitimate one in specific circumstances. You remove the encryption from the HFS+ volume, leaving a plain Mac OS Extended volume, and then either convert that to APFS or leave it unencrypted (which, remember, is fine -- unencrypted HFS+ is not affected by this change).
To decrypt, right-click the mounted volume in the Finder and choose the decrypt option, or use Disk Utility. Decryption is a background process that runs while the volume stays usable, and on a large spinning disk it can take many hours. You can check progress from the command line with diskutil cs list, which reports conversion status for the logical volume.
When this is the better choice
When the drive is going to stay as an HFS+ archive. If you have a drive that needs to be readable by an older Mac, or by a machine running a much older macOS, or by a device with limited file system support, converting it to APFS may create a compatibility problem you did not have. Decrypting it and leaving it as unencrypted Mac OS Extended keeps it readable everywhere it was readable before and takes it out of the scope of this deprecation entirely.
When the contents are not sensitive. Plenty of "encrypted" drives were encrypted reflexively rather than deliberately. If the drive holds installer files, ripped media, or project assets that carry no personal or confidential information, removing the encryption is a legitimate answer, not a compromise.
When conversion has already failed. If Convert to APFS refuses to run or fails partway, decrypting first sometimes clears the obstruction, because it removes the CoreStorage layer from the equation before the conversion runs.
For Time Machine volumes. This is the significant case, and it gets a full section below. Oakley's recommendation for HFS+ Time Machine backups is decryption as the alternative to conversion, precisely because conversion is not viable for them.
The trade-off
Between decryption completing and re-encryption completing, the data on that drive is sitting in the clear. Anyone who picks up the drive can read it. For a drive that never leaves a locked home office, that window is an acceptable risk. For a drive with client data, medical records, financial documents, or anything covered by an obligation you have made to someone else, it may not be -- and Option 1's direct conversion, which never exposes the plaintext, is the better answer.
The window is also longer than people expect. Decrypting a full 4TB spinning disk and then re-encrypting an APFS volume of the same size can span more than a day of elapsed time. Plan around where the drive physically sits during that period.
Option 3: Erase and Reformat, Then Copy Back
The bluntest option and, for a lot of drives, the correct one. You copy the contents somewhere else, erase the drive completely, format it as APFS (Encrypted), and copy the contents back.
Nothing is converted, so nothing can fail halfway through a conversion. The failure modes here are ordinary file-copy failures, which are visible, recoverable, and easy to reason about. You either finish the copy or you do not, and you still have the source until you deliberately erase it.
The steps
- Copy everything off the drive to a location with enough free space. Verify the copy -- count the files, check total size, spot-check that a few large files open.
- In Disk Utility with Show All Devices on, select the physical disk (not the volume) and click Erase.
- Set the scheme to GUID Partition Map and the format to APFS (Encrypted). Choose a strong password. Save it in your password manager at the moment you create it, not afterwards.
- Copy the contents back.
- Verify again before deleting the intermediate copy.
Selecting the physical disk rather than the volume matters. Erasing at the disk level rebuilds the partition scheme, which is what you want on an old drive that may have an outdated or unusual layout -- and it is the only way to be certain the CoreStorage structures are entirely gone.
When this is right
For archive disks in particular, this is often the best answer. Old archive drives accumulate sediment: half-finished projects, duplicate copies of the same folder tree with slightly different names, caches, .DS_Store files, the contents of a Downloads folder from 2017. A copy-out, erase, copy-back cycle is a natural moment to look at what is actually on there and put back only what you want to keep. You end up with a smaller, cleaner, modern-format drive.
It is also the right answer when the drive's contents are fully reproducible -- a clone of another drive, a media library that exists elsewhere, exported files you still have originals of. If there is no unique data at risk, there is no reason to accept conversion risk. Erase it.
And it is the right answer for old spinning disks where conversion would take a very long time anyway. A sequential copy off and back on is far friendlier to a mechanical drive than hours of metadata-heavy random I/O, and it is faster in wall-clock terms surprisingly often. If you are reorganizing external storage as part of this, our external storage and backup guide for Tahoe covers formatting choices and drive layout in more depth.
Choosing a Path: A Decision Table
| Drive type | Recommended path | Risk level | Notes |
|---|---|---|---|
| Encrypted HFS+ working drive, contents backed up elsewhere | Option 1: Convert in place | Low | Fastest route; backup already exists as a safety net |
| Encrypted HFS+ archive, only copy of the data | Copy off first, then Option 1 or Option 3 | Medium | Never convert a sole copy without duplicating it first |
| Encrypted HFS+ archive, contents reproducible | Option 3: Erase and reformat | Low | No conversion risk at all; good moment to prune |
| Encrypted HFS+ drive needed by an older Mac | Option 2: Decrypt, stay HFS+ | Low | Unencrypted HFS+ is not affected; preserves compatibility |
| Encrypted HFS+ drive with sensitive data | Option 1: Convert in place | Low-Medium | Avoids any window where data sits unencrypted |
| Encrypted HFS+ Time Machine backup | Decrypt, or start fresh on APFS | High if converted | Apple excludes these from the conversion solution -- see below |
| Encrypted HFS+ volume you cannot unlock | Recover the password first | Blocked | No path forward without it; see the password section |
| Fusion Drive on an Intel Mac | No action needed | None | macOS 28 will not run on this Mac |
| Encrypted disk image (.dmg) | No action needed | None | Never used CoreStorage |
| Any APFS volume | No action needed | None | Already on the supported side |
Time Machine Drives Are a Special Case
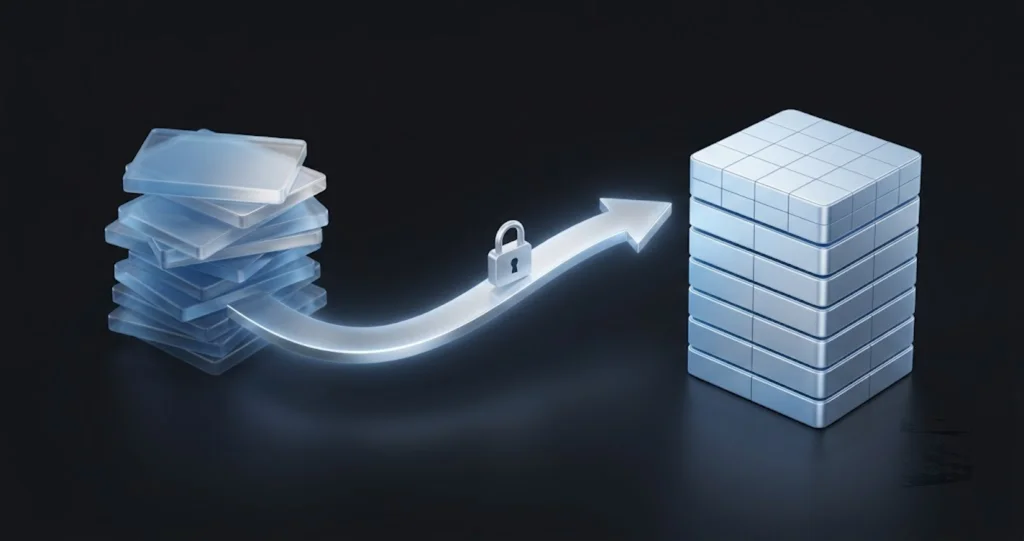
Apple's support document carries an explicit warning alongside the conversion instructions: this solution does not apply to encrypted Time Machine backup disks. That is not a hedge or a footnote. It is Apple telling you that the fix it just published does not work for the single most common category of encrypted HFS+ drive in existence.
Oakley is more direct about why. His assessment is that attempting in situ conversion to APFS is high risk and unlikely to be successful, so it should not be attempted on Time Machine backups on HFS+. The reason comes down to how HFS+ Time Machine backups are built.
What an HFS+ Time Machine backup actually is
When Time Machine writes to an HFS+ volume, it creates a dated folder for each backup that appears to contain a complete copy of your Mac. It obviously does not contain a complete copy -- a 500GB Mac backed up hourly for three years would need petabytes. What each dated folder actually contains, for anything unchanged since the previous backup, is a hard link pointing at the existing copy.
Ordinary hard links to files are a standard Unix feature that HFS+ supports normally. But Time Machine needed to do the same trick for entire directories, so that an unchanged folder containing ten thousand unchanged files could be represented as one link rather than ten thousand. Apple added directory hard links to HFS+ specifically for Time Machine. They are a non-standard extension, implemented with hidden machinery in a private directory at the volume root, and they exist nowhere else in the file system world.
A multi-year Time Machine volume can contain millions of these links. That structure is the backup. The dated folders are almost entirely links.
APFS does not implement directory hard links. It solves the same problem a completely different way, with copy-on-write snapshots -- which is why Time Machine on APFS destinations, the default since macOS Big Sur, is faster and more space-efficient than the HFS+ scheme ever was. There is no mechanical translation from one representation to the other, because they are not the same idea expressed differently. They are different ideas.
Which is why conversion behaves so differently depending on what is on the volume. Oakley notes that in-place conversion has an exceedingly good track record on startup disks -- normal file systems, normal structures, well-trodden path. On a Time Machine backup, the conversion machinery encounters millions of directory hard links that have no APFS equivalent, and it fails.
Your realistic options
There is no clean way to carry a long HFS+ Time Machine history forward onto APFS. That is the honest answer, and any guide telling you otherwise is guessing. What you have are three imperfect choices.
Decrypt the volume and keep it as an unencrypted HFS+ archive. This is Oakley's suggested alternative for Time Machine volumes and, for most people, the pragmatic answer. Decryption removes the CoreStorage layer, which is the only thing this deprecation targets. The result is an unencrypted Mac OS Extended Time Machine volume -- and unencrypted HFS+ remains supported in macOS 28. Your backup history stays intact and stays readable.
The cost is physical security. That drive now holds an unencrypted copy of everything on your Mac -- every document, every email database, every saved credential in whatever form your applications store them. It needs to live somewhere you actually control. A locked drawer at home is fine. A drive that travels, or sits in a shared office, or gets stored at a relative's house, is a genuinely bad idea in this state. Make that decision consciously.
Start a fresh Time Machine destination on APFS (Encrypted) and retire the old drive. Format a new drive -- or a second partition, or a different disk entirely -- as APFS (Encrypted) and point Time Machine at it. You begin a new backup history from today, with modern snapshot-based backups that are faster and more reliable than the HFS+ scheme.
Keep the old drive. Do not erase it. It remains your access to history older than today, and you should hold onto it for at least as long as you might plausibly need to reach back into it. If you also decrypt it, per the option above, you get to keep that history readable on future Macs too. This combination -- decrypt the old one, start fresh on the new one -- is what I would do for most setups. If you are rebuilding your Time Machine configuration anyway, our complete Time Machine troubleshooting guide covers the setup problems that tend to appear when you point Time Machine at a new destination.
Keep the old drive encrypted as a cold archive, and accept the constraint. If you leave it as encrypted HFS+, you are choosing to keep a volume that a macOS 28 Mac should not be expected to mount. That is a viable choice only if you have a deliberate plan for reading it: an Intel Mac kept on Tahoe, or an Apple silicon Mac you intend not to update past macOS 27. Both plans have expiry dates -- security updates stop, hardware fails, and a machine you keep specifically to read one drive is a machine you will eventually stop maintaining. If you go this route, write down what the drive is, why it is encrypted, and what can read it, and tape the note to the drive. Future you will not remember.
One thing not to do: do not attempt to migrate an HFS+ Time Machine history by copying the backup folder structure to an APFS volume with the Finder, cp, rsync, or a general-purpose sync tool. The hard link structure will not survive, and the copy will either fail, run effectively forever, or expand into something enormously larger than the source as every link becomes a real file. This is not a case where the right tool or the right flags rescues the approach.
Verifying the Result
Whichever path you took, verify before you trust it, and verify before you delete whatever safety copy you made.
Check the format in Disk Utility. Select the volume with Show All Devices enabled. It should now report APFS, and if you converted or formatted with encryption, it should say APFS (Encrypted). If it says APFS without the encrypted marker and you expected encryption, the encryption did not survive -- you have an unencrypted volume, which is a real security regression if the data is sensitive. Fix it before moving on.
Confirm from the command line.
diskutil apfs listYour converted volume should appear under an APFS container, with its encryption state shown. Then, for the specific volume:
diskutil info /dev/disk4s2Read the file system personality field (should indicate APFS), the encryption field, and the volume name. Use the identifier from diskutil list for your drive.
diskutil cs listIf this drive was your only CoreStorage volume, this command should now report nothing to speak of. That absence is the cleanest confirmation that the old layer is gone.
Test the unlock across a reboot. This is the step that separates a verified conversion from an assumed one. Eject the drive properly, restart the Mac, then reconnect the drive and unlock it with its password. A volume that unlocks fine in the session where you created it but fails after a restart is a real failure mode, usually involving a key stored only in the current session's keychain state. Find that out now, with your backup copy still intact, rather than in eighteen months.
Spot-check the files. Open several files from different parts of the volume -- a document, a large video, something deep in a nested folder. Compare the total item count and size against your source copy. On a converted drive, pay particular attention to anything with unusual characters in the filename or unusually deep paths.
Only then delete the safety copy. And if the drive is anything close to irreplaceable, consider keeping that copy for a while longer regardless.
Where Your Encryption Password and Recovery Keys Live
A drive you cannot unlock cannot be converted. That sentence covers the entire failure mode, and it is not a rare one -- these drives were encrypted years ago, often with a password chosen in the moment and stored nowhere.
For external encrypted volumes, the password was set when you encrypted the drive. If you checked "Remember this password in my keychain" at the time, it is in your login keychain. Open Keychain Access (Applications, Utilities), search for the drive's volume name, and look for an entry of kind "encrypted volume password". Select it, tick "Show password", and authenticate with your account password to reveal it.
There is a catch worth knowing: that keychain entry lives on the Mac where you created it. If you have since migrated to a new Mac, and particularly if you set the new Mac up fresh rather than via Migration Assistant, the entry may not have come along. Check the old Mac if you still have it.
Password hints. When you encrypted a volume, macOS required a hint. It appears in the unlock dialog and in the Finder's password prompt. It is not much, but if you are trying to recall a password from 2018 it is a genuine starting point.
FileVault recovery keys are a different mechanism and worth distinguishing clearly. A FileVault recovery key unlocks a FileVault-protected startup disk. It does not unlock an external encrypted volume. If you are hunting for the password to an external drive, the FileVault recovery key you carefully saved is not it.
Third-party password managers. Search for the drive's name, its model, its capacity, and the year you bought it. People frequently save these under names they later cannot recall -- "backup drive", "WD 2TB", "photos disk".
If you truly cannot recover the password, the honest answer is that the data is gone. This is encryption working as designed. There is no Apple-side recovery for an encrypted volume password, and the commercial tools that advertise otherwise are running brute-force attacks that only succeed against weak passwords. If the drive holds something critical, the time to exhaust every possibility is now, while you still have a Mac that can mount the volume once you find the password -- not after macOS 28 has removed the ability to mount it at all.
Take fifteen minutes today and confirm you can unlock every encrypted drive on your list. Not "I am fairly sure I know it" -- actually plug the drive in and unlock it. Then put the password in your password manager, labelled clearly, before you do anything else. Everything in this guide depends on that one thing.
A Realistic Timeline and What to Do First
macOS 28 is expected roughly a year out from July 2026 -- around fall 2027 by Oakley's estimate -- and Apple has not announced a date. Treat any specific date you see as a guess. What you can rely on is the shape of the schedule: an announcement in the summer, developer betas over several months, a public release in the autumn, and then a period where you can still choose to stay on macOS 27 for a while.
That is more than a year of runway, and it means nothing about this needs to happen this week. What it does not mean is that you can leave it entirely, because the failure mode is a drive you had forgotten about, and the whole point of acting early is to remember it while remembering is still possible.
A sensible order:
This week: audit. Find the drives. Run the checks. Make the list. Confirm you can unlock every encrypted volume on it. This is the hour that actually matters -- everything after it is mechanical, and can happen on whatever schedule suits you. Add the passwords to your password manager as you go.
This month: convert the drives you actively use. Anything in regular rotation -- a working external SSD, a scratch drive, a project disk -- should get converted now, while you have a supported macOS in front of you and no time pressure. These are typically backed up elsewhere, which makes them the low-risk cases, and getting them done removes most of the problem from your list.
Over the next few months: deal with the archives. These are the drives holding your only copy of something, and they deserve deliberate handling rather than a rushed evening. Copy off, verify, then convert or reformat. Do them one at a time. If the archive is large and slow, spread it over several weekends. There is no prize for speed, and the risk of a rushed conversion on a sole copy is entirely avoidable.
Make a decision about Time Machine, and write it down. Whether you decrypt the old drive, start fresh on APFS, or keep it as a cold archive -- make the call consciously rather than by default, and leave yourself a note explaining what you decided. Reconstructing your own reasoning about a backup drive two years later is harder than it sounds.
Before you upgrade to macOS 28: re-check. When macOS 28 actually ships, do one more pass with diskutil cs list and Disk Utility before you install it. Drives accumulate. You may have acquired one in the interim, or been handed one, or found the drive you could not locate during your first audit. It is a two-minute check and it is the last comfortable moment to do it. While you are cleaning up storage anyway, a general storage optimization pass pairs naturally with this work.
And if you are on an Intel Mac, note the asymmetry: your machine will never run macOS 28, so this deadline does not apply to it. But the drives are still drives, and they will eventually be plugged into a newer Mac -- yours, or someone else's, or one you buy after the Intel machine finally dies. The audit is still worth doing. The conversions are just less urgent.
Troubleshooting Common Issues
Convert to APFS Is Greyed Out
Problem: You select the volume in Disk Utility, open the Edit menu, and Convert to APFS is dimmed and unclickable.
Solution: Work through the causes in order. First, make sure View → Show All Devices is enabled and that you have selected the volume, not the physical disk or a container -- the command applies to volumes, and selecting the wrong level of the hierarchy is by far the most common reason it is unavailable. Second, the volume must be mounted and unlocked; a locked encrypted volume cannot be converted. Third, the disk must use the GUID Partition Map scheme. Old drives sometimes carry the legacy Apple Partition Map or an MBR scheme, and neither supports APFS -- select the physical disk and check the partition map in the info panel. If it is not GPT, your only route is Option 3: copy everything off, erase the disk with GUID Partition Map, and copy back. Fourth, quit any application using the volume, including Time Machine, backup software, and anything with an open file on it. Finally, if the volume was not cleanly unmounted at some point, run First Aid against it; a volume with unresolved errors may be refused.
Conversion Fails Partway Through
Problem: The conversion starts and then fails, or the drive disconnects mid-process, and now you are not sure what state the volume is in.
Solution: Stop and assess before doing anything else. Reconnect the drive, let macOS settle for a minute, and run diskutil list and diskutil cs list to see what actually exists on the disk now. Do not immediately retry the conversion and do not run recovery utilities in sequence -- every write reduces your options. Run First Aid on the volume from Disk Utility and read what it reports. If the volume mounts and its contents are intact, compare against your backup copy before you continue. If it does not mount, use the backup copy: erase the drive at the physical-disk level, format as APFS (Encrypted), and restore. If you have no backup copy and the volume will not mount, stop touching the drive entirely and consult a data recovery service -- continued attempts are the thing most likely to make an expensive recovery impossible. Common root causes worth eliminating before a retry: a USB hub, a marginal cable, the Mac sleeping mid-process, or a drive with developing hardware faults (check the SMART status in Disk Utility's info panel).
The Drive Will Not Unlock, So You Cannot Convert It
Problem: The encrypted volume shows up greyed out in Disk Utility, and the password you thought was correct is rejected.
Solution: Check Keychain Access first -- search the volume's name and look for an entry of kind "encrypted volume password", then reveal it with "Show password". If the keychain has nothing, check whether you are on the same Mac where you encrypted the drive; keychain entries do not always survive a fresh setup on new hardware. Read the password hint in the unlock dialog. Search your password manager under the drive's name, model, and capacity. Try obvious variants -- a password you used consistently in the era the drive was encrypted, with and without trailing punctuation, and check the keyboard layout matches what you used at the time if you have changed it. If the volume is mounted right now on any Mac, that is a gift: change the password immediately while you still have access, and save the new one properly. If nothing works, the volume is unrecoverable by design, and no software will change that. Deal with it now rather than after macOS 28 removes your ability to mount it at all.
Time Machine Will Not Use the Converted Drive
Problem: You converted a drive to APFS and Time Machine either refuses to select it as a destination or errors out on the first backup.
Solution: Understand the important distinction first: converting an old HFS+ Time Machine volume is not supported and should not be attempted, so if that is what you did, the correct move is to erase the drive and start a fresh backup history rather than try to repair it. For a converted drive that was not previously a Time Machine destination, check that the format shows APFS (or APFS Encrypted) and the partition scheme is GUID. Remove the drive from Time Machine's destination list in System Settings and re-add it, which forces macOS to re-evaluate the volume. Time Machine on APFS wants the destination volume to be reasonably clean; a volume carrying leftover structures from a previous life sometimes needs a proper erase before it is accepted. Confirm the drive is not read-only and that your account has write permission at the volume root. If Time Machine accepts the destination but the first backup fails, work through the standard destination diagnostics rather than assuming the conversion is at fault -- the causes are usually unrelated.
A Fusion Drive or a Drive with a Non-Standard Partition Scheme
Problem: The drive is a Fusion Drive, or Disk Utility reports a partition scheme other than GUID Partition Map, and the normal conversion path does not apply.
Solution: For a Fusion Drive, the practical answer is usually that you do not need to do anything. Fusion Drives shipped only in Intel Macs, and macOS 28 will not run on an Intel Mac, so the deadline does not reach that machine. If you are decommissioning the Mac and want the data elsewhere, copy it off rather than attempting any conversion -- a Fusion Drive is a CoreStorage volume group spanning two physical devices, and it is not a candidate for in-place conversion to APFS. For an external drive with a legacy Apple Partition Map or MBR scheme, APFS is not available on those schemes at all, so conversion is impossible by construction. Copy the contents off, select the physical disk in Disk Utility, erase with GUID Partition Map and APFS (Encrypted), then copy back. Very old drives may also have a hidden legacy driver partition; erasing at the disk level clears it. If a drive shows a partition scheme you do not recognise, or diskutil list shows partitions you cannot account for, copy the data off before experimenting -- an unfamiliar layout on an old disk is a reason for caution, not curiosity.
FAQ
Will my encrypted HFS+ drive stop working the day macOS 28 ships?
No. Nothing changes until you actually install macOS 28. Apple's statement is that Mac OS Extended will be supported only for unencrypted volumes in that release, so the sensible expectation is that an encrypted HFS+ volume will not mount there. The data is not destroyed -- your Mac simply loses the ability to read it.
Do I need to do anything if my drive is Mac OS Extended but not encrypted?
No. Unencrypted HFS+ remains supported in macOS 28. Only encryption is being removed, because encrypted HFS+ depends on CoreStorage and CoreStorage is what Apple is retiring. You may still choose to move to APFS for its snapshots and better integrity handling, but this deadline does not require it.
Are my encrypted disk images affected?
No. Encrypted .dmg files and sparse bundles never used CoreStorage. As Howard Oakley notes, disk image encryption is implemented independently of the file system inside the image, so it is unaffected by this change regardless of whether the image contains HFS+ or APFS. No action needed.
Can I convert my encrypted Time Machine drive to APFS?
Apple explicitly excludes encrypted Time Machine backup disks from the conversion solution, and Oakley describes in-place conversion of HFS+ Time Machine backups as high risk and unlikely to succeed, because of the millions of directory hard links involved. Decrypt the volume instead, or start a fresh APFS destination and keep the old drive.
How long does converting a drive to APFS take?
It depends far more on the drive mechanism than on the data volume. An external SSD typically finishes in minutes to tens of minutes. A large spinning hard disk can take hours, sometimes many hours, because conversion is metadata-heavy and mechanical drives handle that workload poorly. Start a hard disk conversion when you do not need the Mac.
Does this affect my Intel Mac?
Not directly. macOS 28 will never run on an Intel Mac, so an Intel machine staying on Tahoe keeps mounting encrypted HFS+ volumes. Oakley states this will never affect Intel Macs. The drives themselves are still worth converting, though, since they will eventually be connected to newer hardware.
Conclusion
This is a small change with an unusually long fuse. Apple is retiring CoreStorage, a fifteen-year-old volume manager that has been obsolete since APFS shipped native encryption, and encrypted Mac OS Extended volumes go with it. Unencrypted HFS+ survives. Encrypted disk images survive. APFS encryption, FileVault, and Intel Macs on Tahoe are all untouched. The affected set is narrower than the headlines suggest.
But the drives in that narrow set are precisely the ones you are least likely to think about, which is why the audit matters more than the conversion. An hour spent now -- finding every encrypted HFS+ drive you own, confirming you can still unlock each one, and writing down what is on it -- turns this from a future surprise into a scheduled chore. Apple's direct Convert to APFS path makes the conversion itself straightforward for most drives, and Option 3 (copy off, erase, copy back) remains the zero-conversion-risk fallback whenever the stakes are high.
Time Machine is the genuinely awkward part, and it deserves an honest answer rather than a reassuring one: there is no clean, low-risk way to carry a long HFS+ backup history onto APFS. Decrypt the old volume and keep it as an unencrypted archive, start fresh on an APFS destination, and hold onto the old drive. That is not elegant, but it is what works.
You probably have until around fall 2027. Use the first hour of it well, check support.apple.com/en-us/125615 for Apple's current wording since the page has already been revised once, and then let the rest happen at whatever pace suits you.
Related reading: Best Mac Backup Strategy 2026: Time Machine, iCloud, and Clones