System Data Storage Huge on Mac? Fix macOS Tahoe Bloat 2026

System Data eating 100GB+ on your Mac and won't shrink? Learn safe, step-by-step fixes for macOS Tahoe System Data storage bloat — including update-blocked cases.
If you have opened System Settings on macOS Tahoe (26.x) and discovered that System Data is quietly devouring 80GB, 200GB, or in some alarming cases more than half a terabyte of your drive, you are looking at one of the most confusing storage problems Apple has ever shipped. The category has no "open folder" button, no obvious list of files, and no straightforward way to clear it. Worse, it stubbornly refuses to shrink even after you delete apps and empty the Trash — and sometimes it grows large enough to block a macOS update entirely. This guide explains exactly what System Data is on macOS Tahoe, why it balloons, how to tell a genuine bloat problem apart from a cosmetic display glitch, and a safe-first, step-by-step path to reclaiming your space without breaking anything.
Key Takeaways
- System Data is a catch-all bucket, not a single folder. It holds everything macOS cannot file under Apps, Documents, Photos, Mail, and similar categories — caches, logs, local Time Machine snapshots, device backups, and more.
- A surprisingly large share of the problem is cosmetic. macOS Tahoe sometimes reports a stale or miscalculated figure. If Disk Utility's free space disagrees with the Storage bar, the number may simply need time to recalculate.
- The single most effective first step is a restart followed by some idle time. It forces macOS to recalculate the category and lets background cleanup processes run.
- The biggest real contributor is usually APFS local snapshots created by Time Machine. These can be safely thinned with
tmutil, and macOS auto-thins them under disk pressure. - Never delete files you do not understand, and back up first. Most of the safe wins come from caches, old device backups, downloads, and snapshots — not from digging into system folders.
What "System Data" Actually Is on macOS Tahoe
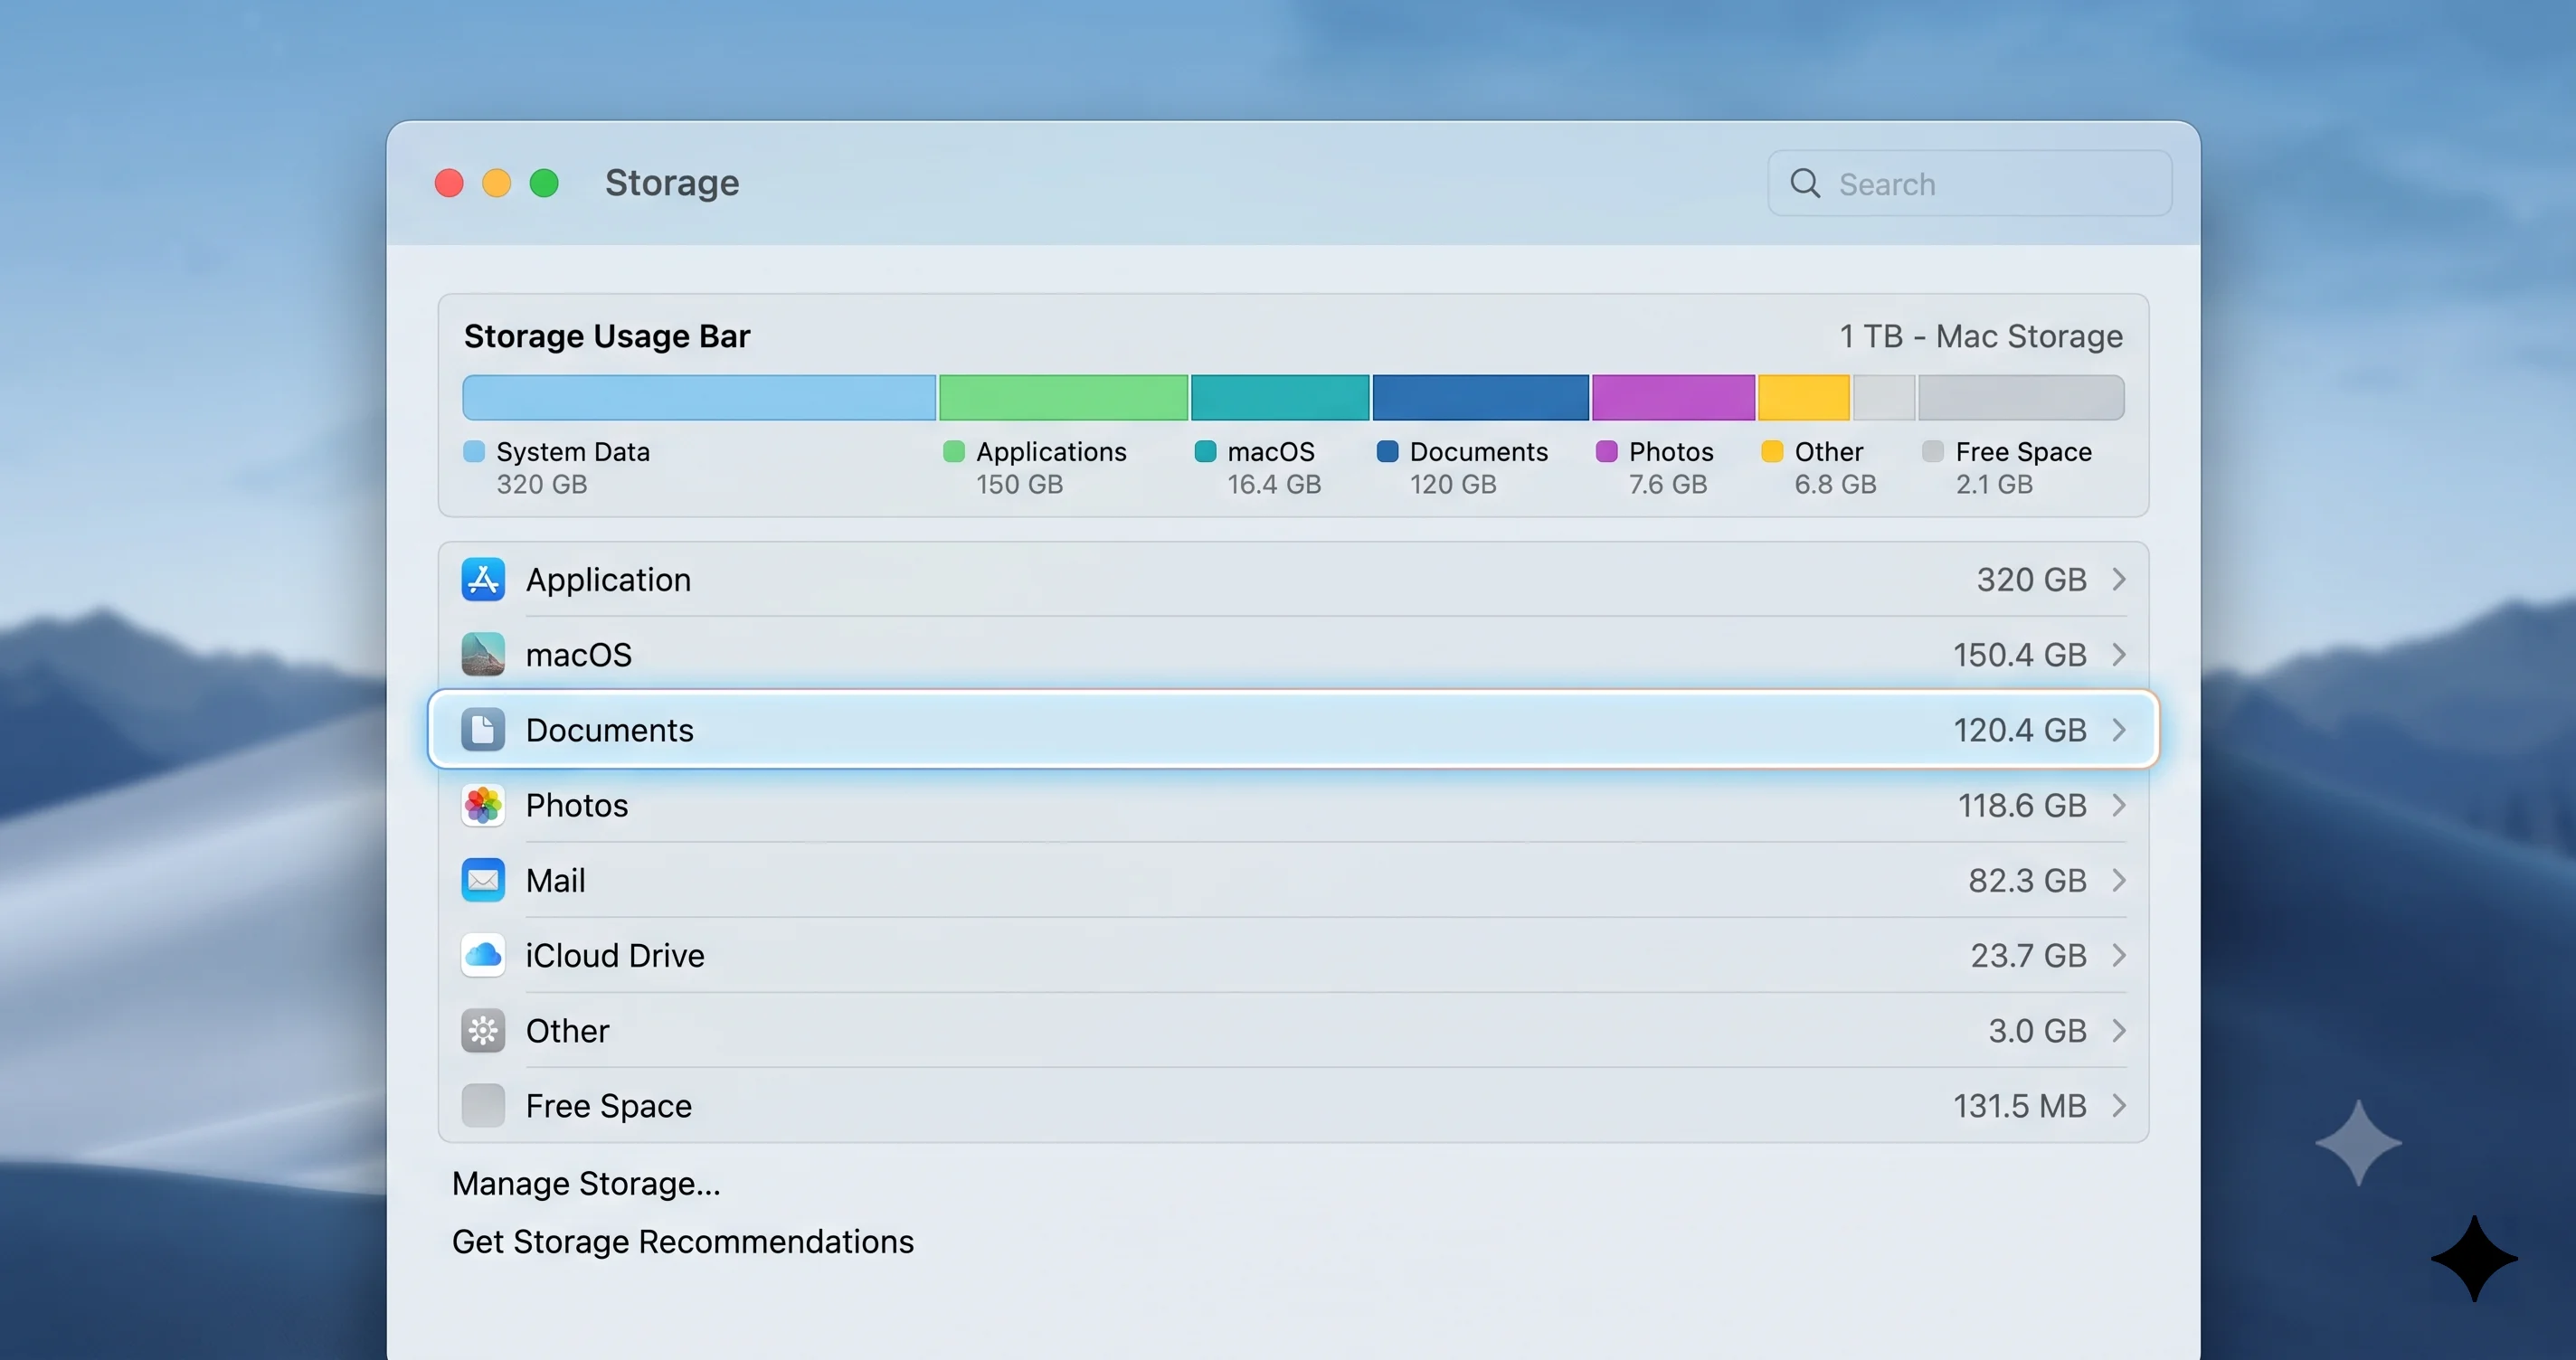
When you open System Settings > General > Storage (or click "More Info" under About This Mac), macOS draws a colored bar that breaks your drive usage into friendly categories: Applications, Documents, Photos, Mail, Music, iCloud Drive, macOS itself, and a stubborn gray segment labeled System Data.
System Data is best understood as the "everything else" category. It is not a place on disk you can navigate to. Instead, it is a computed total of every byte that macOS could not confidently assign to one of the named categories. Apple deliberately groups these files together because they are mostly support files, working data, and operational overhead that the average user should not need to manage by hand.
That design choice is reasonable in theory. In practice, it produces a number that feels like a black box. You cannot click it, you cannot sort it, and you cannot see a file list. So when it grows to 50GB, 120GB, or far beyond, your only feedback is a shrinking pool of free space and a category you cannot open.
What lives inside System Data
While the exact contents shift over time, the category typically includes:
- System and application caches — temporary data apps generate to load faster next time.
- Logs and diagnostic reports — records of system and app activity.
- Time Machine local snapshots (APFS local backups) — point-in-time copies macOS keeps on your internal drive between full backups.
- iOS and iPadOS device backups — full backups of iPhones and iPads stored locally via Finder.
- Mail downloads and attachments — cached copies of message content and files.
- Application support data — databases, configuration, and working files apps keep outside Documents.
- Leftover update installers and temporary files — partial or completed downloads that were never cleaned up.
- Virtual machine disk images — large container files used by virtualization apps.
- Developer artifacts — Xcode derived data, device support files, and simulator runtimes.
- Fonts, plug-ins, and other system extras that do not fit a named category.
The takeaway is that System Data is not inherently a problem. A healthy macOS install legitimately uses tens of gigabytes here. The problem begins when the number is much larger than it should be, when it refuses to shrink after you clear things, or when the figure itself appears to be wrong.
Why System Data Balloons on macOS Tahoe
Understanding the cause is the difference between a five-minute fix and hours of frantic file deletion. There are two broad explanations, and most real-world cases are a mix of both.
Explanation 1: Genuine bloat
These are real files genuinely occupying space. The most common culprits, in rough order of how much space they tend to consume:
- Time Machine local snapshots. This is the single most common reason System Data swells unexpectedly. macOS keeps local APFS snapshots on your internal drive so it can offer hourly backups even when your external Time Machine disk is unplugged. These can quietly accumulate to many gigabytes. They are designed to be temporary and to thin automatically, but under certain conditions they persist longer than expected.
- Caches that never got cleared. Browsers, media apps, and creative tools can cache enormous amounts of data. A single video editor or streaming app can hold tens of gigabytes.
- Old iOS and iPadOS device backups. Each full local backup of an iPhone can be 30GB to well over 100GB. Keep a couple of old ones and the total adds up fast.
- Mail attachments and downloads. If you use the Mail app with "Download all attachments," years of message content can pile up.
- Leftover macOS update installers. A full installer is several gigabytes and is occasionally left behind after an update.
- Virtual machine images and developer artifacts. For power users and developers, VM disk images, Xcode derived data, and simulator runtimes are frequently the largest single contributors.
Explanation 2: The display and calculation glitch
This is the part that drives people to the edge. On macOS Tahoe, the Storage screen does not measure your disk in real time. It relies on indexing and periodic recalculation. As a result, the System Data figure can be stale, double-counted, or simply wrong, especially after big changes such as an upgrade, a large file deletion, a Time Machine backup, or a Photos library migration.
Symptoms of the cosmetic glitch include:
- System Data showing an extreme number (300GB to 700GB) that does not match how much you have actually stored.
- The number staying frozen for hours or days even after you delete large files.
- The Storage bar disagreeing with the free space reported by Finder or Disk Utility.
The crucial diagnostic principle: if your free space looks correct but the Storage bar's breakdown looks wrong, the breakdown is probably the thing that is broken — not your disk. That distinction tells you whether to spend your energy deleting files or simply letting macOS recalculate.
Is It a Bug or Real Bloat? Diagnose Before You Delete
Before deleting a single file, spend two minutes determining which problem you actually have. Deleting files to fix a display bug is wasted effort; waiting for a recalculation that will never come is wasted patience.
Step 1: Compare free space across three sources
Check the same drive in three places and compare the available (free) space figure:
- System Settings > General > Storage — note both the free space and the System Data figure.
- Finder — select your drive in the sidebar, then choose File > Get Info (or look at the status bar with View > Show Status Bar).
- Disk Utility — open Disk Utility, select your Macintosh HD volume, and read the "Available" figure.
If all three agree on free space and you genuinely have very little left, you have a real bloat problem — proceed to the cleanup steps. If Finder and Disk Utility show plenty of free space while the Storage bar insists System Data is enormous, you are most likely looking at the display glitch — a restart and some idle time is the right fix.
Step 2: Note what changed recently
Did you just upgrade to Tahoe, finish a large Time Machine backup, migrate a Photos library, or delete a huge file? Any of these can leave the Storage breakdown temporarily out of sync. Recent change plus a free-space mismatch strongly points to the cosmetic glitch.
Step 3: Decide your path
- Free space looks fine, breakdown looks wrong → restart, wait, recalculate. Do not delete anything.
- Free space genuinely low, all sources agree → work through the safe-first cleanup below.
- Both (common) → restart first to clear the cosmetic component, then re-measure and clean the real remainder.
For a deeper toolbox of measurement utilities, our Mac storage analyzer tools guide walks through apps that visualize disk usage far better than the built-in bar.
Why the numbers disagree in the first place
It helps to understand why the Storage bar and the actual disk can drift apart, because that knowledge stops you from panicking. The Storage screen is essentially a reporting layer built on top of indexing services. It categorizes files by inspecting metadata, ownership, and location, then caches that classification. When you make a large change, the underlying filesystem updates immediately, but the cached classification does not always catch up at the same moment. During that window, the Storage bar can show a figure that was true a few hours ago but is no longer accurate.
On top of that, APFS — the filesystem macOS uses — has features that genuinely confuse simple size reporting. Snapshots preserve old versions of files, so a file you "deleted" can still occupy space until every snapshot referencing it is gone. Clones let two files share the same underlying blocks, so naive tools can double-count shared data. Purgeable space is storage macOS knows it can reclaim on demand (caches, offloaded files, thinnable snapshots) but has not yet freed. Disk Utility distinguishes purgeable space; the friendly Storage bar largely folds it into System Data. This is precisely why a drive can be "full" by one measure and have tens of gigabytes available by another — the space is real but reclaimable, and macOS only reclaims it when something actually needs the room.
Step-by-Step Fixes (Safe-First Order)
Work through these in order. The earliest steps are the safest and resolve the majority of cases. Stop as soon as your problem is solved — you rarely need to reach the advanced steps. Before doing anything destructive, make sure you have a current backup. If your backup situation is shaky, read our best Mac backup strategy guide first.
Fix 1: Restart and wait (do this first, always)
A restart is genuinely the most effective single action for this specific problem, and it is completely safe.
- Save your work and close apps.
- Choose Apple menu > Restart.
- After the Mac boots, leave it on and idle (plugged in if it is a laptop) for 15 to 30 minutes.
- Reopen System Settings > General > Storage and look again.
Why this works: restarting clears temporary caches, forces macOS to recompute the Storage breakdown from scratch, and gives background maintenance routines a chance to run — including snapshot thinning. In a large share of "System Data won't shrink" reports, the number drops or corrects on its own after a reboot and some idle time. If this fixes it, you are done.
A few notes that make this step more effective. First, the idle time genuinely matters — macOS schedules many cleanup routines for periods of low activity, so resist the urge to immediately reopen heavy apps. Second, if you are on a laptop, keep it plugged in; some maintenance tasks are deferred on battery to save power. Third, if a single restart only partially corrects the figure, a second restart after the first round of cleanup sometimes nudges the remainder into place. None of this risks your data, which is what makes the restart-and-wait step the correct opening move every single time.
Fix 2: Thin or clear Time Machine local snapshots
If a restart did not help and you use Time Machine, local APFS snapshots are the most likely real culprit. These are safe to thin because they are, by design, temporary local copies — your real backups live on your Time Machine destination drive.
First, list the snapshots currently on your startup volume:
tmutil listlocalsnapshots /You will see entries like com.apple.TimeMachine.2026-06-26-101500.local. Each line is one snapshot. The more lines, the more space potentially tied up.
The safest way to reclaim space is to let macOS thin the snapshots for you. The thinlocalsnapshots command asks macOS to free a target number of bytes at a given urgency level (1 = low/normal, 4 = high). For example, to request that macOS free roughly 20GB at high urgency:
# Request macOS free ~20 GB of snapshots from the / volume at urgency 4
tmutil thinlocalsnapshots / 21474836480 4
The number 21474836480 is 20GB expressed in bytes (20 × 1024³). Adjust it to your needs. macOS decides which snapshots to remove, oldest first, and will not remove more than it judges safe.
Important:
tmutilis powerful. Thinning snapshots only removes local copies — it does not touch the backups on your dedicated Time Machine drive, so your backup history is preserved as long as that drive is intact. Still, confirm your external Time Machine backup is healthy before thinning aggressively.
The simplest no-command alternative: macOS automatically thins local snapshots when free space gets low. You can also temporarily turn Time Machine off (System Settings > General > Time Machine > Options, or remove the backup disk), which stops new local snapshots from accumulating while you sort things out, then turn it back on. If Time Machine itself is misbehaving, our Time Machine troubleshooting guide covers the deeper failures.
Fix 3: Clear caches (with care)
Caches are temporary by definition, so clearing them is generally safe — apps simply rebuild what they need. The caution is to avoid deleting blindly and to never trash entire system folders.
There are two cache locations:
- User caches:
~/Library/Caches - System caches:
/Library/Caches
To reach your user Library, in Finder choose Go > Go to Folder and enter ~/Library/Caches. Inside you will find folders named after apps and services. The safe approach is to quit the relevant app first, then delete the contents of that app's cache folder — not the whole Caches folder. Empty the Trash afterward to actually reclaim the space.
To see which cache folders are largest from Terminal, navigate in and measure:
# Show the size of each item in your user cache folder, sorted largest first
du -sh ~/Library/Caches/* 2>/dev/null | sort -rh | head -20
Warning: Do not delete files from
/Systemand do not remove cache folders for processes you cannot identify. Caches for browsers, streaming apps, and creative tools are the safe, high-value targets. When in doubt, leave it alone and let the Storage recommendations (Fix 7) handle it.
Fix 4: Delete old iOS and iPadOS device backups
Local device backups are frequently tens of gigabytes each and are pure System Data weight. If you back your iPhone or iPad up to your Mac, check for stale copies.
The friendly way:
- Connect the device, or open a Finder window.
- In the Finder sidebar, select your device, then click Manage Backups under the General tab.
- Review the list, select backups you no longer need (old devices, superseded dates), and delete them.
Backups live at ~/Library/Application Support/MobileSync/Backup/. You can inspect their sizes:
# Show the size of each stored device backup
du -sh ~/Library/Application\ Support/MobileSync/Backup/* 2>/dev/null | sort -rh
Warning: Delete a backup only if you are certain you no longer need it. If a device is no longer backed up to iCloud, deleting its only local backup means losing that restore point. Prefer the Finder "Manage Backups" interface over manually deleting folders.
Fix 5: Empty Downloads, large Mail attachments, and Trash
Three quick, low-risk wins:
- Downloads: Open your Downloads folder, switch to list view, sort by Size, and clear out large installers, disk images (
.dmg), and archives you have already used. - Mail attachments: In Mail, you can remove downloaded attachments while keeping the messages. Large attachments and offline message caches count toward System Data.
- Trash: Nothing is actually freed until the Trash is emptied. Right-click the Trash and choose Empty Trash. Remember some apps (Photos, Mail) have their own "Recently Deleted" that must be emptied separately.
Fix 6: Use Storage recommendations
macOS includes built-in tools that handle a lot of this safely. In System Settings > General > Storage, review the Recommendations at the top:
- Store in iCloud / Optimize Storage — offloads older files and originals to iCloud, keeping local space free.
- Empty Trash Automatically — removes items in Trash after 30 days.
- Reduce Clutter — surfaces large and downloaded files for review.
These are conservative by design and are a good way to recover space without manual file hunting. For a complete walkthrough of the optimization options, see our macOS Tahoe storage management and optimization guide.
Fix 7: For developers — clear Xcode derived data and unused simulators
If you write code, Xcode is very often the largest single contributor to System Data. Two areas are worth checking:
# Check the size of Xcode derived data (safe to delete; Xcode rebuilds it)
du -sh ~/Library/Developer/Xcode/DerivedData 2>/dev/null

# Remove derived data (close Xcode first)
rm -rf ~/Library/Developer/Xcode/DerivedData/*
Unused simulator runtimes and devices also pile up. Delete obsolete simulators from within Xcode (Window > Devices and Simulators) or with:
# Remove simulators that are unavailable (old/duplicate runtimes)
xcrun simctl delete unavailable
Warning:
rm -rfis unforgiving — double-check the path before pressing Return. Derived data is safe to remove because Xcode regenerates it, but never runrm -rfagainst a path you have not verified.
Fix 8: Inspect what is actually using space
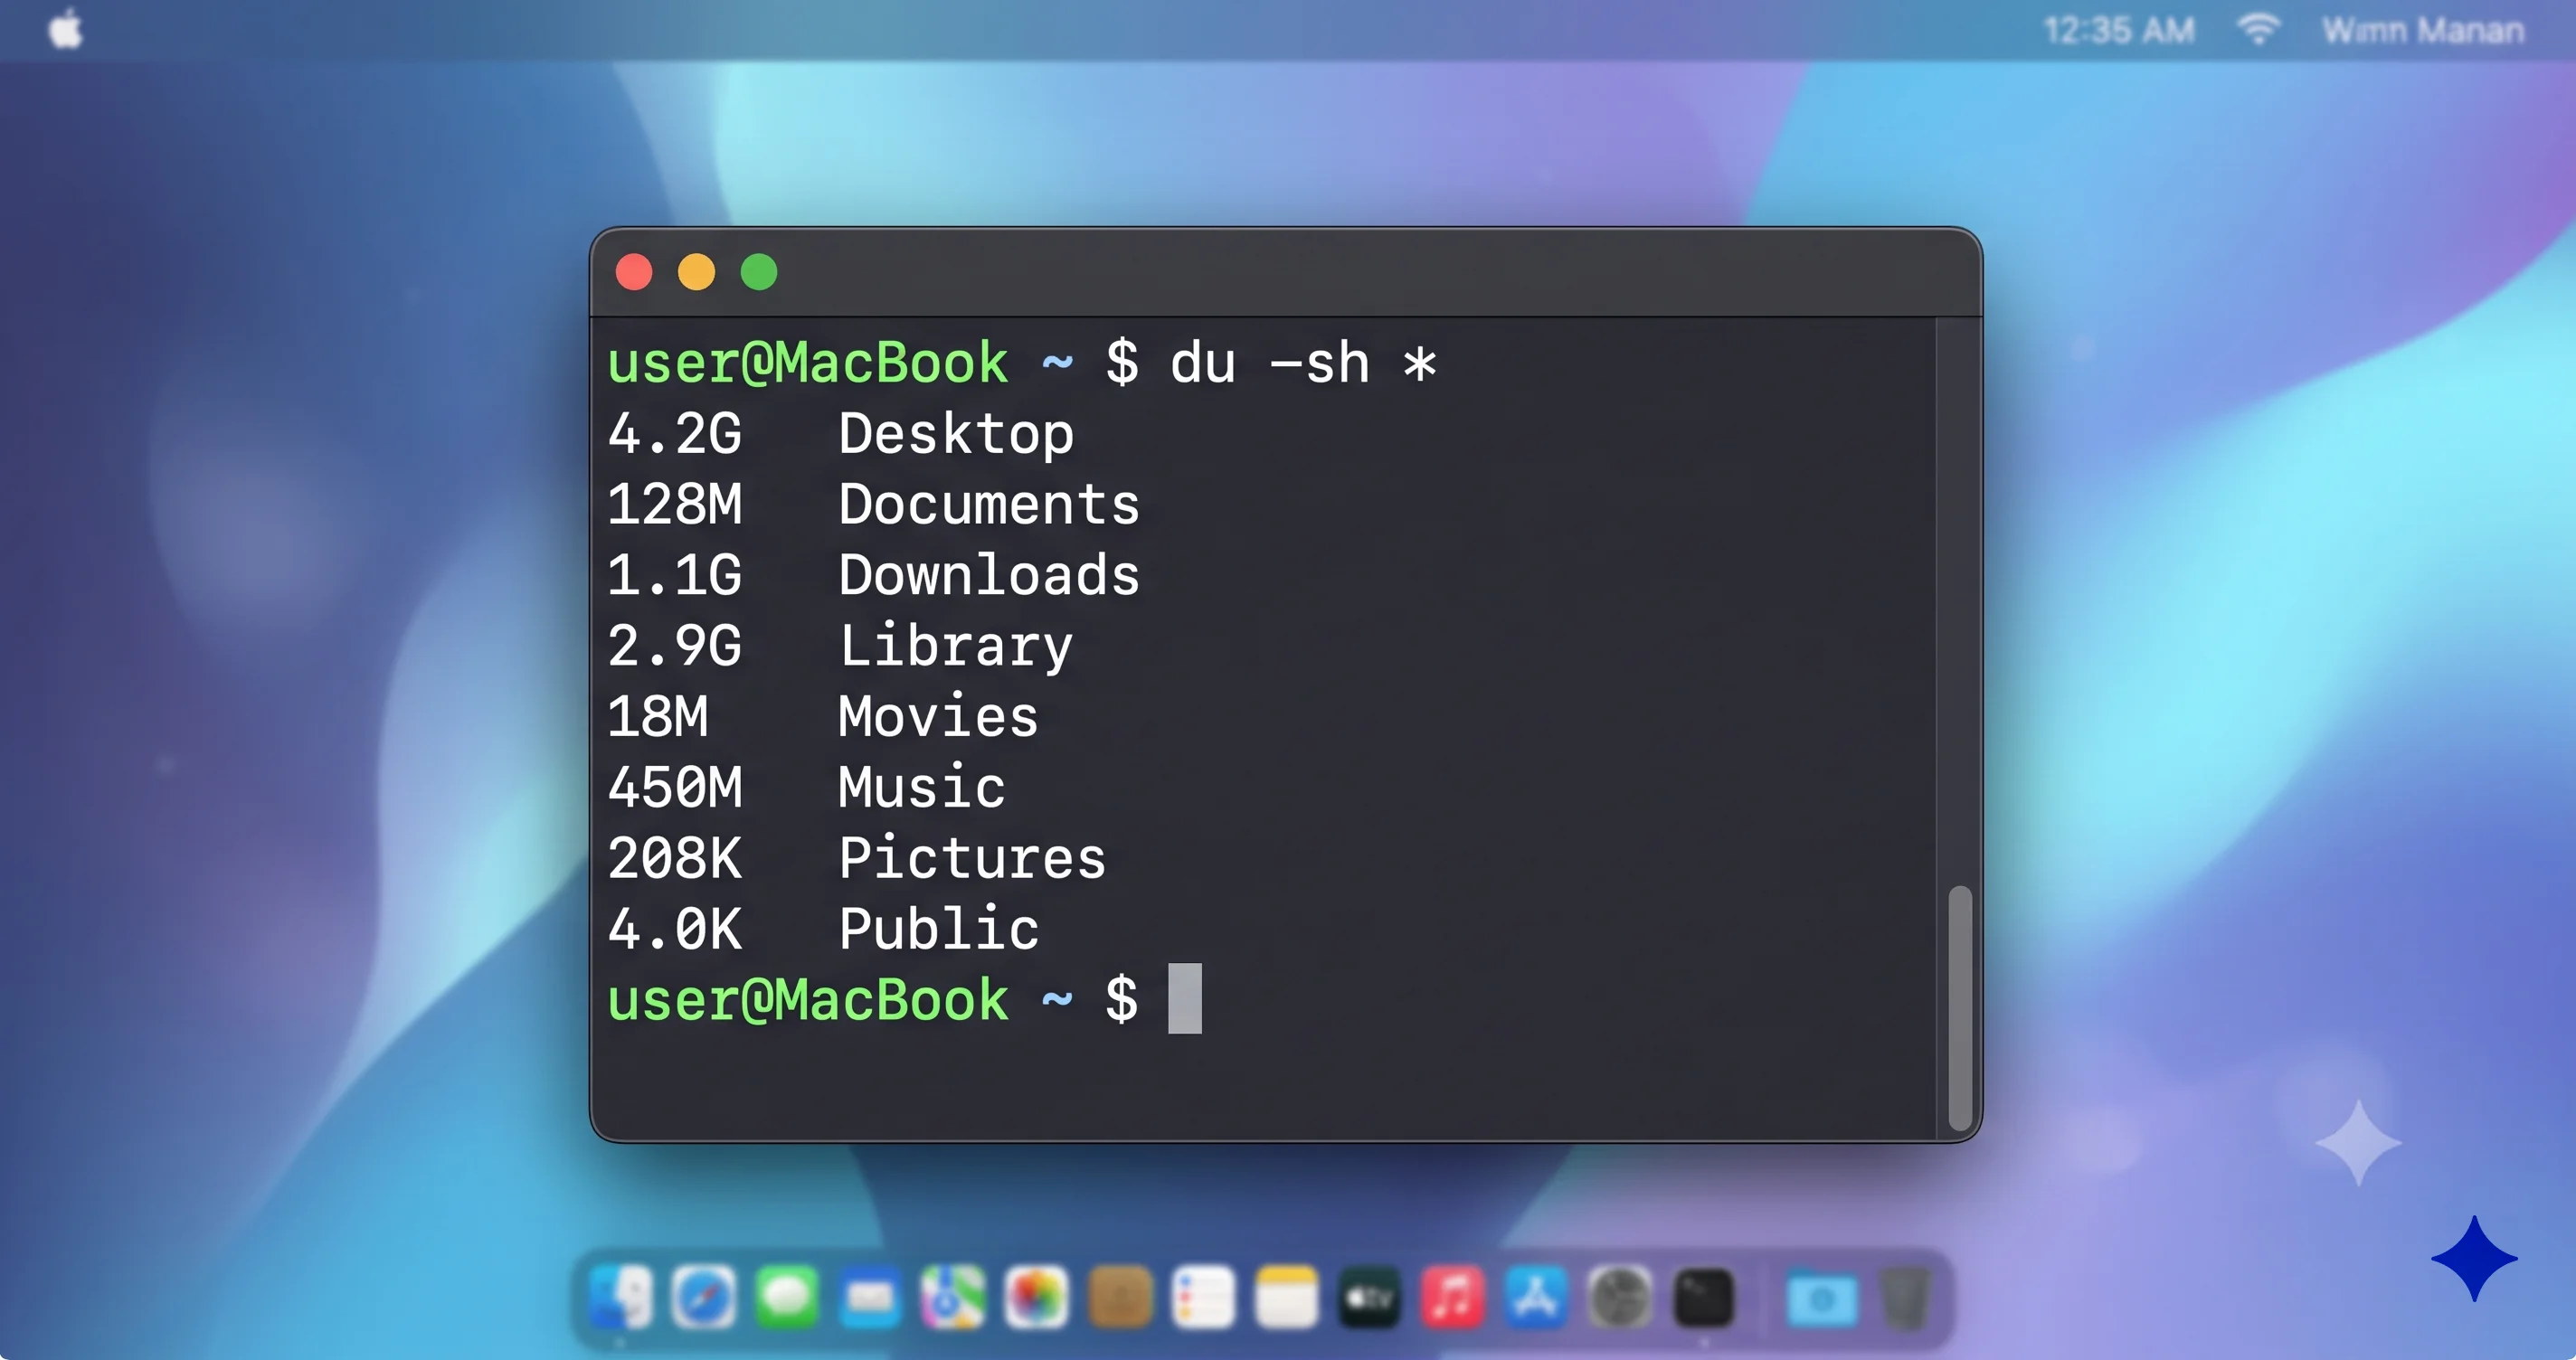
If System Data is still large after the steps above, find out where it is going rather than guessing. From Terminal, you can measure top-level folders:
# Measure the largest folders in your home directory
du -sh ~/* 2>/dev/null | sort -rh | head -15

# Measure the largest items in your user Library (where much System Data lives)
du -sh ~/Library/* 2>/dev/null | sort -rh | head -15
A dedicated storage-analyzer app gives a much clearer visual map of where space is going than Terminal or the built-in bar. Our Mac storage analyzer tools guide compares the best options. Whatever tool you use, the goal is to identify the real heavy folders, then decide deliberately whether each is safe to clear.
Understanding the purgeable-space safety net
One reason the safe-first approach works is that macOS is designed to free purgeable space automatically the moment a process genuinely needs it. When you copy a large file onto a near-full drive, or when an update needs staging room, macOS will silently delete thinnable snapshots and reclaim caches to make space — often without any notification. This is why aggressive manual deletion is rarely necessary: the operating system already has a mechanism for exactly this situation. The catch is that this safety net only functions when there is some margin to operate in. A drive pinned at 100 percent full, with no purgeable headroom and no real free space, leaves macOS nothing to reclaim and no room to maneuver. The practical lesson is to never let your drive run completely dry, and to trust the restart-and-wait step to trigger the cleanup the system would eventually do on its own.
A second practical implication: because purgeable space is reclaimed on demand, the best way to "free" snapshot and cache space is sometimes simply to start the task that needs the room. If an update reports insufficient space, beginning the update can itself trigger macOS to purge what it needs. That said, manually thinning snapshots first is more predictable and gives you visible confirmation that space was freed, which is why the step-by-step path still recommends it.
The Update-Blocked Scenario: When System Data Stops a macOS Update
A particularly frustrating version of this problem appears when you try to install a macOS update and the installer refuses, complaining there is not enough free space — even though you thought you had room. macOS updates need a meaningful chunk of free space to download, stage, and apply the new system, and a bloated System Data category eats directly into that headroom.
Here is a focused recovery path for the update-blocked case:
- Restart first. As above, this often corrects an inflated figure and frees staging space immediately. Then retry the update.
- Remove stale update installers. A previously downloaded full installer can occupy several gigabytes. Delete leftover installer files and any partial download, then re-attempt the update so it fetches a clean copy.
- Thin local snapshots. Run the
tmutil thinlocalsnapshotscommand from Fix 2 to free a few tens of gigabytes quickly. macOS also auto-thins snapshots specifically when an update needs room, so giving it a restart plus time can be enough. - Clear the obvious heavy hitters. Old device backups (Fix 4) and large caches (Fix 3) are the fastest way to free double-digit gigabytes.
- Aim for comfortable headroom. Rather than freeing the bare minimum, target well above the stated requirement so the staging process has room to work. Then start the update.
If the update still fails after you have genuinely freed plenty of space, the problem may lie with the update mechanism itself rather than storage. Our macOS Tahoe upgrade problems and solutions guide covers installer errors, stuck downloads, and verification failures in depth.
Prevention: Keeping System Data Under Control
Once you have reclaimed your space, a few habits keep System Data from creeping back up.
Keep healthy free space at all times
macOS manages itself best with breathing room. Aim to keep at least 10 to 15 percent of your drive free. When space gets tight, macOS thins snapshots and caches automatically — but only if there is enough margin to work with. Chronically full drives are where System Data problems fester.
Let macOS manage snapshots, but keep a real backup
Local snapshots are convenient, but they are not a substitute for a proper backup. Maintain a dedicated Time Machine drive (or a broader strategy combining local backups, a clone, and iCloud) so that macOS can freely thin local copies without you losing anything. Compare approaches in our best Mac backup strategy guide, and if you back up to an external disk, our external storage backup guide covers setup and reliability.
Audit periodically
Check System Settings > General > Storage once a month. Catching a growing category early means a five-minute cleanup instead of an emergency. A quick du -sh ~/Library/* | sort -rh | head from Terminal once in a while is an excellent early-warning habit.
Manage device backups deliberately
If you back up an iPhone or iPad to your Mac, prune old backups whenever you replace a device. One forgotten 100GB backup of a phone you no longer own is a classic, avoidable cause of bloat.
Mind your downloads and installers
Treat the Downloads folder as temporary. Delete installers and disk images as soon as you have used them, and turn on "Empty Trash Automatically" so deleted files do not linger for 30 days.
Troubleshooting Common Issues
Even with the right steps, a few situations cause repeated confusion. Here is how to handle the most common ones.
"I deleted tons of files but System Data didn't change"
This is almost always the recalculation lag. The Storage bar does not update instantly. Restart, leave the Mac idle for 15 to 30 minutes, and check again. Also confirm you emptied the Trash and any app-specific "Recently Deleted" folders — until you do, the space is not actually freed.
"System Data shows 400GB but my drive isn't even that big"
This is a clear sign of the display glitch — a figure that large relative to your drive cannot be literally accurate. Compare free space in Disk Utility and Finder. If they look sane, ignore the inflated bar, restart, and let it recompute. Do not start deleting system files to chase a number that is broken.
"tmutil says snapshots were thinned but nothing was freed"
If there were no eligible snapshots (or they were already thinned), the command frees nothing. Re-run tmutil listlocalsnapshots / to confirm what exists. Snapshots that back an in-progress operation will not be removed. Also remember that very recent snapshots are kept; only older ones get thinned.
"The number drops, then climbs right back up"
Something is actively generating data — most often Time Machine creating fresh local snapshots, a sync service re-caching, or a runaway app log. Identify the source with the du commands in Fix 8, run a couple of times an hour apart to see which folder grows, then address that specific app or temporarily pause Time Machine.
"Spotlight reindexing is using huge space and CPU after I cleared caches"
Clearing caches or upgrading can trigger a full Spotlight reindex, which temporarily inflates working data and CPU. It usually settles on its own. If it stays stuck, see our guide on Spotlight reindexing battery drain and how to fix it.
"Safe Mode shows different numbers"
Booting into Safe Mode disables many caches and snapshots and forces certain cleanups, so storage figures can look different. That difference is itself diagnostic: if System Data is dramatically smaller in Safe Mode, your bloat is cache- and snapshot-driven and the safe-first steps above will resolve it after a normal reboot.
FAQ
Is it safe to delete System Data on macOS Tahoe?
You cannot delete the category directly, and you should not try to. What is safe is clearing the things inside it — caches, old device backups, downloads, leftover installers, and local snapshots — using the methods above. Avoid deleting anything in system folders you do not understand, and always back up first.
Why won't my System Data shrink even after deleting files?
Most often it is recalculation lag: the Storage bar updates on a delay, not in real time. Restart your Mac, leave it idle for 15 to 30 minutes, and re-check. Also confirm the Trash and any app-level "Recently Deleted" areas are empty, since space is not freed until then.
How much System Data is normal on a Mac?
There is no fixed figure, but tens of gigabytes is typical and healthy. Roughly 20GB to 60GB is common depending on your apps and habits. Numbers above 100GB warrant a look, and figures in the hundreds of gigabytes usually mean either heavy real bloat, a misreading, or both.
Will clearing local Time Machine snapshots delete my backups?
No. Thinning local snapshots only removes the temporary copies stored on your internal drive. The full backup history on your dedicated Time Machine destination drive stays intact, as long as that drive is healthy. Confirm your external backup is working before thinning aggressively.
Does a bigger System Data slow my Mac down?
Not directly — the size of the category itself does not harm performance. The real risk is a nearly full drive, which can slow macOS, stall updates, and prevent proper caching. Keeping 10 to 15 percent of your drive free matters far more than the System Data number alone.
Can System Data really block a macOS update?
Yes. Updates need free space to download, stage, and install. If System Data has consumed your headroom, the installer can refuse to proceed. Restart, remove stale installers, thin snapshots, and clear old backups to free comfortable space, then retry the update.
Conclusion
A swollen System Data category on macOS Tahoe looks alarming, but it is almost never the disaster it appears to be. The category is simply macOS's "everything else" bucket, and an inflated reading is frequently part real bloat and part display glitch. That is why the right approach is to diagnose before you delete: compare free space across Disk Utility, Finder, and System Settings, then choose your path. A restart plus idle time fixes a remarkable share of cases for free. From there, thinning Time Machine local snapshots, clearing caches with care, removing old device backups, and emptying downloads will reclaim the rest — safely, and without ever touching files you do not understand.
If you are dealing with a blocked macOS update, work the focused recovery path: restart, remove stale installers, thin snapshots, clear the heavy hitters, and aim for generous headroom before retrying. And once your space is back, a few simple habits — keeping 10 to 15 percent free, maintaining a real backup so macOS can thin snapshots freely, and auditing storage monthly — will keep the problem from returning.
Ready to go deeper? Pair this guide with our macOS Tahoe storage management and optimization guide for advanced reclamation techniques, and bookmark the Mac storage analyzer tools guide so you always know exactly where your space is going. Your drive — and your next macOS update — will thank you for the careful, methodical effort.