Mac Photos App Complete Guide (2025): Master Organization, Editing, Performance & Professional Workflows
Comprehensive guide to Mac Photos app on macOS Tahoe 26. Learn advanced organization strategies, editing workflows, performance optimization, AI features, and professional photography techniques. Includes comparisons with Google Photos and Lightroom.
Mac Photos app has evolved into a powerful photo management and editing platform on macOS Tahoe 26, offering seamless integration across Apple devices, AI-powered features, and professional-grade tools. Whether you're a casual iPhone photographer, serious enthusiast, or professional photographer, this comprehensive guide will help you master Photos app and transform your photography workflow.
What's New in Mac Photos for macOS Tahoe 26
macOS Tahoe 26, announced at WWDC 2025 and released September 15, 2025, brings significant enhancements to the Photos app that fundamentally change how Mac users organize, edit, and share their photos.
Major New Features
Liquid Glass Design Integration The Photos app now features Apple's new Liquid Glass design language, creating a more immersive and visually stunning interface. Translucent materials, refined sidebars, and enhanced depth create a premium editing environment that puts your photos front and center.
Apple Intelligence AI Features (Apple Silicon Only)
- Clean Up Tool: AI-powered object removal that intelligently fills backgrounds after removing unwanted elements
- Natural Language Search: Find photos by describing what you're looking for in plain English
- AI Memory Creation: Type a description and Photos automatically creates curated Memory movies with appropriate music and storylines
Enhanced Organization
- Pinned Collections: Quick sidebar access to your most-used albums and projects
- Improved Duplicates Detection: Automatic identification and merging of duplicate photos
- Better Smart Albums: Enhanced filtering capabilities for automated organization
Performance Improvements
- 15-25% faster library loading on Apple Silicon Macs
- Optimized thumbnail generation and rendering
- Enhanced iCloud Photos sync performance
- Better memory management for large libraries (100GB+)
macOS Tahoe Compatibility
Important: macOS Tahoe 26 is the final macOS version supporting Intel Macs. Only four Intel models are compatible:
- Mac Pro (2019)
- MacBook Pro 16-inch (2019)
- MacBook Pro 13-inch (2020, four Thunderbolt 3 ports)
- iMac (2020)
Apple Intelligence Features Require Apple Silicon (M1 or later). Intel Macs cannot use:
- Clean Up tool
- AI-powered Memory creation
- Enhanced natural language search
Getting Started with Mac Photos
Initial Setup and iCloud Photos
iCloud Photos Configuration (Recommended)
- Open System Settings → Apple ID → iCloud → Photos
- Enable "iCloud Photos" checkbox
- Choose storage optimization:
- Optimize Mac Storage: Keeps smaller versions locally when space is limited (recommended for Macs with less than 512GB storage)
- Download Originals: Stores full-resolution files locally (recommended for primary Mac with adequate storage)
Why iCloud Photos?
- Automatic sync across all Apple devices
- Access photos from iPhone, iPad, Mac, Apple TV, and iCloud.com
- 100% end-to-end encrypted with Advanced Data Protection enabled
- Works as offsite backup solution
- Enables Shared Photo Libraries for families
Understanding the Photos App Interface
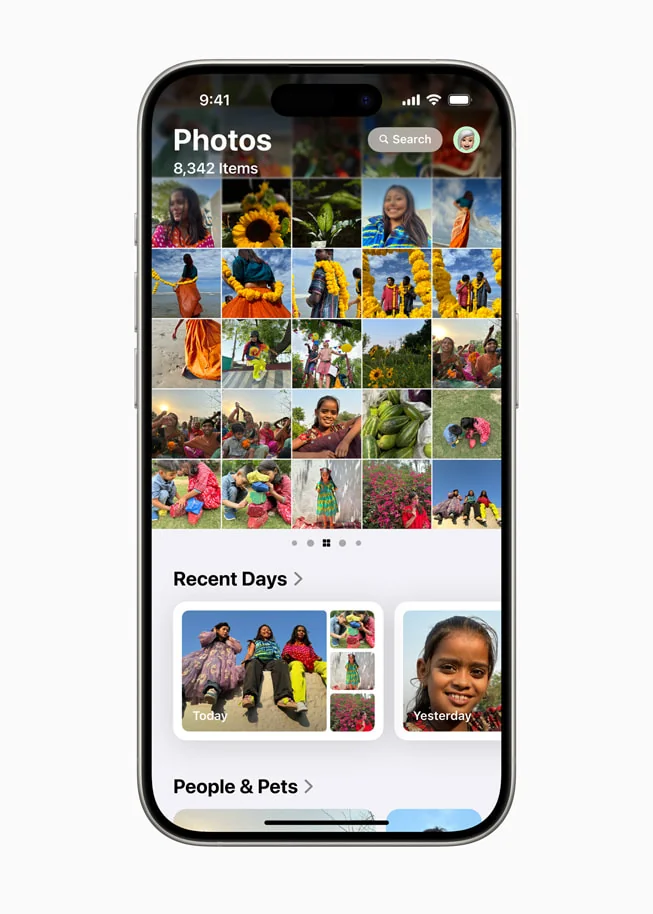
Sidebar Navigation (Left):
- Library: All photos in chronological order
- Memories: Auto-generated collections based on time, people, and places
- People: Facial recognition-organized albums
- Places: Geographic organization using GPS data
- Albums: Your custom and shared albums
- Utilities: Recently Deleted, Imports, Duplicates, Hidden
Main View (Center):
- Default grid view showing thumbnails
- Double-click to view full-screen
- Press Space for Quick Look preview
- Zoom with ⌘+ / ⌘-
Info Panel (⌘I):
- Title, description, and keywords
- Date, time, and location metadata
- Camera settings (EXIF data)
- File size and dimensions
Import Workflow Best Practices
Importing from iPhone/iPad:
- iPhone connects → Photos automatically opens import dialog
- Review thumbnails before importing
- Click "Import All New Photos" or select specific images
- Create album during import for automatic organization
Importing from Camera/Memory Card:
- Connect camera or card reader
- Photos detects and displays import interface
- Review and select photos to import
- Pro Tip: Delete bad shots before importing to save storage and organization time
Importing from Folder:
- File → Import
- Select folder containing photos
- Choose whether to copy to library or keep as referenced files
- Automatic date-based organization
Mastering Photo Organization
Album Strategies for Different Users
Casual Users (Simple Organization):
📁 Favorites (built-in)
📁 2024 Highlights
📁 2025 Highlights
📁 Family Events
📁 Travel
Enthusiasts (Date + Event Structure):
📁 2024
  📁 2024-01_January
    📁 2024-01-15_Winter_Mountains
    📁 2024-01-28_Friend_Birthday
📁 2025
  📁 2025-01_January
  📁 2025-02_February
📁 Projects
  📁 Street_Photography
  📁 Nature_Macro
Professional Photographers (Client-Based):
📁 Clients_2024
  📁 Smith_Wedding_2024-06-15
    📁 1_All_RAW_Files
    📁 2_First_Selects
    📁 3_Client_Selects
    📁 4_Final_Edited
    📁 5_Delivered
Smart Albums: Automated Organization
Smart Albums are saved searches that automatically update based on your criteria. They're one of Photos' most powerful but underutilized features.
Essential Smart Albums to Create:
Recently Added (Last 30 Days)
- Condition: Date Added > is in the last > 30 days
- Use: Quick access to new photos without manual filtering
Unedited Photos
- Condition: Photo > is edited > No
- Use: Find photos that need attention
Favorites with People
- Condition 1: Photo > is favorite > Yes
- Condition 2: Photo > has face > Yes
- Match: All conditions
- Use: Best people photos for sharing
Large RAW Files
- Condition 1: File Size > is greater than > 20 MB
- Condition 2: Filetype > is > RAW
- Use: Identify storage-heavy files for archive consideration
Photos by Camera Model
- Condition: Camera Model > is > [Your Camera]
- Use: Separate iPhone from dedicated camera photos
Portrait Orientation
- Condition: Photo > Orientation > is portrait
- Use: Find vertical photos perfect for Instagram Stories or phone wallpapers
Last Year Highlights
- Condition 1: Date > is in the range > [one year ago to today]
- Condition 2: Photo > is favorite > Yes
- Use: Create year-in-review compilations
Smart Album Tips:
- Click "+" to add multiple conditions for precise filtering
- Use "All" for AND logic (meet all criteria), "Any" for OR logic (meet any criteria)
- Combine up to 50+ conditions for very specific filtering
- Important: Smart Albums sync across Macs via iCloud but NOT to iOS/iPadOS
People & Face Recognition Workflow
Initial Setup (15-30 minutes investment):
- Open Photos → People album (in sidebar)
- Photos shows unnamed faces with photo counts
- Click face thumbnail → Type name (pulls from Contacts if exists)
- Repeat for your top 10-20 people
Training for Accuracy:
- Open a person's album
- Scroll to bottom → "Confirm Additional Photos"
- Tap "Yes" or "No" for suggested matches
- Complete 2-3 training sessions per person (5-10 minutes each)
- Accuracy improves to 95%+ after proper training
Advanced People Features:
- Drag favorite people to top of People album for quick access
- Right-click → "Hide This Person" for acquaintances you don't need easy access to
- Merge duplicates by typing same name when prompted
- All face recognition happens on-device (100% private)
Places: Geographic Organization
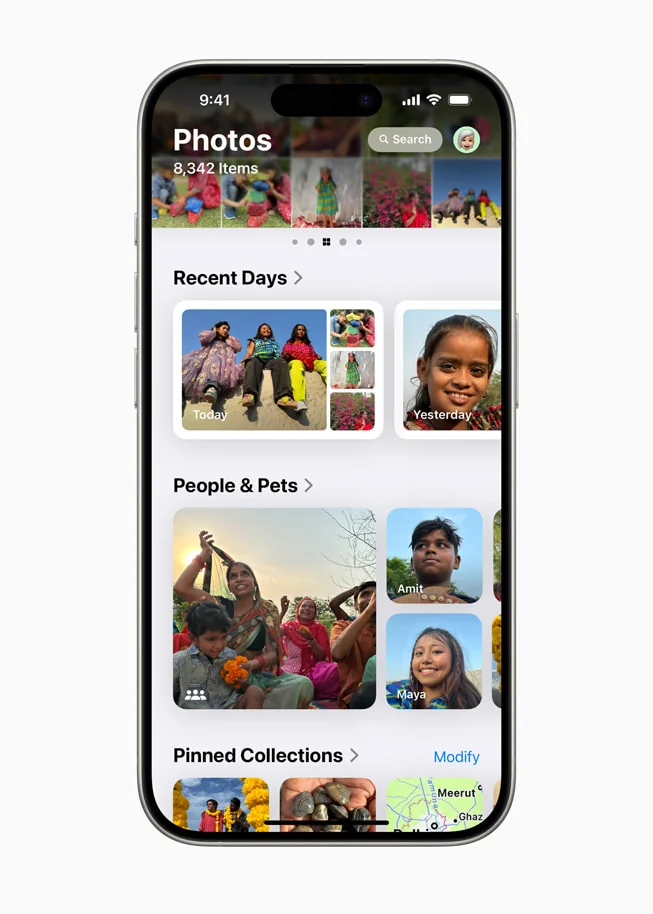
Automatic Geographic Organization:
- Photos uses GPS metadata from iPhone and GPS-enabled cameras
- View as interactive map or grid in Places album
- Pinch to zoom on map, click clusters to expand
Adding Missing Locations:
- Select photos without GPS data
- Press ⌘I (Info panel)
- Click "Add a location"
- Type address, landmark, or city name
- Confirm location on map
Location-Based Smart Albums (Workaround):
Since Smart Albums can't directly filter by Place, use keywords:
- Select all photos from a location
- ⌘I → Add keyword: "Tokyo_2024" or "Grand_Canyon"
- Create Smart Album: Keyword > is > Tokyo_2024
Pro Tip: Add location keywords immediately after trips while memory is fresh for best organization.
Editing Like a Pro: Complete Workflow Guide
Basic Enhancement Workflow (30 Seconds Per Photo)
For Everyday Photos:
- Select photo → Press Return (or ⌘Return) to enter Edit mode
- Press ⌘E or click magic wand for Auto Enhance
- Works well for 70% of casual photos
- Automatically adjusts exposure, contrast, and saturation
- Manual fine-tuning (if needed):
- Brilliance: +10 to +20 (makes photos "pop")
- Highlights: -20 to -40 (recover bright skies)
- Shadows: +20 to +40 (open up dark areas)
- Saturation: +5 to +10 (more vibrant colors)
- Press C for crop tool if composition needs adjustment
- Press Return to save and exit
Portrait Retouching Workflow (2-3 Minutes)
Professional Portrait Editing:
-
Initial Adjustments:
- Apply Auto Enhance (⌘E)
- Reduce Exposure by -0.1 to -0.3 (prevents blown highlights on skin)
- Increase Shadows (+20 to +30) to open up face
-
Optimize Skin Tones:
- Adjust White Balance → Warmth slider slightly right (+5 to +10)
- Verify skin doesn't look orange or unnatural
-
Sharpen & Define:
- Sharpness: +20 to +30
- Definition: +10 to +15 (adds midtone contrast for dimensional look)
- Warning: Don't over-sharpen, creates harsh appearance
-
Retouch Blemishes:
- Click Retouch tool (or press R)
- Click on blemishes, spots, or small distractions
- Photos automatically blends surrounding pixels
- Keep brush size small for precision work
-
Subtle Vignette (Optional):
- Vignette slider: -10 to -20
- Darkens edges, draws attention to face
-
Compare Results: Hold M key to toggle before/after view
Landscape Photography Workflow (3-5 Minutes)
Optimizing Landscape Photos:
-
Structure Foundation:
- Press C → Straighten horizon using grid overlay
- Crop to rule-of-thirds composition for visual balance
-
Exposure & Light Mastery:
- Exposure: 0 to +0.3 (slight brightening)
- Highlights: -40 to -60 (critical for sky detail recovery)
- Shadows: +30 to +50 (open up foreground)
- Contrast: +10 to +20
- Brilliance: +15 to +25
-
Color Enhancement:
- Saturation: +10 to +20 (vivid landscape colors)
- Vibrancy: +15 to +25 (selective boost to less saturated areas)
- Adjust Blue/Green cast if color temperature looks off
-
Detail Sharpening:
- Sharpness: +30 to +50 (landscapes can handle higher sharpening)
- Definition: +20 to +30
- Noise Reduction: +10 to +20 (for high ISO shots)
Advanced Landscape Editing: For gradient filters (sky darkening) or radial filters, use "Edit With" → Pixelmator Pro or Affinity Photo for advanced selective adjustments, then round-trip back to Photos.
Batch Editing: Copy & Paste Adjustments
Photos doesn't support true simultaneous batch editing, but copy/paste adjustments is highly effective:
Workflow for Event Photos (50-100 photos from same shoot):
- Create album for the batch
- Edit first "master" photo carefully (5 minutes):
- Perfect exposure, color, sharpness
- Apply filters if desired
- With adjustments panel open, press ⌘Shift+C (Copy Adjustments)
- Press → (right arrow) to move to next photo (stay in Edit mode!)
- Press ⌘Shift+V (Paste Adjustments)
- Repeat: → → ⌘Shift+V → → ⌘Shift+V (develops fast rhythm)
- Make individual tweaks where lighting differs
Time Savings Example:
- Manual editing: 2 min/photo × 50 = 100 minutes
- Batch paste: 5 min master + 10 sec/photo × 49 = ~13 minutes
- 87% time reduction!
What Syncs vs. What Doesn't:
✅ Can Be Copied/Pasted:
- All Light adjustments
- All Color adjustments
- Sharpness, Definition, Noise Reduction
- Filters and intensity
- Vignette
❌ Cannot Be Batch Applied:
- Crop (must be done individually)
- Rotation/Straightening
- Retouch tool corrections
- Third-party app extensions
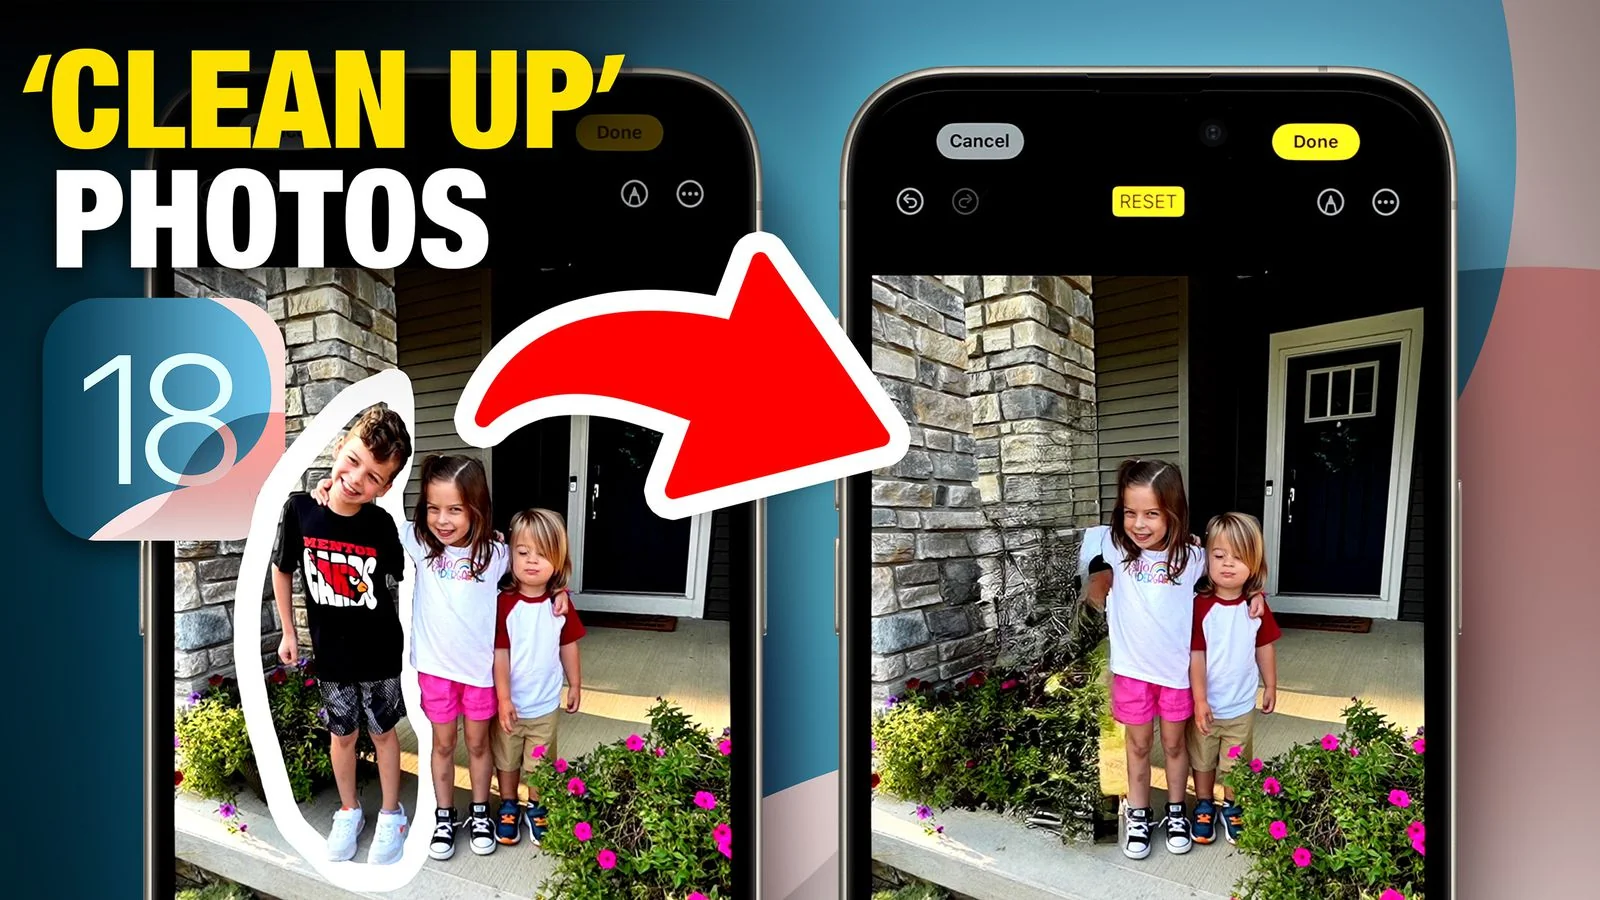
AI-Powered Clean Up Tool (macOS Sequoia 15.1+)
Requirements: Mac with M1 chip or later
How Clean Up Works:
- Enter Edit mode on photo
- Click "Clean Up" tool (if available on your Mac)
- Brush over unwanted object/person or let AI detect automatically
- AI removes object and intelligently fills background
- Works on: Tourists in landscapes, power lines, trash, photobombers
Limitations:
- Converts Live Photos to still images
- Cannot be used on videos
- Works best with smaller objects and clear backgrounds
- Not available in all languages/regions yet
100% Privacy: All processing happens on-device, nothing uploaded to servers.
Performance Optimization: Speed Up Photos App
Common Performance Issues
Based on extensive user feedback from Apple Support Communities, MacRumors forums, and Reddit, these are the most frequently reported problems:
Slow Launch Times: Users report several minutes just to display first photos, especially with libraries >100GB
Browsing Lag: Out-of-focus images appearing initially, taking 3-4 seconds to snap into sharp focus
External Drive Slowness: "Painfully slow access" when library is on external HDD, constant beachballing
Memory Usage: Background processes (photoanalysisd, photolibraryd) consuming 50-300% CPU during face detection and scene analysis
System-Level Optimizations
RAM Requirements Reality Check:
- 8GB RAM: Constrained for Photos with libraries >10,000 photos. Struggles with simultaneous editing and background processing
- 16GB RAM: Recommended minimum for serious photography work. Provides headroom for large libraries and multitasking
- 32GB+ RAM: Ideal for professionals with 100,000+ photo libraries or heavy RAW editing
Storage Optimization (Critical!):
"Photos becomes slow as molasses when available storage drops below 30GB" - Apple Support Community
Best Practices:
- Maintain 20-25% free disk space minimum (Photos needs space for cache and temp files)
- Use SSD for Photos library (HDDs cause constant beachballing, no longer viable)
- Monitor storage regularly via System Settings → General → Storage
External Drive Requirements:
HDD = Unusable: Community consensus is Photos library "basically requires an SSD nowadays" on external drives
SSD Performance Tiers:
- USB 3.1 Gen 2 (1000 MB/s): Good, acceptable for most users
- Thunderbolt 3/4 (2800 MB/s): Excellent, professional-grade performance
- USB 3.0 (500 MB/s): Minimum acceptable, noticeably slower
Recommended External SSDs:
- Samsung T7 Shield (rugged, 1000 MB/s)
- SanDisk Extreme Pro SSD (reliable, 2000 MB/s)
- OWC Envoy Pro (Thunderbolt, 2800 MB/s)
Photos App Settings Optimization
Enable Reduce Motion (Instant Performance Boost):
- Open Photos → Settings → General
- Enable "Reduce Motion" checkbox
- Replaces zooming animations with fast fades
- Eliminates stuttering animations, especially on older Macs
System-Wide Animation Reduction (Optional):
- System Settings → Accessibility → Display
- Enable "Reduce motion" toggle
- Speeds up entire macOS experience, extends battery life
iCloud Photos Storage Strategy:
Option 1: Optimize Mac Storage (Space-Constrained Macs):
- Photos → Settings → iCloud
- Select "Optimize Mac Storage"
- Keeps smaller versions locally, downloads originals on-demand
- Targets ~10% free disk space automatically
Pros: Conserves space on 256GB-512GB Macs Cons: May slow down Photos (requires downloading from iCloud before editing)
Option 2: Download Originals (Performance Priority):
- Photos → Settings → iCloud
- Select "Download Originals to this Mac"
- Stores full-resolution files locally
- Serves as complete local backup
Pros: Best performance, no internet required for full access Cons: Requires adequate local storage
Recommended Strategy: Use "Download Originals" on at least one Mac with sufficient storage (primary machine), "Optimize Storage" on space-limited devices (MacBook Air, etc.)
Library Management Best Practices
Multiple Library Strategy:
When to Split Libraries:
- Total library exceeds 100GB
- Separating personal from work photos
- Organizing by year for easier management
- Different backup strategies for different content
How to Create Additional Libraries:
- Quit Photos
- Hold Option key while launching Photos
- Click "Create New..."
- Name and save in desired location (internal or external drive)
How to Switch Between Libraries:
- Quit Photos
- Hold Option key → Launch Photos
- Select desired library from list
- Click "Choose Library"
Important: Only the System Photo Library syncs with iCloud Photos. Secondary libraries require manual backup.
Recommended Structure for Large Collections:
Main: Photos_Current (2024-present, iCloud synced)
Archive: Photos_2023 (external drive)
Archive: Photos_2022 (external drive)
Work: Photos_Work_Clients (separate, no iCloud)
Avoid Referenced Libraries: While Aperture supported referenced originals well, Photos has limited tools for maintaining referenced photos. Stick to managed libraries (copied into library package) for reliability.
Advanced Performance Fixes
Disable Memory-Intensive Features (Temporary):
- Photos → Settings → Memories
- Uncheck "Show Featured Content"
- Reduces photoanalysisd CPU usage
- Re-enable after background processing completes
Audit Smart Albums: Too many complex Smart Albums slow Photos when deleting/organizing photos. Delete unnecessary ones, simplify criteria.
Library Repair (For Corruption Issues):
- Quit Photos
- Hold ⌘ + Option while launching Photos
- Click "Repair" in popup dialog
- Wait for completion (can take hours for large libraries)
- Restart Mac after repair completes
When to Start Fresh: If library is severely corrupted or performance doesn't improve after all optimizations, consider:
- Export all photos (File → Export → Unmodified Originals)
- Create fresh library
- Re-import photos systematically
- Archive old library for 6-12 months as backup
Advanced Features & Hidden Capabilities
Natural Language Search
macOS Tahoe Search Improvements:
Type plain English descriptions:
- "photos from last summer"
- "beach sunset"
- "photos of John from 2022"
- "screenshots"
- "portrait mode photos"
Search Operators for Power Users:
date:2024 → Photos from 2024
date:2024-06 → Photos from June 2024
date:2024-06-15 → Specific day
favorite:yes → Only favorites
keyword:family → Tagged with "family"
description:vacation → Description contains "vacation"
Combine Operators:
date:2024 favorite:yes keyword:landscape
= Favorite landscape photos from 2024
Live Text Integration
Extract Text from Any Photo:
- Open photo containing text (screenshot, document, sign, business card)
- Hover cursor over text in photo
- Text becomes highlighted/selectable
- Click to select → ⌘C to copy
- Paste anywhere
Smart Actions:
- Phone numbers: Click to call via FaceTime
- Email addresses: Click to compose new email
- Addresses: Click to open in Maps
- URLs: Click to visit website
- Foreign language text: Right-click for translation
Use Cases:
- Copy confirmation numbers from booking screenshots
- Extract phone numbers from business card photos
- Grab text from photos of whiteboards
- Copy recipes from cookbook photos
- Translate street signs from travel photos
Memory Customization
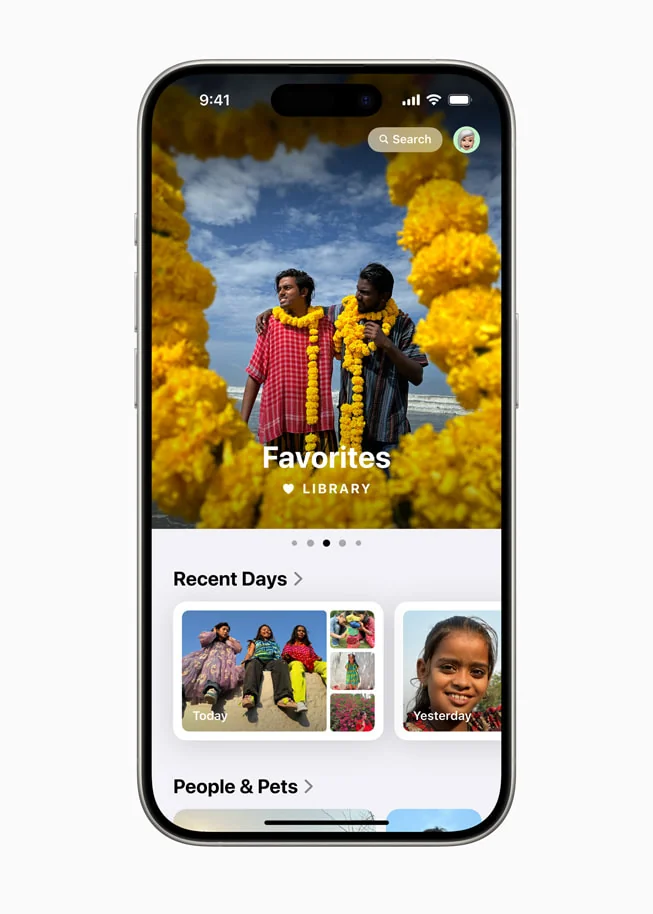
AI Memory Creation (macOS Tahoe + Apple Silicon):
- Open Memories tab
- Click "Create New Memory"
- Type description: "Summer vacation beach moments" or "Kids' birthday parties 2024"
- Apple Intelligence finds best photos/videos matching description
- Crafts storyline with chapters
- Sets appropriate music automatically
- Fully customizable after generation
Influencing Memory Appearance:
- Favorite more: Photos prioritizes Favorites in Memories
- Name people: Better face recognition = better people-focused Memories
- Add locations: GPS data improves trip-based Memories
- Block unwanted content: Click "•••" → "Block Person/Place/Holiday" to exclude from future Memories
Creating Custom Memory Movies:
- Select album or photos
- Click slideshow button (⌘⌥S)
- Choose theme (Classic, Ken Burns, Magazine, Vintage)
- Select music from library or Apple Music
- Adjust slide duration
- Export as video: File → Export → Export Memory
Keyboard Shortcuts Mastery
Essential Navigation Shortcuts:
⌘ReturnorReturn: Enter/Exit Edit mode↑↓←→: Navigate photos (works in edit mode!)Space: Quick Look full screen previewEsc: Exit full screen/edit mode⌘F: Search
Organization Shortcuts:
⌘.(period): Toggle Favorite⌘Delete: Delete photo(s)⌘N: Create new album⌘Shift+N: Create new folder⌘I: Show Info panel (metadata, keywords)
Editing Speed Shortcuts:
⌘E: Auto Enhance (magic wand)C: Crop toolR: Retouch tool⌘Z: Undo⌘Shift+Z: RedoM: View original (hold to compare before/after)
Advanced Editing Shortcuts:
⌘Shift+C: Copy adjustments⌘Shift+V: Paste adjustments (batch editing!)⌘1: Adjust panel⌘2: Filters panel⌘3: Crop panel
Power User Workflow Example:
Space → ⌘. → → → Space → ⌘. → →
(Quick Look, Favorite, Next, repeat for rapid culling)

Return → Make edits → ⌘Shift+C → → ⌘Shift+V → → ⌘Shift+V
(Edit master, copy adjustments, paste to batch)
Background Removal (macOS Ventura+)
Instant Subject Isolation:
- Open photo with clear subject (person, pet, object)
- Click and hold on subject for 1-2 seconds
- Subject glows/highlights
- Lift to copy subject with transparent background
- Paste into other apps (Pages, Keynote, Messages)
Use Cases:
- Create custom stickers for Messages
- Isolate subjects for presentations
- Quick product photos for eBay/marketplace listings
- Fun composites without complex masking
Professional Photography Workflows
RAW Workflow in Photos
Photos vs. Lightroom for RAW:
Use Photos for RAW when:
- Simple adjustments sufficient
- Integrated Apple ecosystem important
- Budget-conscious (Photos is free)
- Shooting fewer than 1,000 RAW files per month
Use Lightroom when:
- Need advanced local adjustments (brush, gradient, radial masks)
- Batch processing hundreds of RAW files per session
- Require catalog management across multiple drives
- Industry-standard color grading essential
Photos RAW Editing Workflow:

- Import RAW files from camera/card reader
- First Pass Cull (Press Delete on obvious failures):
- Out of focus
- Bad exposure beyond recovery
- Closed eyes (portraits)
- Duplicates from burst mode
- Second Pass (⌘. on keepers, reduces to 30-40% of original)
- Edit Master Photo (5-10 minutes):
Light Adjustments: - Exposure: Correct overall brightness - Highlights: -50 to -70 (recover sky/bright detail) - Shadows: +40 to +60 (open up dark areas) - Contrast: +10 to +25 - Black Point: +5 to +15 (deepen blacks) Color Adjustments: - White Balance: Adjust temp/tint for accurate colors - Saturation: +5 to +15 - Vibrancy: +10 to +20 Detail: - Sharpness: +30 to +60 (RAW needs aggressive sharpening) - Definition: +15 to +30 - Noise Reduction: +15 to +35 (for ISO 1600+) - Copy adjustments (⌘Shift+C) → Paste to similar images (⌘Shift+V)
- Fine-tune individuals for exposure variation
Third-Party RAW Extensions:
- RAW Power ($29.99): Advanced RAW processing with support for 80+ camera formats beyond macOS default
- Pixelmator Photo ($7.99): ML-powered adjustments, advanced RAW controls
- Affinity Photo ($74.99): Professional-grade with layer-based editing
Color Management for Print
Monitor Calibration (Essential for Accuracy):
- Hardware calibrator required: X-Rite ColorMunki Display or Datacolor SpyderX
- Calibrate monthly (weekly for critical color work)
- Target settings:
- Brightness: 120 cd/m² (print standard)
- White Point: 6500K (D65 daylight)
- Gamma: 2.2 (Mac standard)
Color Space Workflow:
For Web/Social Media:
- Export in sRGB color space
- Ensures consistent appearance across all browsers and devices
- File → Export → Color Profile: sRGB
For Print:
- Export in Adobe RGB (1998) or ProPhoto RGB
- Wider color gamut captures more printable colors
- Include embedded ICC profile
- File → Export → Color Profile: Adobe RGB → Include color profile: ✓
Soft Proofing (Photos Limitation):
- Photos lacks built-in soft proofing for printer simulation
- For critical prints: Edit With → Photoshop
- View → Proof Setup → Custom
- Load printer ICC profile
- Adjust for printer color gamut
- Save back to Photos
Client Delivery Workflows
Shared Album for Proofing:
- File → New Shared Album
- Name: "Smith Wedding Proofs"
- Invite client via email/phone number
- Add edited photos to shared album
- Client reviews, can:
- Like favorites
- Comment on specific photos
- Download if permissions granted
Export for Final Delivery:
- Select client's final picks
- File → Export → [X] Photos
- Recommended export settings:
Photo Kind: JPEG Quality: Maximum Size: Full Size (or 4K long edge for web delivery) File Naming: Use Title (sequential numbers) Color Profile: sRGB (universal compatibility) Metadata: Include IPTC, Copyright - Create organized folder:
Smith_Wedding_2024-06-15_Finals/ ├── Ceremony/ ├── Reception/ └── Portraits/ - Deliver via:
- Cloud storage link (Dropbox, Google Drive)
- Client gallery (Pixieset, ShootProof)
- USB drive (premium option)
Backup Strategy for Professionals
3-2-1 Backup Rule:
- Primary: Photos library on Mac internal/Thunderbolt SSD (copy 1)
- Onsite Backup: Time Machine to external HDD (copy 2, different media type)
- Cloud Backup: iCloud Photos OR Backblaze unlimited (copy 3, offsite)
Additional Layer for Critical Work: 4. Offsite Archive: External HDD with quarterly archives stored at different location (bank safe deposit, office, trusted friend's house)
Photos Library Management:
- Keep current year in Photos library (~500GB-1TB)
- Archive older years to external drives
- Use referenced files for very large collections (10,000+ RAW files per project)
Platform Comparison: Photos vs. Competitors
Photos vs. Google Photos
Choose Apple Photos if:
- ✅ You use primarily Apple devices (Mac, iPhone, iPad)
- ✅ Privacy is top priority (on-device AI, no ad targeting)
- ✅ You want powerful local editing tools
- ✅ You shoot RAW and need editing support
- ✅ You prefer one-time/no subscription costs
Choose Google Photos if:
- ✅ Mixed devices (Android + iOS + Windows)
- ✅ You want AI to do all organization automatically
- ✅ You share with non-Apple users frequently
- ✅ You want the best search (context-aware, visual AI)
- ✅ You value 15GB free storage vs. 5GB (iCloud)
Feature Comparison:
| Feature | Apple Photos | Google Photos |
|---|---|---|
| Privacy | ⭐⭐⭐⭐⭐ Excellent | ⭐⭐⭐ Fair |
| RAW Editing | ⭐⭐⭐⭐⭐ Full | ⭐⭐ View only |
| Search | ⭐⭐⭐⭐ Good | ⭐⭐⭐⭐⭐ Excellent |
| Cross-Platform | ⭐⭐ Apple only | ⭐⭐⭐⭐⭐ Universal |
| Editing Tools | ⭐⭐⭐⭐⭐ Advanced | ⭐⭐⭐ Basic |
| Sharing | ⭐⭐⭐ Apple easy | ⭐⭐⭐⭐⭐ Universal |
| Offline Access | ⭐⭐⭐⭐⭐ Full | ⭐⭐ Cached only |
Photos vs. Adobe Lightroom
Choose Apple Photos if:
- ✅ Casual to enthusiast photographer
- ✅ Primarily iPhone photography with occasional dedicated camera use
- ✅ Want simplicity over maximum power
- ✅ Hate subscriptions ($0 vs. $9.99/month)
- ✅ RAW editing with basic needs sufficient
Choose Lightroom Classic if:
- ✅ Professional or serious enthusiast
- ✅ Need advanced local adjustments (gradients, brushes, masks)
- ✅ Shoot RAW extensively (wedding, events, portraits)
- ✅ Edit hundreds of photos per session
- ✅ Need precise color management and print workflows
- ✅ Willing to learn complex software for maximum control
Feature Comparison:
| Feature | Apple Photos | Lightroom Classic |
|---|---|---|
| Cost | Free | $9.99/month |
| Learning Curve | ⭐ Easy | ⭐⭐⭐⭐⭐ Steep |
| RAW Editing | ⭐⭐⭐⭐ Good | ⭐⭐⭐⭐⭐ Excellent |
| Local Adjustments | ❌ No (need external) | ⭐⭐⭐⭐⭐ Extensive |
| Batch Processing | ⭐⭐ Limited | ⭐⭐⭐⭐⭐ Excellent |
| Mobile Sync | ⭐⭐⭐⭐⭐ Excellent | ❌ No (desktop only) |
| Presets | ❌ No | ⭐⭐⭐⭐⭐ Huge ecosystem |
| Color Management | ⭐⭐⭐ Basic | ⭐⭐⭐⭐⭐ Professional |
Hybrid Workflow (Many pros use both):
Lightroom Classic: Primary editing and RAW workflow
  ↓ Export finished JPEGs
Apple Photos: Sync finals for easy iPhone/iPad viewing
  - iCloud sync for mobile access
  - Easy sharing with family
  - Quick reference on all devices
Troubleshooting Common Issues
Photos App Won't Open or Crashes
Solutions:
- Update macOS: System Settings → General → Software Update
- Many Photos crashes fixed with OS updates
- Repair Library: Hold ⌘ + Option → Launch Photos → Click "Repair"
- Check Storage: Ensure 20GB+ free space minimum
- Reset Preferences:
rm ~/Library/Preferences/com.apple.Photos.plist rm ~/Library/Preferences/com.apple.photolibraryd.plist - Create New Library (last resort): Option-click Photos → Create New
iCloud Photos Not Syncing
Diagnosis:
- Check iCloud status: Photos → Settings → iCloud
- Should show "Updating [X items]" or "Up to Date"
- Verify storage: System Settings → Apple ID → iCloud
- Ensure not over storage quota
- Check network: Photos requires Wi-Fi for large uploads
Solutions:
- Pause and Resume: Photos → Settings → iCloud → Uncheck → Wait 30s → Re-check
- Restart photoanalysisd:
killall photoanalysisd photolibraryd - Sign Out/In iCloud (nuclear option):
- System Settings → Apple ID → Sign Out
- Restart Mac
- Sign back in
- Re-enable iCloud Photos
High CPU Usage from Background Processes
photoanalysisd (Face Detection, Scene Analysis):
Normal Behavior:
- Runs after large imports, OS upgrades, or when Mac is idle
- Can consume 50-300% CPU (on multi-core Macs)
- Completes faster on Apple Silicon (M1/M2/M3/M4)
Solutions:
- Let it finish: Usually completes in 24-48 hours
- Accelerate: Keep Mac awake, connected to power overnight
- Disable Memories: Photos → Settings → Memories → Uncheck "Show Featured Content"
photolibraryd (Library Management):
Normal Behavior:
- Processes photos after OS upgrades, imports, iCloud syncs
- Can consume significant RAM (up to 35GB on 16GB machines via memory compression)
Solutions:
- Wait for completion: Check Activity Monitor → % CPU → If dropping, nearly done
- Restart if stuck: Force quit via Activity Monitor → Relaunch Photos
Duplicates Not Appearing
Requirements: macOS Ventura (13.0) or later
If Duplicates Album is Empty:
- Wait for scanning: Can take hours on large libraries
- Check Photos → Settings: Ensure iCloud Photos enabled
- Use third-party tools: DupeGuru (free), Gemini 2 ($20/year) find more duplicates than built-in
Conclusion: Maximizing Mac Photos Potential
Mac Photos app on macOS Tahoe 26 represents a significant evolution in Apple's photo management philosophy. With Liquid Glass design, Apple Intelligence integration, and enhanced performance optimizations, Photos serves as a capable solution for 80% of Mac users—from casual iPhone photographers to semi-professional creators.
Who Should Use Photos
Excellent for:
- All-Apple households seeking seamless device integration
- Privacy-conscious users wanting on-device AI processing
- Enthusiasts shooting RAW but not needing complex local adjustments
- Families using iCloud Shared Photo Libraries
- Users who value simplicity and integrated workflows
May Need Alternatives:
- Professional photographers with 100,000+ RAW files (consider Lightroom Classic or Capture One)
- Advanced color grading specialists (Photos lacks sophisticated curves and color wheels)
- Cross-platform users (Windows + Mac + Android scenarios better served by Google Photos)
- Budget-conscious with huge libraries (Google Photos' 15GB free vs. iCloud's 5GB)
Key Takeaways
Performance Optimization Priority:
- Ensure 16GB+ RAM for serious use, 32GB+ for professionals
- Use SSD (internal or Thunderbolt external), never HDD
- Maintain 20-25% free storage minimum
- Enable Reduce Motion for instant responsiveness boost
- Split libraries over 100GB for better management
Organization Mastery:
- Leverage Smart Albums for automated filtering
- Train People face recognition for accurate grouping
- Add location keywords for travel organization
- Use Favorites liberally for quick access to best shots
- Create simple album structures you'll actually maintain
Editing Efficiency:
- Master copy/paste adjustments for batch editing
- Learn essential keyboard shortcuts (⌘Shift+C/V, ⌘E, M, C, R)
- Use "Edit With" for advanced needs (Pixelmator Pro, Affinity Photo)
- Create editing presets via copy/paste for consistent looks
Professional Workflows:
- Implement 3-2-1 backup strategy for critical work
- Use client-based album structures for organization
- Export in correct color space (sRGB web, Adobe RGB print)
- Maintain one primary Mac with "Download Originals" enabled
Future-Proofing:
- Intel Mac users: Plan Apple Silicon upgrade path (macOS Tahoe is final Intel release)
- Large library users: Monitor library size, consider splitting at 100GB+
- Professional photographers: Evaluate if Lightroom better serves evolving needs
- Privacy advocates: Enable Advanced Data Protection for end-to-end encryption
Mac Photos excels when users understand its capabilities and limitations, implement proven optimization strategies, and leverage its deep integration with the Apple ecosystem. For most users, mastering Photos' hidden features, keyboard shortcuts, and Smart Albums unlocks a powerful photography platform that requires minimal maintenance while delivering professional-grade results.
Ready to optimize your Mac for maximum performance? Explore our macOS Tahoe Performance Analysis for detailed benchmarks and optimization strategies.