macOS Tahoe ウィンドウ管理完全ガイド 2025:ネイティブタイリング、サードパーティアプリ比較、生産性ワークフロー
macOS Tahoe 26 のウィンドウ管理を完全マスター。ネイティブウィンドウタイリング、Rectangle vs Amethyst vs AeroSpace vs yabai の比較、キーボードショートカット設定、マルチモニターワークフロー最適化で生産性を最大化。
Window management has long been a pain point for Mac users transitioning from Windows or Linux, where robust tiling and snapping features have been standard for years. With macOS Tahoe 26, Apple finally delivers native window tiling capabilities that eliminate the need for third-party tools for basic users—while power users still have access to an impressive ecosystem of advanced window managers. This comprehensive guide covers everything you need to know about managing windows effectively on your Mac in 2025.
Executive Summary: Window Management in macOS Tahoe 26
Key Takeaways
macOS Tahoe 26 represents a significant leap forward in native window management capabilities, though it still doesn't match the sophistication of dedicated tiling window managers for power users.
What's New in macOS Tahoe 26:
- Native Window Tiling: Drag-to-snap, green button menu layouts, and keyboard shortcuts
- Improved Multi-Monitor Support: Better handling of window positions across displays
- Reduced Margins Option: Maximize screen real estate by eliminating gaps between tiled windows
- Liquid Glass Integration: Modern translucent aesthetic that works seamlessly with window arrangements
When You Still Need Third-Party Apps:
- Automatic tiling (windows arrange themselves without manual intervention)
- Binary space partitioning layouts
- i3/xmonad-style workflow with workspaces
- Advanced keyboard-driven navigation
- Focus-follows-mouse functionality
- Custom layouts beyond Apple's presets
Who This Guide Is For
This guide serves multiple audiences with different window management needs:
| User Type | Recommended Solution | Why |
|---|---|---|
| Casual Users | Native macOS Tiling | Simple, built-in, no setup required |
| Productivity Workers | Rectangle or Magnet | Easy keyboard shortcuts, reliable |
| Developers | AeroSpace or yabai | i3-like workflows, workspaces |
| Designers | Rectangle Pro or Lasso | Custom layouts, precise positioning |
| Linux Converts | Amethyst or AeroSpace | Familiar tiling paradigms |
Part 1: Mastering Native Window Tiling in macOS Tahoe
Apple introduced native window tiling in macOS Sequoia 15 and refined it further in macOS Tahoe 26. This built-in feature covers most basic window management needs without requiring any additional software.
Method 1: Drag-to-Tile (The Easiest Way)
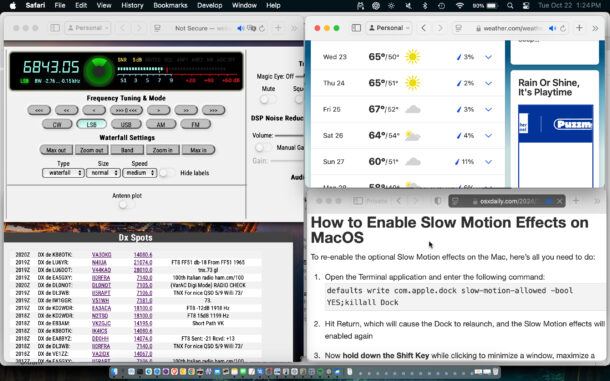
The most intuitive method for tiling windows is simply dragging them to screen edges:
How It Works:
- Click and hold a window's title bar
- Drag it toward any screen edge or corner
- Watch for the gray preview outline
- Release to snap the window into position
Available Snap Positions:
- Left/Right Edge: Half-screen tiles (50% width)
- Top Edge: Full-width tile (useful for reference windows)
- Corners: Quarter-screen tiles (25% of display)
Pro Tips:
- Hold Option while dragging for faster snapping—the preview appears immediately without needing to reach the edge
- Release near the edge to fine-tune position before committing
- Some apps with fixed minimum window sizes may not tile properly
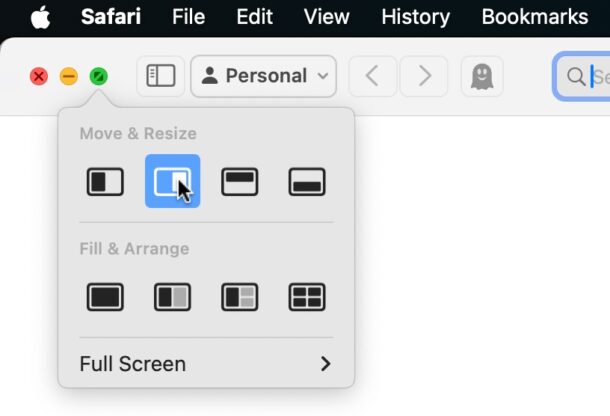
Method 2: Green Button Menu (Most Versatile)
The green zoom button in every window's title bar now reveals a powerful tiling menu:
Accessing the Menu:
- Hover your cursor over the green button (don't click)
- Wait for the menu to appear (about 0.5 seconds)
- Select your desired layout option
Menu Options Explained:
Move & Resize Section:
- Left Half / Right Half: Split screen horizontally
- Top Half / Bottom Half: Split screen vertically
- Fill (Maximize): Fill the entire screen without going full-screen
- Center: Center the window on screen (hold Option key)
Fill & Arrange Section:
- Left & Right: Tile with another window side by side
- Top & Bottom: Stack windows vertically
- Quarters: Arrange up to four windows in corners
Hidden Options (Hold Option Key): When you hold the Option key while hovering:
- "Fill" changes to "Center"
- Layout priority shifts to the right side
- Additional arrangement options appear
Method 3: Menu Bar Controls
Access tiling from any application's menu bar:
- Click Window in the menu bar
- Navigate to Move & Resize
- Select your preferred layout
This method is useful when:
- The green button is obscured
- You prefer menu-based navigation
- You're using keyboard navigation (arrow keys in menus)
Method 4: Keyboard Shortcuts
macOS Tahoe includes native keyboard shortcuts for window tiling:
Default Shortcuts:
| Action | Shortcut |
|---|---|
| Tile Left Half | Fn + Control + ← |
| Tile Right Half | Fn + Control + → |
| Tile Top Half | Fn + Control + ↑ |
| Tile Bottom Half | Fn + Control + ↓ |
| Move to Adjacent Tile | Fn + Control + Shift + Arrow |
Important Notes:
- These shortcuts require the
Fnkey, which differs from third-party apps - Some keyboards may require different modifier combinations
- Reliability can vary across macOS updates
Customizing Native Tiling Settings
Fine-tune the tiling experience in System Settings:
Navigate to Settings:
- Open System Settings
- Click Desktop & Dock
- Scroll to the Windows section
Available Options:
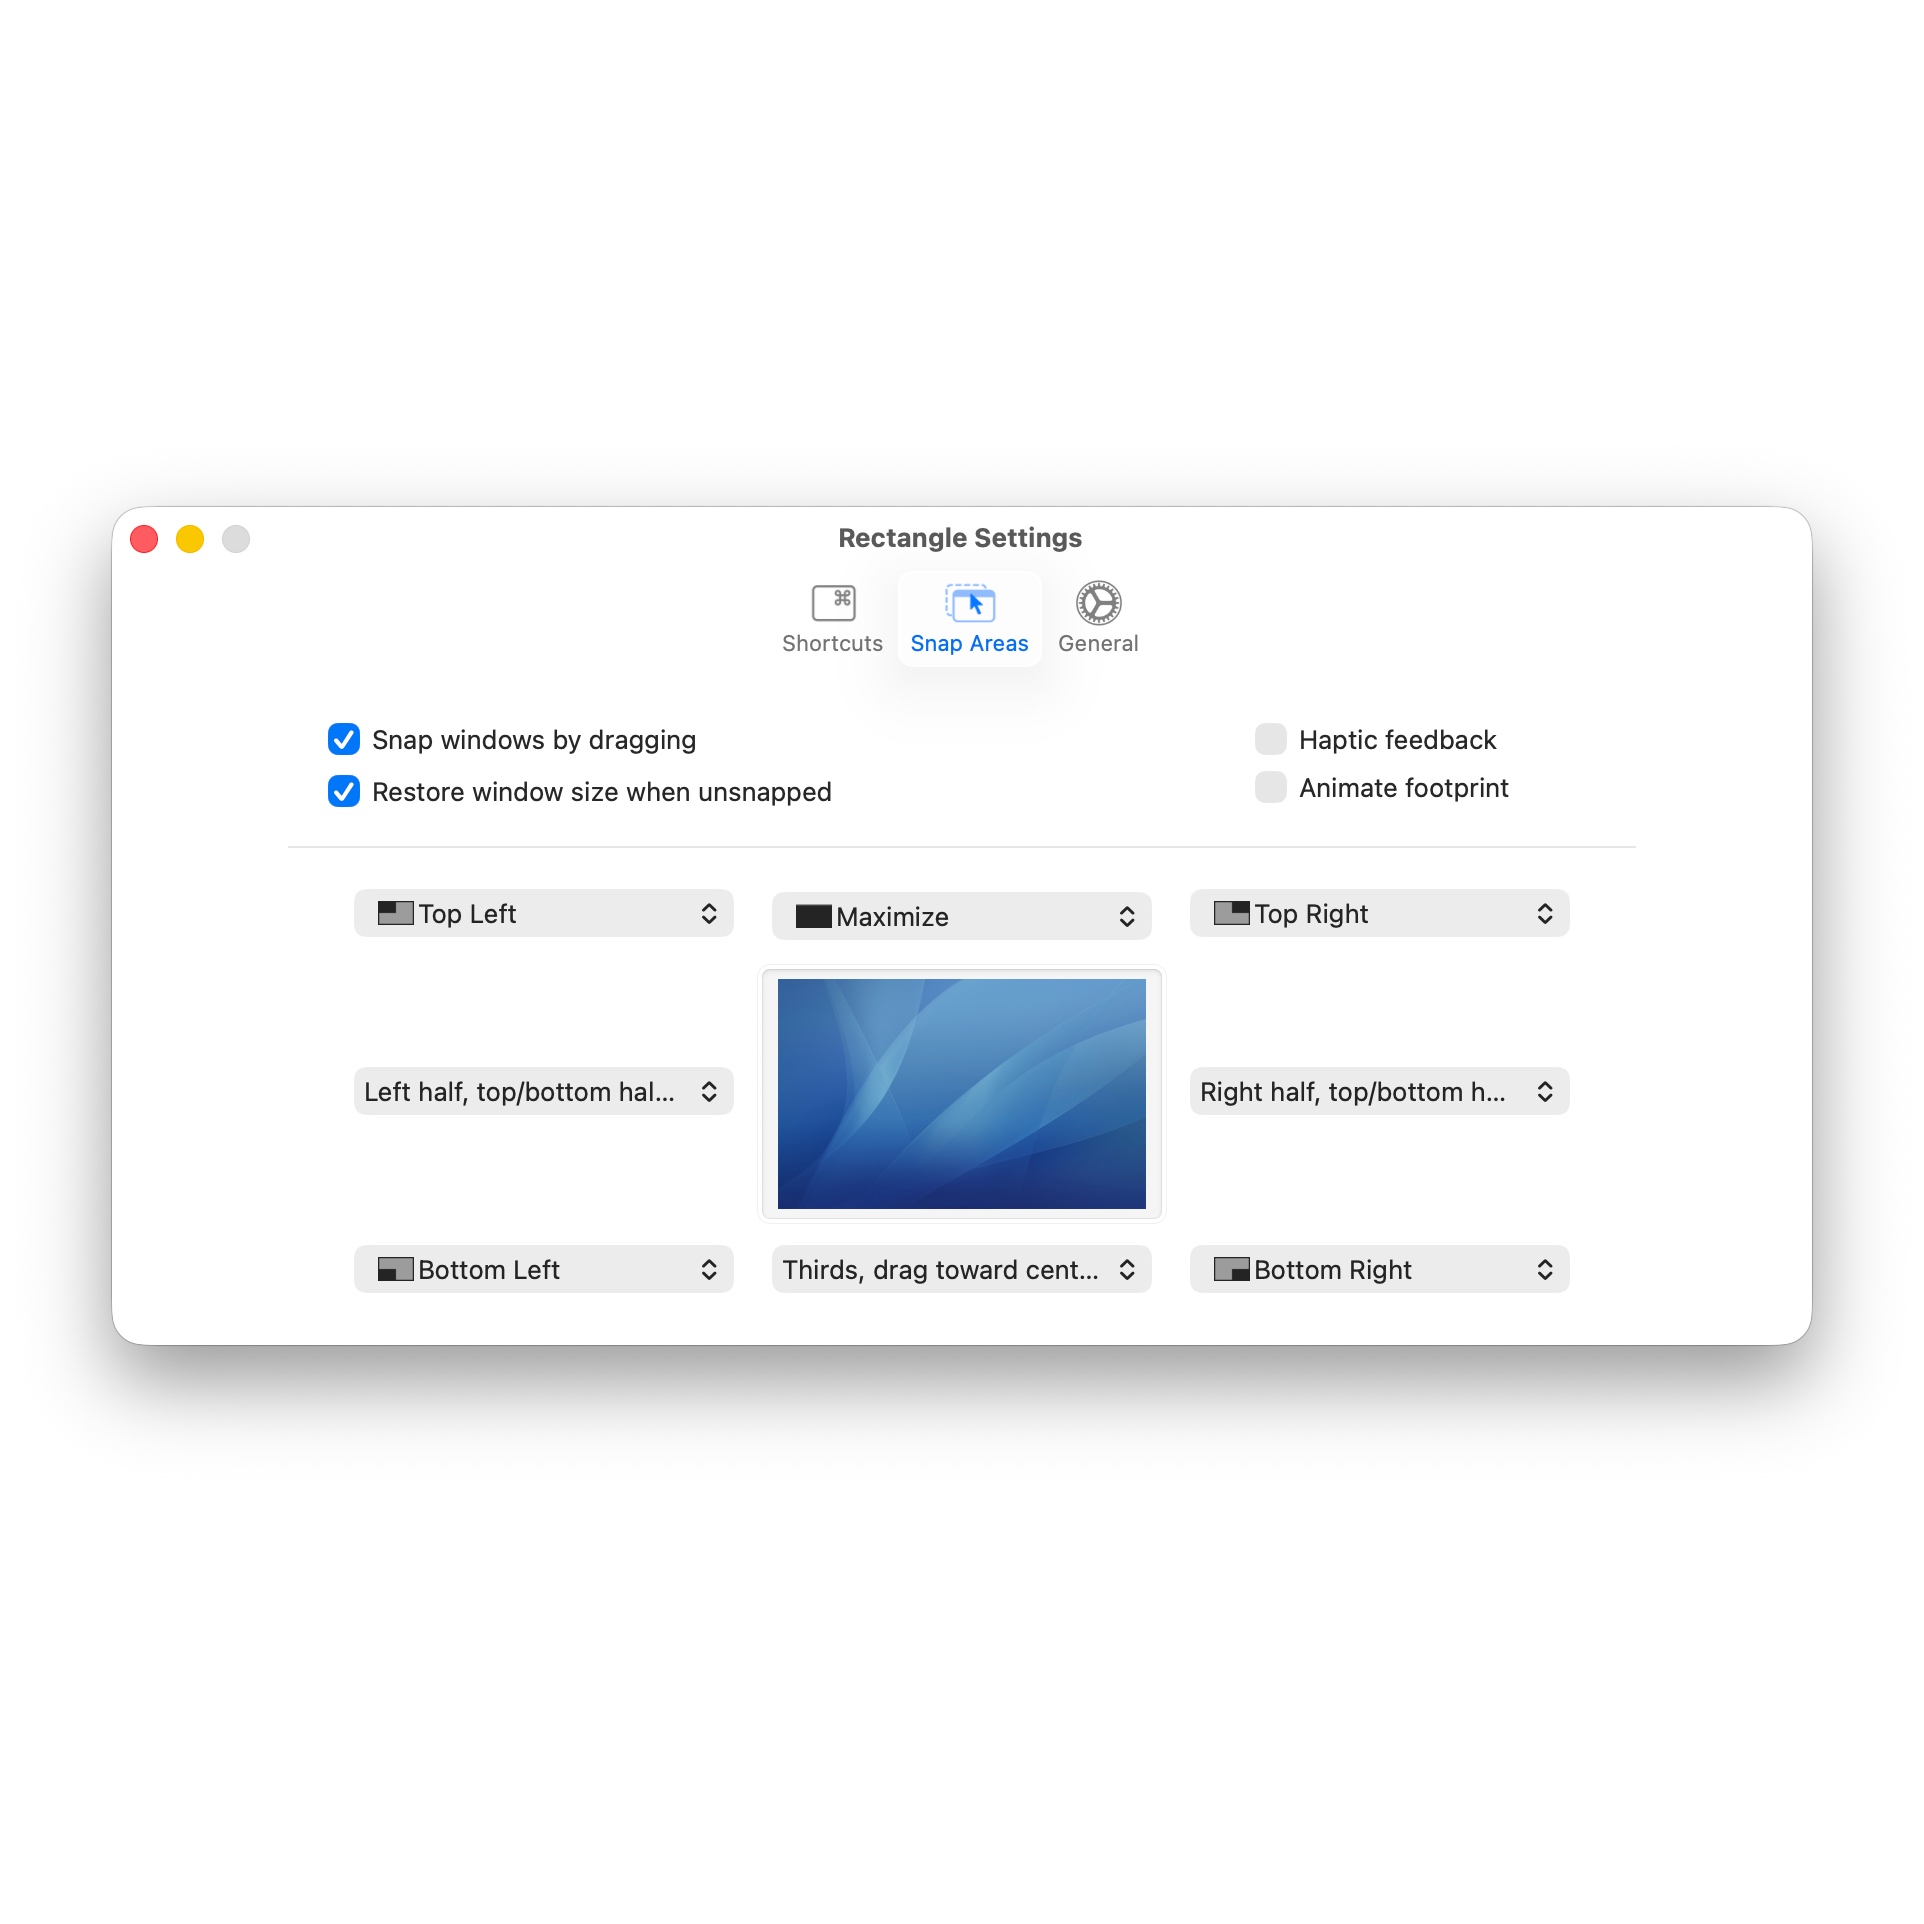
Tile by dragging windows to screen edges:
- Toggle on/off for drag-to-snap behavior
- Disable if you prefer mouse-based window movement without snapping
Tiled windows have margins:
- Enabled: Small gaps between tiled windows (Apple default)
- Disabled: Windows touch edge-to-edge, maximizing screen space
Hold ⌥ key to tile by dragging:
- Changes Option-drag behavior
- Useful if you frequently accidentally trigger tiling
Limitations of Native Tiling
While macOS Tahoe's native tiling covers basic needs, it has notable limitations:
What Native Tiling Cannot Do:
- Automatic Tiling: Windows don't arrange themselves—you must manually place each one
- Custom Layouts: Limited to Apple's preset arrangements (halves, quarters)
- Thirds or Sixths: No native support for three-column or six-panel layouts
- Workspace Management: No virtual desktop integration beyond Mission Control
- Focus-Follows-Mouse: Always click to focus
- Persistent Layouts: Window arrangements don't survive app restarts
Apps That Don't Play Nice:
- Apple News (fixed minimum size)
- Some Electron apps with custom title bars
- Legacy apps without modern window APIs
- Full-screen media players during playback
Part 2: Third-Party Window Managers Compared
For users who need more than native tiling offers, macOS has a rich ecosystem of window management tools. Here's a detailed comparison of the most popular options in 2025.
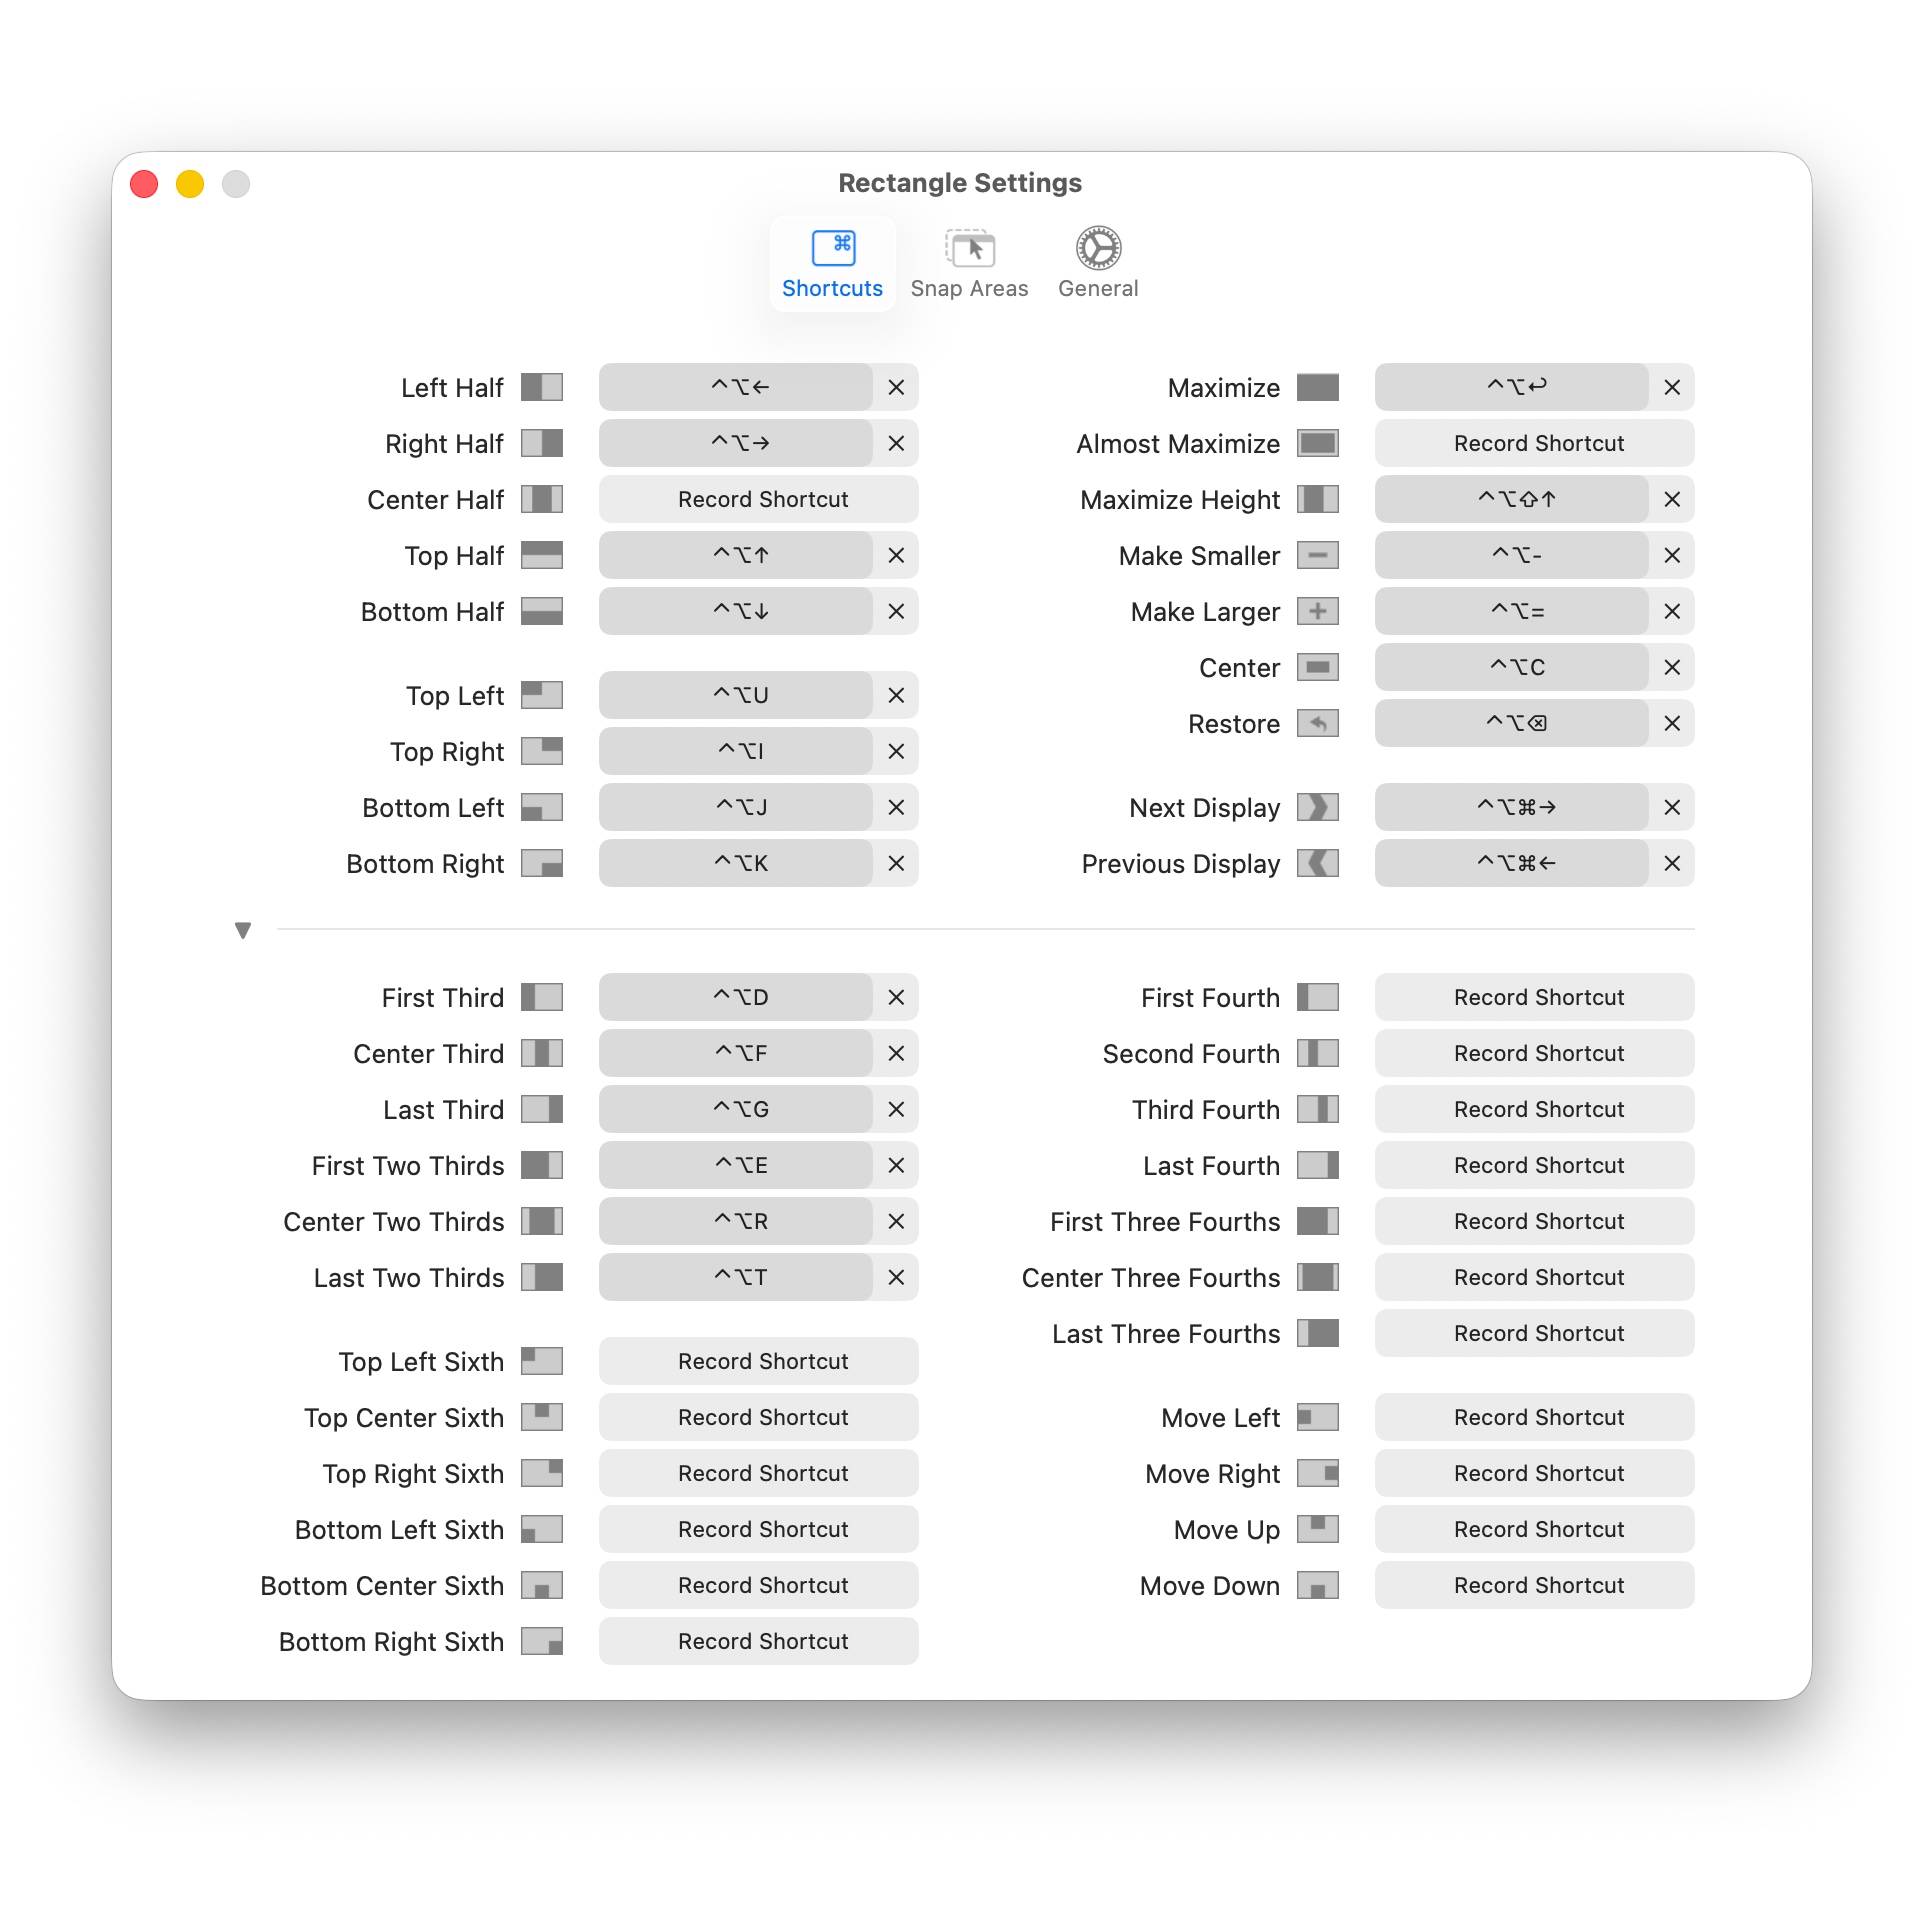
Rectangle: The Best Free Option
Overview: Rectangle is the spiritual successor to Spectacle, rebuilt in Swift for modern macOS. It's free, open-source, and strikes the perfect balance between simplicity and power.
Key Features:
- Keyboard shortcuts for 20+ window positions
- Drag-to-snap zones (edges and corners)
- Portrait display support
- Cycle through sizes with repeated shortcut presses
- Menu bar access and customization
Default Keyboard Shortcuts:
| Action | Shortcut |
|---|---|
| Left Half | Control + Option + ← |
| Right Half | Control + Option + → |
| Top Half | Control + Option + ↑ |
| Bottom Half | Control + Option + ↓ |
| Maximize | Control + Option + Return |
| Left Third | Control + Option + D |
| Center Third | Control + Option + F |
| Right Third | Control + Option + G |
| First Quarter | Control + Option + U |
| Second Quarter | Control + Option + I |
| Third Quarter | Control + Option + J |
| Fourth Quarter | Control + Option + K |
Installation:
# Via Homebrew
brew install --cask rectangle

# Or download from rectangleapp.com
Pros:
- Completely free and open-source
- Excellent reliability (it just works)
- Active development and community
- Low resource usage
- Intuitive default shortcuts
Cons:
- No automatic tiling
- Limited to manual window placement
- Pro version costs $9.99 for advanced features
Best For: Users who want simple, reliable keyboard-driven window snapping without complexity.
Rectangle Pro: Professional Upgrade
Rectangle Pro ($9.99) adds advanced features:
- Cursor Throw Gestures: Fling windows to snap positions
- Trackpad Gestures: Three-finger swipe to tile
- Application Layouts: Save and restore window arrangements per app
- Custom Window Sizes: Define pixel-perfect positions
- Window Groups: Organize related windows together
Best For: Professionals who need precise control and are willing to pay for it.
Magnet: The App Store Favorite
Overview: Magnet is the most popular paid window manager on the Mac App Store. It offers similar functionality to Rectangle in a polished, sandboxed package.
Price: $7.99 (one-time purchase)
Key Features:
- Drag-to-snap to edges and corners
- Keyboard shortcuts for all positions
- Menu bar controls
- Support for up to 6 external displays
Comparison with Rectangle:
| Feature | Rectangle | Magnet |
|---|---|---|
| Price | Free | $7.99 |
| Open Source | Yes | No |
| Distribution | Website + Homebrew | App Store only |
| Features | Nearly identical | Nearly identical |
| Updates | Community-driven | Commercial support |
Verdict: Choose Rectangle unless you specifically want App Store distribution and updates. The functionality is virtually identical.
Amethyst: Automatic Tiling for Keyboard Warriors
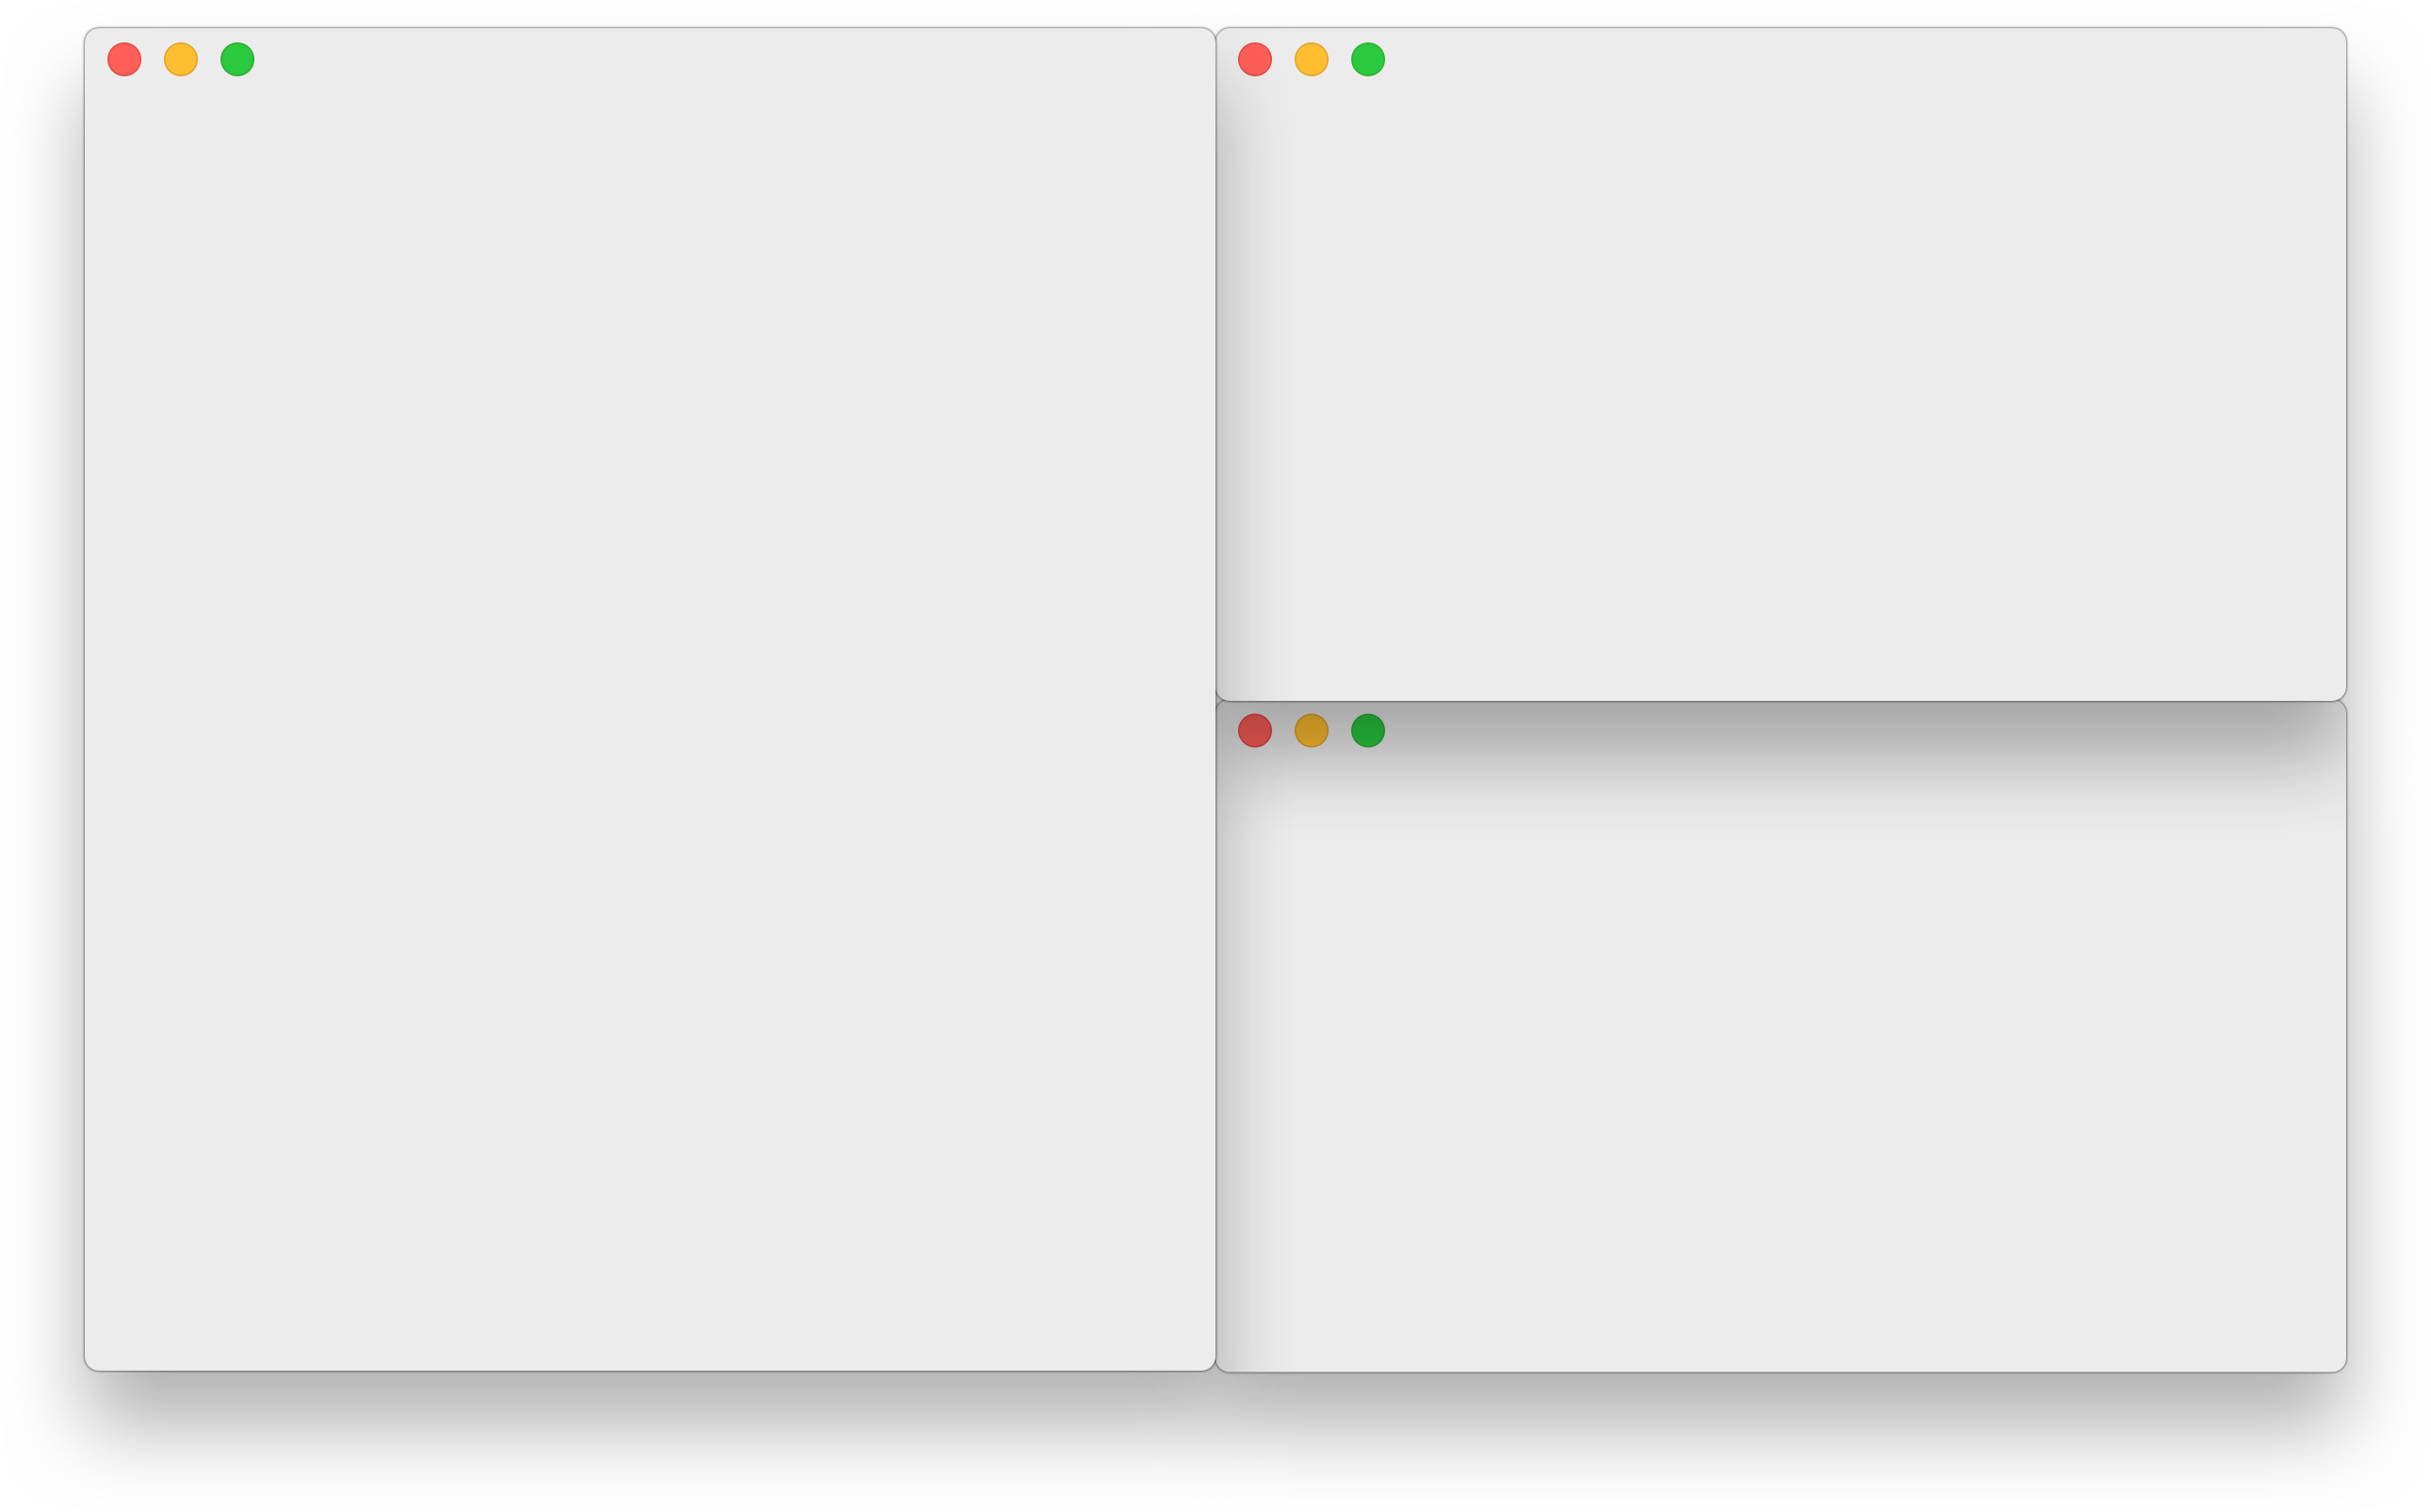
Overview: Amethyst is an automatic tiling window manager inspired by xmonad. Unlike Rectangle or Magnet, windows automatically arrange themselves—you never manually position them.
How It Works:
- Open any window—it automatically fills the screen
- Open a second window—both windows tile side by side
- Continue opening windows—they all rearrange automatically
- Switch layouts with keyboard shortcuts to change the arrangement pattern
Built-in Layouts:
- Tall: Main window on left, others stacked on right
- Wide: Main window on top, others below
- Fullscreen: One window maximized, others hidden
- Column: Equal-width vertical columns
- Row: Equal-height horizontal rows
- Floating: Traditional overlapping windows
- 3-Column Layouts: Various three-column arrangements
- Binary Space Partitioning (BSP): Advanced recursive splitting
Key Shortcuts:
| Action | Shortcut |
|---|---|
| Cycle Layout | Option + Shift + Space |
| Focus Next | Option + Shift + J |
| Focus Previous | Option + Shift + K |
| Swap with Main | Option + Shift + Return |
| Shrink Main | Option + Shift + H |
| Expand Main | Option + Shift + L |
Configuration: Amethyst supports YAML configuration and custom JavaScript layouts:
# ~/.amethyst.yml
layouts:
  - tall
  - wide
  - fullscreen
  - column

mod1:
  - option
  - shift

mouse-follows-focus: true
focus-follows-mouse: false
Pros:
- True automatic tiling (zero manual work)
- Excellent Spaces integration
- Stable after a decade of development
- Active community
Cons:
- Learning curve for newcomers
- Can feel restrictive to floating-window users
- Some apps don't play well with forced tiling
Best For: Linux refugees, keyboard enthusiasts, and developers who want xmonad-style workflow on macOS.
AeroSpace: The Modern i3 Clone
Overview: AeroSpace is a relatively new i3-like tiling window manager that has quickly become the preferred choice for developers seeking Linux-style workflows without compromises.
Key Differentiators from Amethyst:
1. No SIP Disable Required: AeroSpace never requires disabling System Integrity Protection. This makes it:
- Easier to maintain
- Resistant to macOS updates
- More secure by default
2. Custom Workspace Implementation: AeroSpace bypasses Mission Control entirely, implementing its own workspace system:
- Instant workspace switching (no animations)
- No 16-space limit
- Better multi-monitor support
3. Built-in Hotkey Management: Unlike yabai (which requires skhd), AeroSpace includes hotkey functionality:
- Modal keybindings (like vim modes)
- Visual mode indicator
- Simpler configuration
Configuration Example:
# ~/.aerospace.toml

[mode.main.binding]
alt-h = 'focus left'
alt-j = 'focus down'
alt-k = 'focus up'
alt-l = 'focus right'

alt-shift-h = 'move left'
alt-shift-j = 'move down'
alt-shift-k = 'move up'
alt-shift-l = 'move right'

alt-1 = 'workspace 1'
alt-2 = 'workspace 2'
alt-3 = 'workspace 3'

alt-shift-1 = 'move-node-to-workspace 1'
alt-shift-2 = 'move-node-to-workspace 2'
alt-shift-3 = 'move-node-to-workspace 3'

[mode.resize.binding]
h = 'resize width -50'
l = 'resize width +50'
j = 'resize height +50'
k = 'resize height -50'
Installation:
brew install --cask aerospacePros:
- No SIP disabling
- Blazing fast workspace switching
- Built-in keybinding support
- Active development in 2025
- Excellent documentation
Cons:
- Younger project (less battle-tested)
- Fewer features than yabai
- Performance issues under high CPU load
- Cannot remove window shadows
Best For: Developers who want i3-style workflows with minimal setup complexity.
yabai: Maximum Power, Maximum Complexity
Overview: yabai is the most powerful tiling window manager available for macOS, offering unparalleled customization at the cost of complexity.
Key Features:
- Binary space partitioning (BSP) layouts
- Focus-follows-mouse
- Disabling window animations
- Custom window rules per application
- Scriptable with shell commands
- Integration with skhd for keybindings
The SIP Question: yabai's full feature set requires disabling System Integrity Protection:
Features Available Without Disabling SIP:
- Window focusing and moving
- Basic tiling layouts
- Opacity and border modifications
Features Requiring SIP Disabled:
- Moving windows to specific spaces
- Following focus to another space
- Full scripting capabilities
- Disabling system animations
Configuration: yabai uses shell script configuration:
# ~/.yabairc

# Layout configuration
yabai -m config layout bsp
yabai -m config window_placement second_child

# Padding and gaps
yabai -m config top_padding    12
yabai -m config bottom_padding 12
yabai -m config left_padding   12
yabai -m config right_padding  12
yabai -m config window_gap     12

# Mouse settings
yabai -m config mouse_follows_focus on
yabai -m config focus_follows_mouse autoraise

# Application-specific rules
yabai -m rule --add app="System Preferences" manage=off
yabai -m rule --add app="Calculator" manage=off
yabai -m rule --add app="Activity Monitor" manage=off
Companion Tool - skhd: yabai requires skhd for keybindings:
# ~/.skhdrc

# Focus windows
alt - h : yabai -m window --focus west
alt - j : yabai -m window --focus south
alt - k : yabai -m window --focus north
alt - l : yabai -m window --focus east

# Move windows
shift + alt - h : yabai -m window --swap west
shift + alt - j : yabai -m window --swap south
shift + alt - k : yabai -m window --swap north
shift + alt - l : yabai -m window --swap east

# Resize windows
ctrl + alt - h : yabai -m window --resize left:-20:0
ctrl + alt - l : yabai -m window --resize right:20:0
Pros:
- Most powerful option available
- Complete control over window behavior
- Active development
- Large community
Cons:
- Complex setup
- Requires SIP disabled for full features
- Breaks with major macOS updates
- Steep learning curve
- Requires separate skhd for keybindings
Best For: Power users willing to invest time in configuration for maximum control.
Quick Comparison Table
| Feature | Native | Rectangle | Magnet | Amethyst | AeroSpace | yabai |
|---|---|---|---|---|---|---|
| Price | Free | Free | $7.99 | Free | Free | Free |
| Tiling Type | Manual | Manual | Manual | Auto | Auto | Auto |
| Requires SIP Off | No | No | No | No | No | Partial |
| Setup Complexity | None | Low | Low | Medium | Medium | High |
| Keyboard Shortcuts | Basic | Excellent | Good | Excellent | Excellent | Via skhd |
| Custom Layouts | No | Limited | Limited | Yes | Yes | Yes |
| Workspaces | Mission Control | N/A | N/A | Spaces | Custom | Custom |
| Focus-Follows-Mouse | No | No | No | Yes | No | Yes |
| Best For | Basics | Most Users | App Store | Linux Users | Developers | Power Users |
Part 3: Productivity Workflows and Use Cases
Workflow 1: Writer's Setup
Goal: Distraction-free writing with quick reference access.
Recommended Setup:
- Main Display: Writing app (full height, 60% width)
- Secondary Zone: Research/references (40% width)
Using Rectangle:
- Open your writing app
- Press
Control + Option + E(first two-thirds) - Open Safari or your reference app
- Press
Control + Option + T(last third)
Using Native Tiling:
- Drag writing app to left edge (50%)
- Use green button > Fill on the right for references
Workflow 2: Developer's Multi-Window Setup
Goal: Code editor, terminal, browser, and documentation visible simultaneously.
Recommended Setup (Using AeroSpace):
# Workspace 1: Code
alt-1 = 'workspace 1'  # VSCode full screen

# Workspace 2: Terminal + Docs
alt-2 = 'workspace 2'  # Terminal left, Docs right

# Workspace 3: Browser + API Testing
alt-3 = 'workspace 3'  # Browser left, Postman right
Using Rectangle:
Control + Option + U: Code editor (top-left quarter)Control + Option + K: Terminal (bottom-left quarter)Control + Option + I: Browser (top-right quarter)Control + Option + ,: Documentation (bottom-right quarter)
Workflow 3: Designer's Canvas Layout
Goal: Design tool center stage, references and assets on sides.
Using Lasso or Rectangle Pro:
- Center: Figma/Sketch (60% width, full height)
- Left sidebar: Asset library (20% width)
- Right sidebar: Inspector/references (20% width)
Workflow 4: Multi-Monitor Mastery
Managing Windows Across Displays:
Rectangle Shortcuts for Multi-Monitor:
| Action | Shortcut |
|---|---|
| Move to Next Display | Control + Option + Command + → |
| Move to Previous Display | Control + Option + Command + ← |
| Next Third on Next Display | Control + Option + N |
AeroSpace Multi-Monitor:
# Move window to monitor
alt-shift-tab = 'move-node-to-monitor next'

# Focus monitor
alt-tab = 'focus-monitor next'
Workflow 5: Video Editor's Timeline Setup
Goal: Maximize timeline visibility with essential panels accessible.
Using Rectangle Pro:
- Top 70%: Video editor (Final Cut Pro, DaVinci Resolve)
- Bottom left: Media browser (15% width)
- Bottom right: Audio mixer (15% width)
Alternative Approach: For editors who prefer full-screen editing, use dedicated workspaces:
- Workspace 1: Editing (full screen)
- Workspace 2: Color grading (full screen)
- Workspace 3: Audio mixing (split view)
Workflow 6: Data Analyst's Dashboard
Goal: Multiple data sources visible simultaneously for cross-referencing.
Recommended Layout (Thirds):
- Left third: SQL client or database tool
- Center third: Spreadsheet or notebook (Jupyter, Observable)
- Right third: Documentation or communication (Slack, documentation)
Using Rectangle:
- Database tool:
Control + Option + D(left third) - Main work area:
Control + Option + F(center third) - Reference:
Control + Option + G(right third)
Workflow 7: Customer Support Agent
Goal: Quick access to customer data, ticketing system, and knowledge base.
Optimal Setup:
- Left 50%: Ticketing system (Zendesk, Intercom)
- Top right 25%: Customer database (CRM)
- Bottom right 25%: Knowledge base or internal wiki
Pro Tip: Create dedicated shortcuts for your most-used layout combinations to switch contexts instantly.
Workflow 8: Online Meeting Presenter
Goal: Present content while monitoring chat and notes.
During Screen Sharing:
- Main content: Presentation or demo (80% width)
- Side panel: Speaker notes or agenda (20% width)
- Secondary display: Meeting chat and participant list
Best Practice: Set up this layout before joining the meeting. Use Rectangle's "Specified" feature to save exact window positions.
Part 3.5: Menu Bar Management and Complementary Tools
Effective window management extends beyond window placement. A cluttered menu bar and poor notification handling can undermine even the best tiling setup.
Menu Bar Organization Tools
Ice (Free & Open Source): Ice is the most capable free Bartender alternative in 2025:
- Hide menu bar icons behind expandable sections
- Multiple activation methods (click, hover, scroll)
- Rounded corners and tinting customization
- Special support for notched MacBooks
Installation:
brew install --cask iceHidden Bar (Free): Ultra-lightweight option for basic icon hiding:
- Simple drag-and-drop interface
- Automatic startup support
- Global shortcut key support
Bartender 6 ($16): The original menu bar management tool, now updated for macOS Tahoe:
- Most polished interface
- Search-based icon access
- Trigger-based icon visibility
- Note: Concerns about new ownership and analytics
Raycast: The Ultimate Companion
Raycast deserves special mention as a productivity multiplier that integrates beautifully with window management:
Built-in Window Management:
- Move windows with natural language commands
- Customizable keyboard shortcuts
- Scriptable window actions
Example Raycast Configuration:
| Command | Action | Shortcut |
|---|---|---|
| "Left Half" | Tile window left | Option + Shift + ← |
| "Right Half" | Tile window right | Option + Shift + → |
| "Maximize" | Fill screen | Option + Shift + ↑ |
| "Center" | Center on screen | Option + Shift + C |
| "Next Display" | Move to next monitor | Option + Shift + Tab |
Window Management Extensions: Search "window" in Raycast's extension store for community-created enhancements:
- Window Layouts: Save and restore custom arrangements
- Quick Resize: Pixel-perfect window sizing
- App Windows: Focus specific windows within an app
Notification Management Integration
Focus Modes + Window Management: Combine macOS Focus Modes with your window layout:
- "Work" Focus: Enable full-screen tiling, disable notifications
- "Meetings" Focus: Enable side-by-side layout for video calls
- "Creative" Focus: Single-window full screen for deep work
Automate with Shortcuts: Create shortcuts that:
- Enable a specific Focus Mode
- Open your preferred apps
- Arrange windows in your ideal layout
- All with a single keyboard shortcut or Raycast command
Part 4: Troubleshooting Common Issues
Issue 1: Native Tiling Not Working
Symptoms:
- Windows don't snap when dragged to edges
- Green button menu shows no tiling options
- Keyboard shortcuts don't respond
Solutions:
-
Check System Settings:
- System Settings > Desktop & Dock > Windows
- Ensure "Tile by dragging windows to screen edges" is enabled
-
Reset Window Server:
killall Dock -
Check App Compatibility:
- Some apps have minimum window sizes
- Try resizing the window smaller first, then tile
Issue 2: Third-Party App Conflicts
Symptoms:
- Multiple window managers fighting for control
- Erratic window behavior
- Keyboard shortcuts not working
Solutions:
-
Use Only One Window Manager:
- Uninstall or disable conflicting apps
- Check for forgotten menu bar apps
-
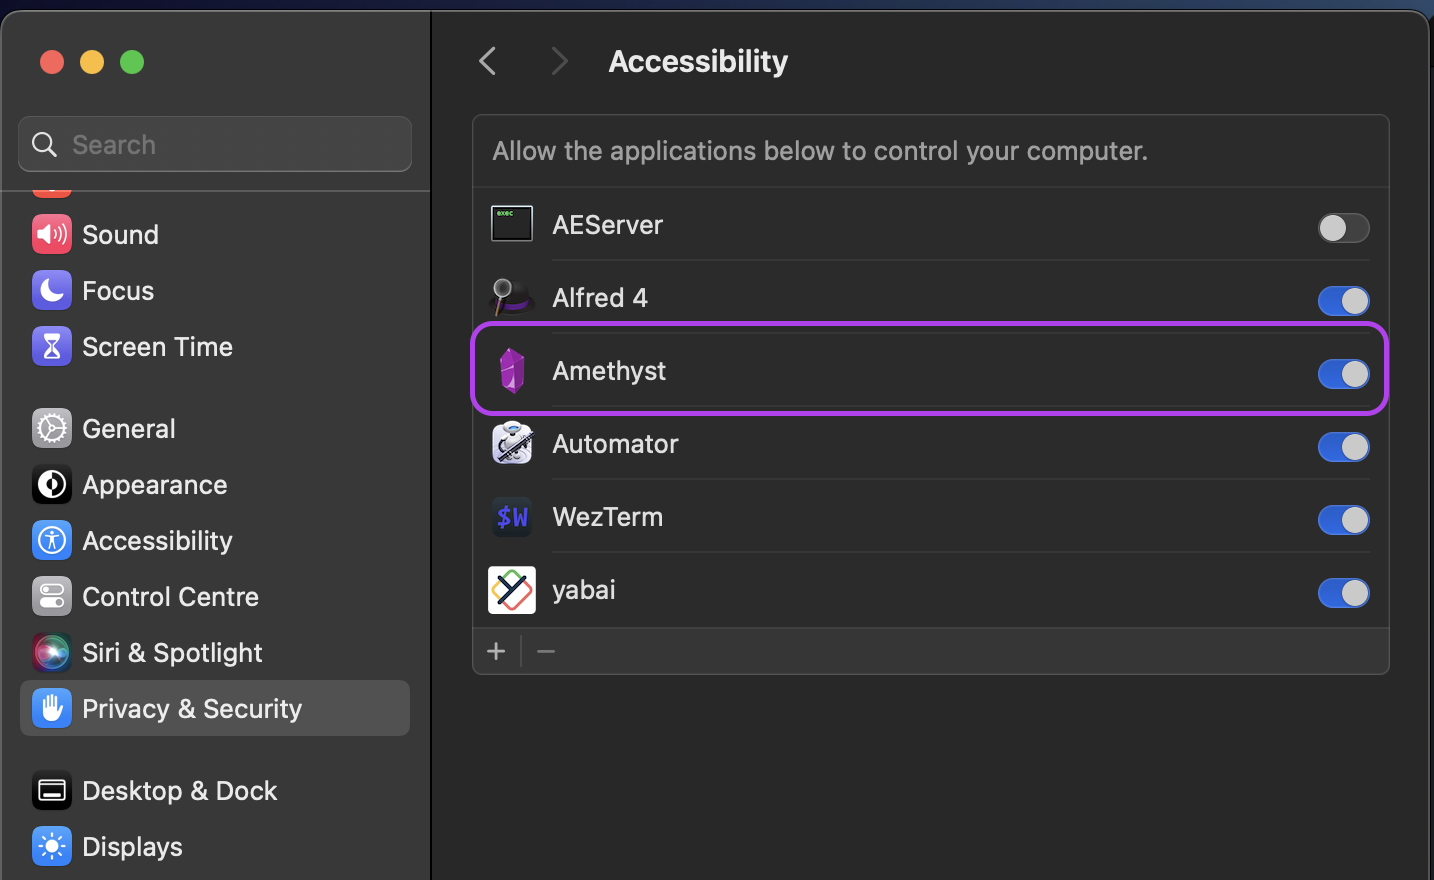
Verify Accessibility Permissions:
- System Settings > Privacy & Security > Accessibility
- Ensure your window manager is enabled
- Reset Permissions:
# Reset accessibility database (requires restart)
sudo tccutil reset Accessibility
Issue 3: Keyboard Shortcuts Not Responding
Symptoms:
- Shortcuts work sometimes, not others
- Different behavior in different apps
- Conflicts with other applications
Solutions:
-
Check for Conflicts:
- System Settings > Keyboard > Keyboard Shortcuts
- Look for duplicate shortcuts
-
Use Different Modifier Combinations:
Control + Option + Commandinstead ofControl + OptionControl + Option + Shiftfor less-used combinations
-
For macOS Tahoe 26 Specifically:
- Some users report
Control + Option + Commandcombinations being more reliable - Update to the latest macOS version for fixes
- Some users report
Issue 4: Performance Issues with Tiling Managers
Symptoms:
- Lag when switching windows or workspaces
- High CPU usage from window manager
- Delayed response to shortcuts
Solutions:
-
AeroSpace Performance:
- Known issues under high CPU load
- Reduce animation complexity in config
-
yabai Performance:
- Disable focus-follows-mouse if not needed
- Reduce window border complexity
- Check for memory leaks:
yabai --restart-service
-
General Tips:
- Reduce number of managed windows
- Close unused applications
- Restart the window manager periodically
Part 5: Advanced Configuration and Customization
Creating Custom Keyboard Shortcuts
System-Level Custom Shortcuts:
- Open System Settings > Keyboard > Keyboard Shortcuts
- Click "App Shortcuts"
- Click "+"
- Select application or "All Applications"
- Enter exact menu item name (e.g., "Tile Window to Left of Screen")
- Record your preferred shortcut
Combining Tools for Ultimate Control
Example: AeroSpace + Raycast Window Management:
Use AeroSpace for workspace navigation and automatic tiling, combined with Raycast for quick window positioning:
# ~/.aerospace.toml - Workspaces and focus
alt-1 = 'workspace 1'
alt-2 = 'workspace 2'
alt-h = 'focus left'
alt-l = 'focus right'
Configure Raycast for quick window throws:
- "Left Half" →
Option + Shift + H - "Right Half" →
Option + Shift + L - "Maximize" →
Option + Shift + M
Automating Window Layouts
Using Shortcuts App:
Create a Shortcut that opens specific apps in predetermined positions:
- Open Shortcuts app
- Create new shortcut
- Add "Open App" actions
- Add "Run Shell Script" for window positioning:
osascript -e 'tell application "System Events" to tell process "YourApp"
    set position of window 1 to {0, 0}
    set size of window 1 to {960, 1080}
end tell'
Complete Workflow Automation Example:
Here's a complete AppleScript that sets up a development environment:
-- Development Environment Setup
tell application "System Events"
    -- Open and position VS Code (left 60%)
    tell process "Code"
        set position of window 1 to {0, 25}
        set size of window 1 to {1152, 1055}
    end tell

    -- Open and position Terminal (bottom right 40%)
    tell process "Terminal"
        set position of window 1 to {1152, 540}
        set size of window 1 to {768, 540}
    end tell

    -- Open and position Safari for docs (top right 40%)
    tell process "Safari"
        set position of window 1 to {1152, 25}
        set size of window 1 to {768, 515}
    end tell
end tell
Window State Persistence
One limitation of macOS window management is that window positions often don't persist across app restarts. Here are solutions:
For Individual Apps: Many apps have built-in window memory:
- Terminal: Window > Save Windows as Group
- Safari: Window > Link Tab Group
- Finder: Hold Option while closing to remember position
For System-Wide Persistence:
Stay (Free Trial, $14.99):
- Automatically saves and restores window positions
- Per-display configurations
- Application-specific rules
- Perfect for users with varying monitor setups
Moom ($10):
- Save layouts with custom names
- Trigger layouts via keyboard, mouse, or menu
- Grid-based positioning
- Excellent for users who want both manual and automated control
Scripting Advanced Window Control
For ultimate control, use AppleScript or JavaScript for Automation (JXA):
List All Windows with Positions:
tell application "System Events"
    repeat with theProcess in processes whose background only is false
        set processName to name of theProcess
        try
            repeat with theWindow in windows of theProcess
                set windowName to name of theWindow
                set windowPos to position of theWindow
                set windowSize to size of theWindow
                log processName & ": " & windowName & " at " & windowPos & " size " & windowSize
            end repeat
        end try
    end repeat
end tell
Focus Window by Title:
tell application "System Events"
    tell process "Safari"
        set frontmost to true
        perform action "AXRaise" of (first window whose name contains "GitHub")
    end tell
end tell
Part 6: Performance Optimization and Best Practices
Optimizing Window Manager Performance
For Rectangle/Magnet Users:
- These apps are extremely lightweight (less than 50MB RAM)
- Performance impact is negligible
- No optimization typically needed
For Amethyst Users:
- Disable layouts you don't use to reduce memory footprint
- Limit managed windows if experiencing slowdown
- Check for updates regularly—performance improvements are frequent
For AeroSpace Users: Known performance considerations:
- High CPU load can cause delays in workspace switching
- Keep workspace count reasonable (under 10 typically)
- Disable visual effects if experiencing lag
For yabai Users:
# Check yabai resource usage
yabai -m query --windows | wc -l

# Restart yabai to clear any memory buildup
yabai --restart-service

# Reduce managed windows by excluding more apps
yabai -m rule --add app="Finder" manage=off
yabai -m rule --add app="System Preferences" manage=off
yabai -m rule --add app="Archive Utility" manage=off
Display-Specific Considerations
For Retina Displays:
- Some third-party apps may have scaling issues
- Rectangle and Magnet handle Retina displays flawlessly
- yabai may require specific padding calculations for Retina
For Mixed-Resolution Setups:
- External monitors at different resolutions can cause positioning issues
- Use percentage-based positioning when possible
- Test layouts on all connected displays
For Notched MacBooks:
- Native tiling automatically accounts for the notch
- Ice and similar menu bar tools provide special notch support
- Some third-party apps may need manual padding adjustments
Accessibility Considerations
VoiceOver Compatibility:
- Native macOS tiling works well with VoiceOver
- Most third-party window managers support VoiceOver
- Keyboard-only navigation is fully supported by all recommended tools
Reduce Motion: If you have "Reduce Motion" enabled in Accessibility settings:
- Native tiling animations are minimized
- Rectangle respects this setting
- AeroSpace already has minimal animations by design
Large Text and Zoom:
- Window managers work with all accessibility zoom levels
- Consider larger window gaps for easier visual distinction
- Test your layouts with your accessibility settings enabled
Battery Life Considerations
Window managers have minimal impact on battery life, but consider:
Low-Power Modes:
- All recommended window managers work in Low Power Mode
- No significant CPU or GPU usage from tiling operations
- Screen refreshes from window movement are negligible
When to Disable:
- No need to disable window managers for battery conservation
- They contribute less than 0.1% of typical power usage
Conclusion: Choosing Your Window Management Strategy
Recommendations by Use Case
If You're New to Window Management: Start with macOS Tahoe's native tiling. It's free, requires no setup, and handles basic needs well. Graduate to Rectangle if you want keyboard shortcuts.
If You're a Productivity Professional: Rectangle (free) or Rectangle Pro ($9.99) offers the best balance of power and simplicity. Reliable, well-documented, and actively maintained.
If You're a Developer or Power User: AeroSpace provides i3-like workflows without the complexity of yabai. No SIP disabling required, instant workspace switching, and excellent documentation.
If You Want Maximum Control: yabai remains the most powerful option, but requires significant investment in configuration and willingness to disable SIP for full features.
If You're a Linux Convert: Amethyst offers familiar automatic tiling with Spaces integration. A decade of development means it's stable and well-tested.
The Future of Window Management on macOS
Apple's continued investment in native window tiling suggests future improvements:
- More layout options (thirds, custom splits)
- Better keyboard shortcut support
- Improved integration with Stage Manager
- Possible automatic tiling features
For now, the third-party ecosystem remains vibrant and essential for power users. Whether you stick with native features or invest in advanced tools, 2025 offers more window management options on macOS than ever before.
Ready to optimize your Mac productivity further? Check out our keyboard shortcuts guide for more efficiency tips, or explore Stage Manager for an alternative window organization approach.