How to Screen Record on Mac: Complete Guide for macOS Tahoe 2026
Master screen recording on your Mac with this comprehensive guide. Learn to use Screenshot toolbar, QuickTime, OBS Studio, and capture system audio. Covers built-in tools, third-party apps, and troubleshooting for macOS Tahoe.
Screen recording on Mac is essential for creating tutorials, capturing gameplay, recording presentations, and documenting software issues. macOS Tahoe includes powerful built-in tools, but understanding all your options—including system audio capture—requires this comprehensive guide.
Screen recording is essential for tutorials, presentations, and content creation.
Quick Start: Record Your Screen in 30 Seconds
Fastest Method (Screenshot Toolbar):
- Press ⌘ + Shift + 5
- Click Record Entire Screen or Record Selected Portion
- Click Record
- Click Stop in menu bar (or press ⌘ + Control + Esc)
Your recording saves to Desktop by default.
Method 1: Screenshot Toolbar (Built-in)
Accessing the Screenshot Toolbar
Press ⌘ + Shift + 5 to open the Screenshot toolbar. You'll see options for:
- Capture entire screen
- Capture selected window
- Capture selected portion
- Record entire screen
- Record selected portion
Recording Options
Record Entire Screen:
- Click the Record Entire Screen button (fourth from left)
- Click anywhere on screen or click Record
- Recording begins immediately
- Stop by clicking menu bar icon or ⌘ + Control + Esc
Record Selected Portion:
- Click the Record Selected Portion button (fifth from left)
- Drag to select the area you want to record
- Adjust selection handles if needed
- Click Record
Screenshot Toolbar Options
Click Options to configure:
Save to:
- Desktop (default)
- Documents
- Clipboard
- Messages
- Preview
- Other Location...
Timer:
- None (start immediately)
- 5 seconds
- 10 seconds
Microphone:
- None
- Built-in Microphone
- External microphone (if connected)
Options:
- Show Floating Thumbnail
- Remember Last Selection
- Show Mouse Clicks
Capturing with System Audio
Important: The Screenshot toolbar does NOT capture system audio by default. It only captures microphone audio.
For system audio, you need:
- A third-party app (see OBS section)
- A virtual audio device (see BlackHole section)
Method 2: QuickTime Player
QuickTime offers more control than the Screenshot toolbar.
Starting a Screen Recording
- Open QuickTime Player (Applications folder or Spotlight)
- File > New Screen Recording (or ⌘ + Control + N)
- Recording controls appear
Recording Controls
QuickTime Recording Interface:
- Record button: Click to start
- Arrow: Click for options before recording
- Stop: Click in menu bar to stop
Options Menu:
- Microphone selection
- Show Mouse Clicks toggle
Recording Quality
QuickTime records in:
- H.264 codec (standard)
- HEVC codec (macOS Tahoe with HDR displays)
- Quality matches your display resolution
Trimming Recordings
After recording:
- Open the recording in QuickTime
- Edit > Trim (or ⌘ + T)
- Drag yellow handles to select portion
- Click Trim
- Save the trimmed version
Method 3: OBS Studio (Professional)
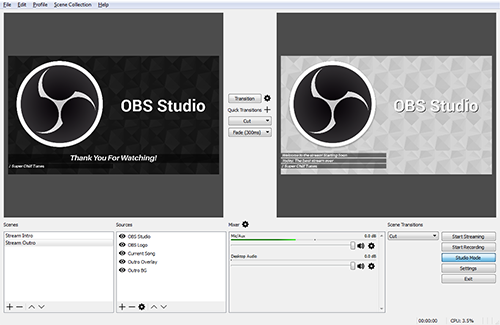
OBS (Open Broadcaster Software) is free, professional-grade software for recording and streaming.
Installing OBS
Via Homebrew:
brew install --cask obsDirect Download: obsproject.com
First-Time Setup
- Launch OBS
- Run the Auto-Configuration Wizard
- Choose "Optimize for recording"
- Select your resolution and frame rate
- Finish setup
Creating a Screen Capture Source
- In Sources panel, click +
- Select macOS Screen Capture
- Name your source
- Choose display or window to capture
- Click OK
OBS Settings for Mac
Recommended Recording Settings:
Output Tab:
- Recording Format: MKV (can convert to MP4 later)
- Encoder: Apple VT H264 Hardware Encoder (best for M-series)
- Recording Quality: High Quality, Medium File Size
Video Tab:
- Base Resolution: Match your display
- Output Resolution: 1920x1080 (or your preference)
- FPS: 30 or 60
Audio Tab:
- Sample Rate: 48kHz
- Channels: Stereo
Capturing System Audio in OBS
OBS requires additional setup for system audio:
Install BlackHole (virtual audio device):
brew install --cask blackhole-2chConfigure Multi-Output Device:
- Open Audio MIDI Setup (Spotlight search)
- Click + > Create Multi-Output Device
- Check your speakers AND BlackHole 2ch
- Set BlackHole as main audio output in System Settings
Add to OBS:
- In Sources, add Audio Input Capture
- Select BlackHole 2ch
- Now OBS captures system audio
OBS Performance Tips for macOS Tahoe
- Use Apple VT Hardware Encoder for best performance
- Lower output resolution if experiencing lag
- Close unnecessary apps during recording
- Disable Preview if not needed (right-click > Deactivate)
Method 4: Third-Party Recording Apps
CleanShot X (Best Overall)
Price: $29 one-time or Setapp subscription
Features:
- Screen recording with audio
- Scrolling capture
- Annotations and markup
- Quick access overlay
- Cloud upload
- GIF creation
Why Choose It: Professional-quality recordings with excellent macOS integration.
ScreenFlow (Best for Editing)
Price: $169 one-time
Features:
- Screen recording with system audio
- Full video editor included
- Multi-track timeline
- Motion graphics
- Export presets
Why Choose It: Complete recording and editing solution in one app.
Kap (Best Free Third-Party)
Price: Free (open source)
Features:
- Simple screen recording
- GIF and video export
- Plugins available
- Keyboard shortcuts
Why Choose It: Lightweight, free, and easy to use.
Install via Homebrew:
brew install --cask kapLoom (Best for Sharing)
Price: Free basic / $12.50/mo business
Features:
- Screen + webcam recording
- Instant cloud sharing
- Comments and reactions
- Viewer analytics
Why Choose It: Quick recording and sharing for team communication.
Comparison Table
| Feature | Screenshot Toolbar | QuickTime | OBS | CleanShot X | ScreenFlow |
|---|---|---|---|---|---|
| Price | Free | Free | Free | $29 | $169 |
| System Audio | No | No | Yes* | Yes | Yes |
| Editing | No | Trim only | No | Basic | Full |
| Streaming | No | No | Yes | No | No |
| Webcam Overlay | No | No | Yes | Yes | Yes |
| Annotations | No | No | No | Yes | Yes |
| Export Formats | MOV | MOV | Multiple | Multiple | Multiple |
*Requires BlackHole setup
Capturing System Audio (Complete Guide)
Why System Audio Is Complicated
macOS security restrictions prevent apps from capturing system audio without user consent. This requires either:
- Apps with special audio capture permissions
- Virtual audio devices
Method 1: BlackHole Virtual Audio Device
Installation:
brew install --cask blackhole-2chSetup Multi-Output Device:
- Open Audio MIDI Setup (search in Spotlight)
- Click + button (bottom left)
- Select Create Multi-Output Device
- Check both:
- Your speakers/headphones
- BlackHole 2ch
- Right-click > Use This Device For Sound Output
Recording Setup:
- In your recording app, select BlackHole 2ch as audio input
- System audio now routes through BlackHole
- Record as normal
After Recording: Change sound output back to regular speakers.
Method 2: Loopback (Paid, Easier)
Price: $99 from Rogue Amoeba
Features:
- Create virtual audio devices
- Route audio between apps
- Mix multiple sources
- No complex setup
Why Choose It: Professional solution without technical complexity.
Method 3: Apps with Built-in Audio Capture
These apps capture system audio without additional setup:
- ScreenFlow - Built-in system audio capture
- CleanShot X - Records system audio
- Screenium - Mac App Store, captures all audio
Recording Tips for Quality Results
Before Recording
1. Clean Your Desktop
- Hide sensitive files
- Use a neutral wallpaper
- Close unnecessary apps in Dock
2. Prepare Your Environment
- Silence notifications: Focus Mode
- Close chat apps
- Disconnect external audio (if not needed)
3. Test Your Setup
- Record a short test
- Check audio levels
- Verify capture area
During Recording
1. Use Keyboard Shortcuts
- Start/stop without clicking in frame
- Pause if needed (third-party apps)
2. Speak Clearly
- Position microphone properly
- Maintain consistent volume
- Reduce background noise
3. Mouse Movements
- Move cursor deliberately
- Use "Show Mouse Clicks" option
- Avoid unnecessary movement
After Recording
1. Review Immediately
- Check for issues
- Note timestamps for edits
2. Edit If Needed
- Trim beginning/end
- Remove mistakes
- Add annotations (CleanShot X, ScreenFlow)
3. Export Appropriately
| Purpose | Format | Resolution | Codec |
|---|---|---|---|
| YouTube | MP4 | 1080p/4K | H.264 |
| Quick share | MP4 | 720p | H.264 |
| Archive | MOV | Original | ProRes |
| GIF | GIF | 480p | - |
| High quality | MOV | Original | HEVC |
Troubleshooting Common Issues
Recording Won't Start
Solution 1: Grant Screen Recording Permission
- System Settings > Privacy & Security
- Screen Recording
- Enable your recording app
- Restart the app
Solution 2: Restart Services
killall SystemUIServerNo Audio in Recording
Solutions:
- Check microphone permission (Privacy & Security > Microphone)
- Verify correct audio source selected
- Check System Settings > Sound > Input
- Test microphone in Voice Memos
Recording is Choppy/Laggy
Solutions:
- Close unnecessary applications
- Reduce recording resolution
- Use hardware encoder (OBS: Apple VT)
- Disable preview while recording
- Check CPU usage in Activity Monitor
File Size Too Large
Solutions:
- Use H.264 instead of ProRes
- Lower resolution (1080p instead of 4K)
- Reduce frame rate (30fps instead of 60fps)
- Compress with HandBrake after recording
OBS Black Screen on macOS Tahoe
Solution:
- System Settings > Privacy & Security
- Screen Recording
- Remove and re-add OBS
- Restart OBS
- Try "Display Capture" instead of "macOS Screen Capture"
QuickTime Recording Fails
Solution:
# Reset QuickTime preferences
defaults delete com.apple.QuickTimePlayerX
Keyboard Shortcuts Reference
| Action | Shortcut |
|---|---|
| Open Screenshot toolbar | ⌘ + Shift + 5 |
| Stop recording | ⌘ + Control + Esc |
| QuickTime new recording | ⌘ + Control + N |
| Screenshot (full screen) | ⌘ + Shift + 3 |
| Screenshot (selection) | ⌘ + Shift + 4 |
| Screenshot (window) | ⌘ + Shift + 4, then Space |
Conclusion
Screen recording on Mac offers multiple approaches depending on your needs:
- Quick recordings: Use the Screenshot toolbar (⌘ + Shift + 5)
- Simple editing: Use QuickTime Player
- Professional recording: Use OBS (free) or ScreenFlow (paid)
- Quick sharing: Use Loom
- System audio: Set up BlackHole or use CleanShot X/ScreenFlow
Key Takeaways:
- Built-in tools are sufficient for basic needs
- System audio requires BlackHole or specific apps
- OBS is powerful but has a learning curve
- Permission settings are crucial on macOS Tahoe
- Test before important recordings to avoid issues
Master these tools, and you'll be ready to create professional screen recordings for any purpose.
Related Articles: