Why Your External SSD Got Slow on Mac: The Trim Problem
Your external SSD writes slowly on Mac while reads stay fast? That is a Trim problem, and the two checks everyone recommends do nothing on Apple silicon.
The external SSD that copied a 40 GB project folder at 900 MB/s last spring now takes eleven minutes to do the same job. Nothing else changed. Same cable, same port, same Mac, same drive. And when you copy that folder back off the drive, it still flies. Reads are exactly as fast as they always were. Only writing has fallen apart.
That asymmetry is the whole story. A cable problem slows reads and writes together. A failing port slows reads and writes together. Thermal throttling slows everything and then recovers when the enclosure cools. A drive whose write speed has collapsed while its read speed is untouched is showing you a specific, well-understood failure: its flash has run out of pre-erased blocks, and nothing is telling it which blocks it is allowed to erase. That is a Trim problem.
The frustrating part is what happens next. You search for how to check Trim status on a Mac, and you find the same two pieces of advice repeated on dozens of sites, including one we published ourselves. Run system_profiler SPSerialATADataType | grep TRIM to check. Run sudo trimforce enable to fix. On a modern Mac, the first command prints nothing at all, and the second one does nothing whatsoever for a USB drive. Neither is a typo, neither is deprecated, and neither will produce an error message telling you it did not apply. They just quietly fail to be relevant.
This guide fixes that. It explains what Trim actually does and why its absence punishes writes specifically, shows you how to tell a Trim problem apart from the four things that look like one, demonstrates exactly why the two standard checks fail (with commands you can run yourself to watch them fail), and then gives you the two checks that genuinely work on an Apple silicon Mac. Everything stated as tested here was captured on an Apple silicon Mac running macOS 26.5.2, build 25F84.
Key Takeaways
- The read/write asymmetry is the diagnosis — Howard Oakley of The Eclectic Light Company puts a number on it: "If its write speed has fallen to 20% or less of its read speed, then you can be confident that there's a Trim problem."
sudo trimforce enableis not a fix for external drives — its own man page says it enables Trim "on third-party drives attached to an AHCI controller," which is the SATA interface, so it has no effect on a USB or NVMe drive.system_profiler SPSerialATADataTypeprints nothing on Apple silicon — the data type does not exist on those machines, so the most-copied Trim check on the internet returns an empty result that people misread as evidence of anything.- The checks that work are
system_profiler SPNVMeDataTypeand the mount-time unified log — APFS emits its Trim scan when a volume mounts, so you must unplug the drive, note the time, plug it back in, and read the log immediately. - The only cure is a full erase and reformat — there is no user-facing command that trims a drive on demand, and Apple publishes no compatibility list telling you which enclosures pass Trim through before you buy one.
What Trim Actually Does, And Why Only Writes Suffer
The Erase Block Problem
Flash memory has an asymmetry baked into the silicon. You can read any page freely. You can write to a page that is currently erased. But you cannot overwrite a page that already contains data. To reuse it, the drive must first erase it, and erasure does not happen page by page. It happens across a much larger unit called an erase block, which contains many pages.
Howard Oakley describes the consequence bluntly: "Before the SSD can write to a memory block that has been in use, it must erase it, and its erase-write cycle time is abysmally slow."
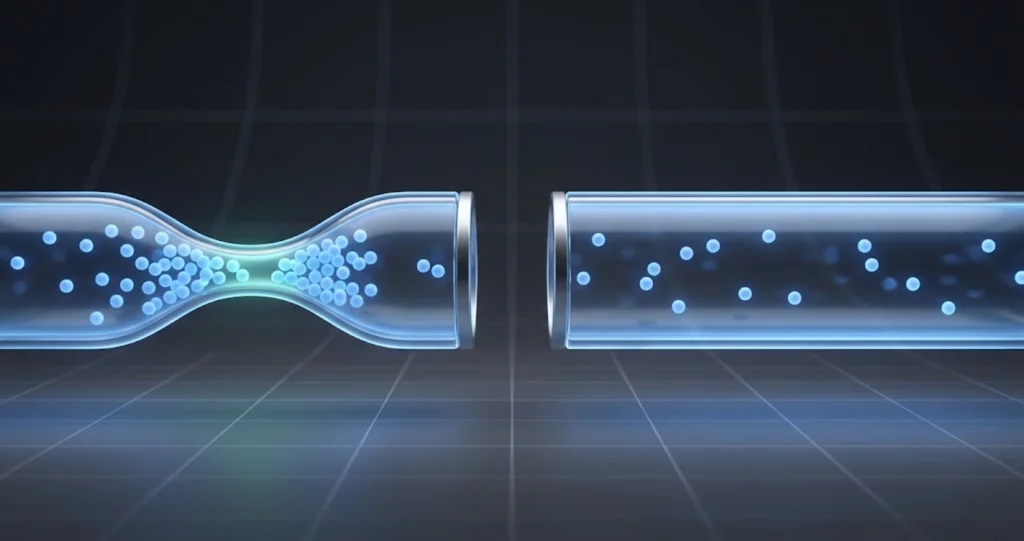
That is the entire mechanism. When a drive has a healthy supply of already-erased blocks waiting, an incoming write is a simple program operation and completes at the drive's rated speed. When it has none, every incoming write turns into a chain of work: find a block with some stale pages, read out the pages that are still live, write those live pages somewhere else, erase the whole block, then finally write your new data. That chain is called read-modify-write, and it can cost an order of magnitude more time than a clean write.
Why The Drive Cannot Figure This Out Alone
Here is the part that surprises people. When you delete a file, the drive does not know. The filesystem updates its own metadata to mark those logical blocks as free, but from the drive controller's point of view, every logical block it has ever been asked to write still contains valid data. It has no way to distinguish a block holding a video you deleted last month from a block holding your active project file. It must preserve both.
Trim is the message that closes that gap. When a filesystem frees space, it can send a Trim command listing the logical block addresses that no longer hold anything the operating system cares about. The drive marks those as invalid and its background garbage collection is then free to consolidate and erase them, building the pool of pre-erased blocks that keeps writes fast.
Without Trim, that pool shrinks toward zero as the drive fills, and then stays at zero forever. The drive is not broken and the flash is not worn out. It is simply spending most of its time doing erase cycles it could have done in the background hours ago.
Why Reads Stay Perfectly Fast
Reading never requires an erase. A read is a lookup in the flash translation layer followed by a sense operation on a page. Whether the drive is holding a hundred gigabytes of genuinely live data or a hundred gigabytes of data that was logically deleted six months ago makes no difference at all to how fast it can hand you back a page you asked for.
This is why the symptom is so distinctive, and why it is worth trusting. A drive with a Trim problem is not sick. Every other measurement you can take on it looks normal: S.M.A.R.T. status is fine, the volume mounts instantly, Disk Utility First Aid passes, sequential reads hit the same numbers they did on day one. Only the write path is degraded, because only the write path depends on having erased blocks in hand.
What A Never-Trimmed Drive Looks Like Over Time
The degradation is neither linear nor immediate, which is why it takes people months to notice.
A brand-new or freshly erased SSD has every block in an erased state, so writes go straight through. That holds until the drive has been written across roughly its whole capacity at least once. Total bytes written matters more than how full it looks in Finder right now: a 2 TB drive that has never held more than 400 GB at any moment can still have had every physical block touched, if you have cycled 400 GB of footage through it twenty times.
Past that point, a drive that receives Trim recovers cleanly after every delete. A drive that does not never recovers. Its controller keeps every block it has ever written marked as live, its over-provisioning margin (the small reserve the manufacturer sets aside, typically a single-digit percentage) is the only free area left, and it grinds through read-modify-write for every incoming write.
So the drive seems fine for six to eighteen months and then, over a few weeks, becomes painful. Nothing happened in those weeks. You crossed a threshold.
The Symptom Signature: Telling A Trim Problem From Four Look-Alikes
Slow external drives on a Mac have several causes, and three of them are far more common than Trim in the first year of a drive's life. Before you erase anything, confirm you are looking at the right failure.
The symptom is common enough that Apple's own support forums carry recurring threads about it, including discussion 254727504, "Why is my external SSD so slow at writing?", and discussion 255040461, "Slow external SSD". If you want to see how other people have described the same problem before you start testing, those are a reasonable place to look.
The Ratio Test
Copy one large file, at least 8 GB, in each direction, and time both. Not a folder of small files, which measures filesystem overhead rather than raw throughput. One large file.
Then compare. If reads and writes are both slow and roughly similar to each other, the problem is on the connection, not in the flash. If reads are normal and writes are a fraction of them, you are in Trim territory. Oakley's threshold is the useful one to hold onto: at 20% or less of read speed, be confident.
Symptom Comparison Table
| What you observe | Most likely cause | How to confirm it |
|---|---|---|
| Writes slow, reads normal, both were fine last year | Trim is not reaching the drive | Ratio test, then the mount-time log check below |
| Reads and writes both slow, by a similar factor | Cable, port, or a link that negotiated below its rated speed | Swap cable, try a different port, check the negotiated speed in System Information |
| Starts fast, drops hard after 20 to 60 seconds, recovers if you pause | SLC write-cache exhaustion or thermal throttling | Run a single 3-minute-plus transfer and watch the curve; touch the enclosure |
| Slow only with folders of many small files | Filesystem and metadata overhead, Spotlight indexing, security software | Repeat with one large file; if that is fast, it is not the drive |
| Random disconnects, "Disk Not Ejected Properly", drive vanishes mid-copy | Bus power or enclosure power management | Fix the disconnects first; every speed measurement is unreliable until you do |
| Drive appears in Disk Utility but not Finder, or shows twice | Mount-layer bug, not a performance problem | Not a speed fault at all, and erasing will not address it |
| Slow on one Mac, fast on another, same cable | That Mac's port, hub, or dock | Test the drive directly on both machines with no hub in between |
| Was always this slow, from the first day | Not Trim. Check whether it is actually an SSD, and what the link is negotiating | A fresh drive has all blocks erased and cannot have a Trim problem yet |
That last row deserves emphasis because it saves people from erasing a drive for no reason. A Trim problem cannot exist on a drive that has always been slow. Trim degradation requires history. If the drive was slow out of the box, look at the enclosure, the cable, and whether the link came up at the speed you paid for.
Ruling Out The Connection First
Two minutes of work here avoids an unnecessary erase.
Open System Information (hold Option and click the Apple menu, then System Information), and look under USB or Thunderbolt/USB4 for the drive. Check the speed the link actually negotiated, not the speed printed on the box. A drive capable of 10 Gb/s that came up on a 480 Mb/s link because of a charging cable will be catastrophically slow in both directions.
system_profiler SPUSBHostDataTypeThat command dumps the same USB tree in text form, including the link speed for each attached device. If you are on Thunderbolt, use SPThunderboltDataType instead. Both of those data types exist on Apple silicon, which, as the next section explains, is more than can be said for the one everyone tells you to use.
Also swap the cable before you conclude anything. USB-C cables vary enormously in what they actually support, and one that charges perfectly can be limited to USB 2.0 data rates. It costs nothing to eliminate this variable and it explains a lot of "my SSD got slow" reports.
Why The Two Standard Internet Checks Fail On A Modern Mac
This is the section that matters most, because the bad advice here is not merely unhelpful. It actively misleads, by producing a silent, empty, error-free result that people interpret as an answer.
trimforce Does Not Do What Nearly Everyone Says It Does
Run man trimforce on your own Mac. The man page is still present on macOS 26.5.2 on Apple silicon, which is part of why this advice refuses to die. Here is what it says, verbatim.
The NAME line reads: "trimforce – enable TRIM commands on third-party drives."
The DESCRIPTION reads: "trimforce enables sending TRIM commands to third-party drives attached to an AHCI controller. By default, TRIM commands are not sent to third-party drives. Use extreme caution when enabling TRIM, as some drives may not correctly handle the commands. trimforce must be run by the system administrator."
The enable verb is documented as: "Start sending TRIM commands to AHCI-attached third-party drives. Requires a reboot to take effect."
And the HISTORY section reads: "The trimforce utility first appeared in OS X 10.10.4."
Read the DESCRIPTION again and stop on four words: attached to an AHCI controller. AHCI, the Advanced Host Controller Interface, is the standard host interface for SATA storage. It is not USB. It is not NVMe. It is not Thunderbolt.
What trimforce was built for, back in OS X 10.10.4 in 2015, is a specific and now largely historical situation: someone opens up a Mac that shipped with a spinning drive or an Apple SATA SSD, installs a third-party SATA SSD inside it, and finds that macOS refuses by default to send Trim to a drive Apple has not qualified. trimforce overrides that refusal. That is its entire purpose, and the warning about drives that "may not correctly handle the commands" exists because in 2015 there were SATA SSDs with firmware bugs that could lose data when trimmed.
For an external SSD in a USB enclosure, trimforce is irrelevant. There is no AHCI controller in the path. The drive is behind a USB mass storage or UASP bridge, and whether Trim reaches the flash is decided by that bridge chip, not by a switch in macOS. For an NVMe drive, internal or in a Thunderbolt enclosure, it is equally irrelevant, because NVMe is not AHCI either.
We got this wrong ourselves. Our earlier macOS external SSD troubleshooting guide lists sudo trimforce enable under "Enable TRIM for Third-Party SSDs" in a section about external drive performance. That recommendation was incorrect for external drives, and this article supersedes it. The man page has said what it says since 2015; we did not read it carefully enough. If you ran the command on the strength of that advice, nothing bad happened, and nothing good happened either.
There is a further reason not to reach for it reflexively. The man page's own instruction to "use extreme caution" is about a real failure mode, and the command requires a reboot to take effect. Running a system-wide storage setting change with a documented data-loss caveat, in the hope that it might affect a drive it explicitly does not cover, is a bad trade at any odds.
system_profiler SPSerialATADataType Returns An Empty Result
The other universally repeated check is this:
system_profiler SPSerialATADataType | grep TRIMOn an Apple silicon Mac, that prints nothing. Not "TRIM Support: No". Nothing at all. And the reason is not that Trim is disabled. It is that the data type does not exist on the machine.
You can confirm this yourself in one command:
system_profiler -listDataTypes | grep -i sataThat returns no matches on an Apple silicon Mac. Running system_profiler -listDataTypes without the filter shows what the machine does have, and on the Mac we tested (macOS 26.5.2, build 25F84) the storage-relevant entries include SPNVMeDataType, SPStorageDataType, SPThunderboltDataType, and SPUSBHostDataType, among others. SPSerialATADataType is absent, because Apple silicon Macs have no SATA controller at all. The internal SSD is NVMe attached to the SoC, and there is no user-accessible SATA bus anywhere in the machine.
So the most widely copied Trim check on the internet asks a modern Mac about hardware it does not have, gets an empty answer, and pipes that empty answer through grep, which dutifully finds nothing in it. No error, no warning, no exit code that anything notices. People run it, see blank output, and draw whichever conclusion they were already leaning toward.
On an Intel Mac with an actual SATA bus, the command does work and does report Trim status for SATA devices. If you are still running one, it remains useful for internal drives. It has never told you anything about a USB-attached external drive on any Mac.
diskutil Does Not Report Trim Status Either
A third variation you will see suggested is to check Disk Utility or diskutil for Trim state. It is not there.
diskutil info -all | grep -i trimThat returns nothing on the Mac we tested. diskutil info -all dumps every property diskutil knows about every disk and every volume on the system, and Trim is not among them. Disk Utility's graphical information panel does not show it either. This is not a case of looking in the wrong pane. diskutil genuinely does not expose Trim status, so any guide implying you can read it there is describing something that does not happen.

The Checks That Actually Work
Two methods, and which one applies depends on how the drive is attached.
system_profiler SPNVMeDataType For Internal And NVMe Drives
For the Mac's internal SSD, and for NVMe drives reached over Thunderbolt or USB4 where macOS speaks NVMe directly rather than through a SCSI translation layer, macOS does report Trim support and it is easy to read:
system_profiler SPNVMeDataTypeThe output is a small indented tree. It opens with NVMExpress:, then a controller entry (on Apple silicon, Apple SSD Controller:), then the drive model as a heading. Under that model heading, on the Mac we tested, the reported keys appeared in this order: Capacity, TRIM Support, Model, Revision, Serial Number, Detachable Drive, BSD Name, Partition Map Type, Removable Media, S.M.A.R.T. status, and Volumes.
The line you want is the second one, TRIM Support. On the internal drive of the Mac we tested, it read Yes. That is what a healthy answer looks like, and it matches Oakley's summary of the situation: "All Apple internal SSDs enjoy full support for Trimming, and third-party external drives with NVMe interfaces should too."
To pull just that line:
system_profiler SPNVMeDataType | grep -A1 -i "capacity"Or simply read the whole tree, which is short enough that filtering is barely worth it. If an external NVMe enclosure appears in this output at all, you are in good shape, because appearing here means macOS is talking NVMe to it rather than tunnelling through USB mass storage.
The important limitation: most USB external SSDs will not appear in SPNVMeDataType at all. Even when the SSD inside the enclosure is an NVMe module, a USB bridge presents it to the Mac as a SCSI device over USB, and it lands in SPUSBHostDataType and SPStorageDataType instead. Its absence from the NVMe list is not a verdict on whether it is being trimmed. It just means this method cannot answer the question, and you need the second one.
The Mount-Time Log Method
This is the check that works for everything formatted APFS, regardless of how it is connected, and it is Howard Oakley's method. It works because APFS does its trimming at a specific, observable moment.
When an APFS volume mounts, the APFS space manager scans the container for free blocks and issues Trim for them. It records what it did in the unified log, in entries beginning with spaceman_scan_free_blocks. A container that was trimmed shows the scan along with trim activity. A container that was not trimmed shows the scan followed by the marker (no trims).
That single string is your answer. (no trims) on a drive that has just mounted and has free space on it means Trim is not reaching that drive.
The procedure:
- Eject the drive properly. Right-click in Finder and choose Eject, or use
diskutil eject /dev/diskN. Do not just pull the cable. - Physically disconnect it. Wait a few seconds.
- Note the exact time. To the second, from the same clock the Mac uses.
datein Terminal gives you it precisely. - Reconnect the drive and wait for the volume to appear in Finder and finish mounting. Give it ten to twenty seconds.
- Read the log for the window around the connection.
log show --last 2m --predicate 'senderImagePath CONTAINS[c] "apfs"'Oakley's predicate is senderImagePath CONTAINS[c] "apfs", which catches everything emitted by the APFS code regardless of subsystem naming. If you noted the time and want a tighter window, log show also accepts explicit bounds:
log show --start "2026-08-15 14:30:00" --end "2026-08-15 14:30:40" --predicate 'senderImagePath CONTAINS[c] "apfs"'If that returns nothing at all, add --info to include informational-level entries, and --debug after that if you are still empty. Those flags widen the level filter rather than changing what is being matched.
Then search the result for spaceman_scan_free_blocks, find the entries naming your drive's device (disk5, disk6, whatever diskutil list shows for it), and look for the (no trims) marker. Confirm the disk number matches the drive you are testing, because your boot container and any other mounted APFS volumes emit their own entries and it is easy to read the wrong one.
Why Uptime Ruins This Check
Here is the trap, and it is the reason so many people try this and conclude the log method does not work.
The APFS Trim messages are emitted only at mount time. They are not periodic. There is no hourly heartbeat. If a volume mounted three weeks ago and has stayed mounted, its Trim entries were written three weeks ago and are long gone from the log's retention window.
We tested exactly this. On a Mac with 21 days of uptime, running:
log show --last 7d --predicate 'senderImagePath CONTAINS[c] "apfs"'returned zero lines. Not one entry in a full week of logs, on a perfectly healthy machine with a perfectly healthy internal SSD that reports TRIM Support: Yes. The boot volume mounted at boot, three weeks earlier, outside the retention window, and nothing has mounted since.
A blank result from a --last 7d query is therefore meaningless. It is not evidence that Trim is broken and it is not evidence that it is working. It is evidence that nothing mounted recently. The check only produces an answer if you create the mount event yourself, immediately before you read the log. Unplug, note the time, plug back in, then read. In that order, without the delay.
Oakley's Tools, If You Prefer Not To Use Terminal
Howard Oakley provides two free utilities that wrap this. Mints includes a Disk Mount feature that captures the log window around a mount, and LogUI is a general unified log browser that lets you apply the same predicate through an interface. Both are available from The Eclectic Light Company. If you would rather not assemble log show invocations by hand, they do the same job with less room for a mistyped predicate.
How To Benchmark Read Versus Write Honestly
The ratio test is only as good as the measurement, and most casual benchmarking on SSDs produces numbers that look reassuring and mean nothing.
Why A Fresh Drive Always Looks Fine
If you erase a drive and immediately benchmark it, you will get its rated speed. Every block is erased, every write is a clean program operation, and no Trim is required to sustain that for the length of a benchmark. This is why "I ran a speed test right after formatting and it was fine" tells you nothing about whether Trim works. You measured the one condition in which Trim is irrelevant.
It is also why the cure described later in this article appears to work instantly and then, on a drive that still is not being trimmed, quietly stops working some months later.
To measure something meaningful, the drive needs to be in the state where Trim matters: substantially used, with a real history of writes and deletes behind it.
Building A Test That Reflects Real Use
Four conditions make a benchmark honest for this purpose.
Use large files. At least 8 GB, ideally more than the drive's SLC cache, which on consumer drives is often a few percent of capacity. Small-file tests measure metadata handling and hide the flash behaviour you are trying to see.
Have the drive around half full or more. An almost-empty drive has free space available regardless of Trim state. The problem you are hunting appears when the controller is short on erased blocks.
Test after a heavy delete cycle. Delete something large, empty the Trash, and then write. This is the exact scenario Trim exists to handle: space that the filesystem considers free and the drive may or may not know is free.
Test sustained throughput, not the first few seconds. Every modern SSD absorbs the first burst into a fast cache. Watch a transfer for three minutes and look at what it settles to.
A Crude But Honest Command-Line Measurement
dd gives you a number without installing anything. Write first:
dd if=/dev/zero of=/Volumes/YourDrive/speedtest.bin bs=1m count=8192That writes 8 GB of zeroes. When it finishes, dd prints a summary line with the bytes transferred, the elapsed time, and the throughput in bytes per second. Note the throughput.
Then flush the Mac's disk cache so the read test actually reads from the drive rather than from RAM, and read the file back:
sudo purge
dd if=/Volumes/YourDrive/speedtest.bin of=/dev/null bs=1m
Compare the two throughput figures. Then delete the test file.
One caveat: some SSD controllers compress or deduplicate highly repetitive input, and a file of pure zeroes is the easiest possible case, so dd from /dev/zero can flatter a drive. To avoid that, copy a large real file such as a video instead and time it. Graphical alternatives work fine too. Blackmagic Disk Speed Test gives a continuous readout you can watch settle over minutes, which makes the cache-exhaustion drop-off easy to see.
Reading The Result
Compute write speed as a percentage of read speed on the same drive, same cable, same port, same session.
At 80% or above, nothing is wrong. Writes are normally somewhat slower than reads on flash and always have been.
Between 40% and 80%, you are in ambiguous territory. It could be an early-stage Trim problem, a drive whose cache is exhausted, thermal behaviour, or simply how that model performs. Retest after a heavy delete cycle and go run the mount-time log check.
Below 20%, take Oakley at his word and treat it as a Trim problem. His phrasing is deliberate: at that ratio "you can be confident that there's a Trim problem."
Filesystem Choice: APFS, HFS+, And The exFAT Trap
Which filesystem you formatted the drive with determines whether Trim is even attempted, before any question about hardware arises.
exFAT Does Not Trim
This is the single most avoidable cause of the whole problem. Oakley states it directly: "APFS and HFS+ will normally Trim an SSD each time it's mounted, a drive formatted in an old PC file system like ExFAT is most unlikely to be Trimmed at all."
exFAT is what drives ship formatted as, because it is the one format both macOS and Windows read and write without extra software. It is also what people choose deliberately when they need to move a drive between a Mac and a PC. And it means the drive will never receive a Trim command from macOS, no matter what enclosure it is in, no matter how it is connected, no matter what any check reports.
If your slow external SSD is exFAT, you have found your answer and you do not need to run the log check. There will be no APFS mount entries for it at all, because there is no APFS container to scan.
The Cross-Platform Trade-Off
The trade-off is real and there is no free answer, so be explicit about which side you are choosing.
| Format | Trim on macOS | Windows compatibility | Best for |
|---|---|---|---|
| APFS | Yes, at every mount | Not natively; needs third-party software | Mac-only drives, Time Machine on newer macOS, anything performance-sensitive |
| HFS+ (Mac OS Extended) | Yes, at every mount | Not natively; needs third-party software | Older Macs, legacy workflows, drives that must work with very old systems |
| exFAT | No | Yes, natively | Genuine cross-platform sharing where you accept the performance cost |
If you genuinely need a drive that plugs into both a Mac and a Windows machine, exFAT is the pragmatic choice and you should accept that its write performance will degrade with age. Mitigate it by keeping the drive well under capacity and reformatting it occasionally rather than never. But if cross-platform access is something you might want someday rather than something you do weekly, format APFS. You can always copy files across a network, and a drive that stays fast for years beats a hypothetical convenience.
HFS+ Is Trimmed, But Is On Borrowed Time
HFS+ still gets trimmed and still works. It is not, however, a good long-term choice on a Mac, and encrypted HFS+ in particular is on a deprecation path. If you are running an HFS+ external drive and thinking about reformatting anyway, this is a good moment to move to APFS. Our guide on converting encrypted HFS+ volumes to APFS covers the migration and the Time Machine implications.
Connection Choice: USB Bridges Versus Thunderbolt And NVMe
Filesystem is necessary but not sufficient. An APFS drive still needs the Trim command to physically reach the flash controller, and that is where the enclosure comes in.
What The Bridge Chip Has To Do
A USB external SSD is not a drive talking directly to your Mac. Inside the enclosure is a bridge chip that translates between USB and whatever the storage module speaks, SATA or NVMe. macOS sends storage commands over USB as SCSI, typically using UASP (USB Attached SCSI Protocol), and the SCSI equivalent of Trim is UNMAP.
So the command has to survive a chain: APFS decides to trim, macOS issues UNMAP over USB, the bridge chip receives it, the bridge chip translates it into a SATA TRIM or an NVMe Deallocate, and the storage module executes it. If the bridge does not implement that translation, the command is dropped. Silently. There is no error surfaced anywhere, which is precisely why this is hard to diagnose and why the log check is the only reliable read on it.
The generally reported situation, consistent across vendor documentation and community testing, is that Trim passthrough over USB bridges is inconsistent: some bridges pass UNMAP through, many do not, and it varies by chip and firmware revision rather than by drive brand. Thunderbolt and native NVMe paths are the reliable route, because there is no translation layer to lose the command in. Oakley's summary again: "All Apple internal SSDs enjoy full support for Trimming, and third-party external drives with NVMe interfaces should too." Note the "should", which is his and is doing honest work.
Older SATA drives are the most exposed. As Oakley puts it, "Slower drives with SATA interfaces are those most likely not to support Trimming." If your external is a SATA SSD in a USB caddy, which describes a lot of drives assembled from a spare 2.5-inch SSD, it is the highest-risk configuration there is.
Apple Publishes No Compatibility List
State this plainly, because it changes how you should shop: Apple publishes no list of external enclosures that support Trim on macOS. There is no support document, no qualified-hardware page, no API that reports it for USB-attached drives, and no marking in System Information. Apple has never documented Trim behaviour for external storage at all.
That means there is no authoritative way to know whether a given enclosure will pass Trim through before you buy it. Manufacturer marketing is not a reliable guide either, because most enclosure vendors do not mention Trim in either direction. The only way to find out is to buy it, format it APFS, and run the mount-time log check.
This is genuinely unsatisfying, and anyone who tells you a specific chipset definitively does or does not support Trim on macOS is asserting more than the available evidence supports. Chip firmware revisions differ, enclosure vendors change internals without changing model numbers, and macOS's own behaviour has shifted across releases. Test the drive you own.
What This Means When You Are Shopping
Given no compatibility list, prefer configurations where the translation problem does not exist. A Thunderbolt or USB4 NVMe enclosure removes the bridge from the equation and delivers considerably higher throughput as a side benefit. If you are already looking at the connectivity side of your setup, our Thunderbolt 5 dock buying guide covers what the current generation of hardware actually delivers.
Buying an integrated portable SSD from a major manufacturer, rather than assembling one from a caddy and a spare drive, is generally lower risk, because the vendor chose and validated the bridge for that specific module. Not a guarantee, but one fewer variable.
And whatever you buy, test it in the first week, while returning it is still easy. Format it APFS, copy some data on, delete some, eject, reconnect, and read the log. Two minutes, and you know.
The Cure: Erase And Reformat
There Is No Command To Trim A Drive On Demand
People look for a "trim my drive now" command and there is not one. macOS exposes no user-facing way to issue Trim to a volume on request. trimforce, as established, toggles a system policy for AHCI-attached third-party drives and does not apply here. Disk Utility has no such function. diskutil has no such verb.
You may see suggestions to fill the drive with a giant file and then delete it. That does not help, and on a drive that is not receiving Trim it makes things worse by writing more data the controller will consider live.
Oakley is unambiguous about what is left: "The only curative treatment is to fully reformat the SSD and see whether that restores normal write speed."
Erasing a drive rebuilds the partition map and filesystem from scratch. On a drive whose controller honours it, the erase itself effectively returns blocks to a free state, and the drive comes back at full speed. That is why the fix is real. It is also why it is temporary if the underlying Trim path is still broken, because you have reset the clock without fixing the mechanism.
Get Your Data Off First, Properly
Erasing destroys everything on the drive, so before you touch Disk Utility, copy everything off and verify it. Not "the copy finished", but actually open several files from the copy, including large ones, and confirm they are intact. Reads are still fast on this drive, so this part goes quickly, which is one small mercy of the failure mode.
If the drive holds your only copy of anything, make a second copy elsewhere first. A drive with a Trim problem is not failing and is unlikely to die during an erase, but never have one copy of anything you care about. And if the drive is a Time Machine destination, you are about to discard your backup history: read the Time Machine section below before you decide.
Doing The Erase
Use Disk Utility, and change one default first.
Open Disk Utility, then choose View → Show All Devices. This matters. Without it, Disk Utility shows only volumes, and erasing a volume leaves the container and partition scheme in place. You want to erase the physical device, which is the top-level entry in the sidebar with the drive's model name.
Select that top-level device, click Erase, and set:
- Scheme: GUID Partition Map
- Format: APFS, unless you have a specific reason for exFAT
Do not use the security options slider that overwrites the drive multiple times. On an SSD it is slow, it writes an enormous amount of data for no benefit, and it works against exactly the block state you are trying to restore.
The command-line equivalent, if you prefer:
diskutil list
diskutil eraseDisk APFS DriveName GPT /dev/diskN
Run diskutil list first and read the output carefully to identify the right device. eraseDisk on the wrong diskN destroys the wrong drive and there is no confirmation prompt.
What To Expect Afterward
Benchmark it immediately and it will be fast. That proves the flash is healthy, and nothing more.
The real test is what happens over the following months. Copy your data back, use it normally, and re-run the ratio test in six to eight weeks, after the drive has been through real delete-and-rewrite cycles. If write speed is holding, Trim is probably reaching the drive and this was a one-off. If it degrades again on the same curve, the enclosure is not passing Trim through and reformatting is maintenance you will be doing periodically, not a fix.
At that point the decision is economic. Periodic reformatting is tolerable for a scratch disk you can rebuild in an hour. It is not tolerable for a working archive. If the drive matters, replacing the enclosure with a Thunderbolt or NVMe unit and testing that one is the durable answer.
Prevention: Keeping A Drive Out Of This State
Leave Headroom
The single most effective habit. A drive kept at 70% or less has free logical space the controller can work with even when Trim is absent, because blocks that were never written remain erased. A drive that has been run to 98% full has had essentially every block touched and has no margin at all.
This applies to internal storage too, where the same physics governs the boot SSD, though there Trim is guaranteed to be working. Our storage management guide covers finding and reclaiming space on a Mac that has crept toward full.
Avoid Fill-To-The-Brim Workflows
Some habits are much harder on a drive than others. Filling a drive to capacity with camera footage, offloading it all, and refilling it is the worst case: maximum blocks touched, maximum reliance on Trim, repeated indefinitely. Media professionals hit this failure mode far earlier than general users, and often assume the drive is wearing out when it is not.
If that describes your work, either use a drive you have verified passes Trim through, or plan on a reformat cycle between projects. Rotating between two drives and reformatting each after offload is a reasonable working pattern, and it costs one erase per project.
Choose The Enclosure Deliberately
Worth restating as prevention rather than diagnosis: the enclosure decides this, not the SSD module inside it and not the brand on the box. Choose Thunderbolt or native NVMe where the workload justifies it, and test whatever you choose in the first week.
Retest Occasionally
The mount-time log check takes two minutes. Running it once a year on your important external drives, or after any macOS major upgrade, catches a change in behaviour before it costs you a month of slow transfers. Note the result somewhere. Knowing that a particular drive tested clean in March is useful context in December.
Time Machine Destinations And Bootable Clones
Why Time Machine Is A Worst Case
A Time Machine destination is close to the maximum-stress scenario for Trim. It fills toward capacity by design, then begins deleting the oldest snapshots to make room, then writes again into that reclaimed space, in a loop, forever. That is a continuous cycle of large deletes followed by large writes, which is precisely the pattern that depends on Trim to stay fast.
On an SSD destination that is not receiving Trim, backups get slower and slower over months. The symptom people report is that Time Machine backups that used to finish in minutes now run for hours, or appear to hang during "Preparing backup" or while writing. It is easy to blame Time Machine, and Time Machine has plenty of genuine problems worth ruling out separately, which our Time Machine troubleshooting guide covers in detail. But if the destination is an SSD and reads from it are still fast while writes crawl, consider Trim before you spend an afternoon on Time Machine's own settings.
The complication is that erasing a Time Machine destination destroys your backup history. There is no way to reformat a drive and keep its snapshots. Your options are to accept the loss of history and start a fresh backup, or to set up a new destination on a different drive and retire the old one once the new backup is established. For most people the second is worth the cost of a drive, because a backup with no history is much less useful than one with months of versions.
A note on hardware choice for backups specifically: this is one case where a conventional hard drive is not a bad answer. Spinning disks have no erase-block problem and no Trim requirement at all. They are slower on paper, but for an overnight incremental backup that is often irrelevant, and their behaviour does not degrade over years of fill-and-delete cycling.
Bootable Clones And External Boot Volumes
Bootable clones behave similarly. The clone software rewrites large amounts of data on every run, so if the destination is not being trimmed, clone times climb steadily. One advantage here is that a clone destination gets mounted and unmounted often, which makes the mount-time log entries trivial to generate: eject, reconnect, read the log, done in under a minute.
If you boot macOS from an external drive as a working setup rather than as a recovery tool, the stakes are higher, because every system write goes through the same degraded path. That is a strong argument for a Thunderbolt NVMe enclosure over a USB caddy for boot drives specifically.
Troubleshooting Common Issues
The Log Check Returns Nothing At All
Problem: You run log show with the APFS predicate and get zero lines, even though the drive is connected.
Solution: You almost certainly read the log without creating a mount event first, or too long after. The entries are written only when a volume mounts. Eject the drive, disconnect it physically, note the time from date, reconnect, wait fifteen seconds for the volume to appear in Finder, and only then run log show --last 2m. If it is still empty, add --info and then --debug to widen the level filter. If it is still empty and the drive did mount, check whether the drive is actually APFS: an exFAT drive produces no APFS entries because there is no APFS container to scan.
system_profiler SPSerialATADataType Prints Nothing
Problem: The Trim check every site recommends produces no output, and you cannot tell whether that means Trim is off.
Solution: It means neither. On an Apple silicon Mac that data type does not exist. Confirm with system_profiler -listDataTypes | grep -i sata, which will also return nothing. Use system_profiler SPNVMeDataType for internal and NVMe drives, and the mount-time log method for anything else. There is no interpretation of the empty SATA result that is meaningful on these machines.
You Ran sudo trimforce enable And Nothing Changed
Problem: You enabled trimforce, rebooted as instructed, and the external drive is exactly as slow as before.
Solution: That is the expected outcome. trimforce affects third-party drives attached to an AHCI (SATA) controller, per its own man page, and your USB or NVMe external is not one. Nothing was broken by running it and nothing was fixed. Run man trimforce and read the DESCRIPTION yourself if you want confirmation. Move on to the mount-time log check to find out what is actually happening.
The Drive Shows TRIM Support: Yes But Writes Are Still Slow
Problem: system_profiler SPNVMeDataType reports Trim support for the drive, yet write performance is poor.
Solution: Trim support being reported means the drive and the path advertise the capability. It does not confirm that trimming is happening on this volume, which is what the mount-time log check measures. Run that check next. Also rule out the non-Trim causes: verify the negotiated link speed in System Information, swap the cable, test on a different port, and run a sustained three-minute transfer to see whether you are looking at cache exhaustion or thermal throttling rather than block starvation.
Speeds Are Fine For The First Thirty Seconds Then Collapse
Problem: Large copies start at full speed and then drop by 70% or more partway through, every time.
Solution: This is usually the SLC write cache filling rather than a Trim problem, and it is normal behaviour on consumer drives, though a Trim-starved drive will show a lower floor after the drop. Distinguish them by testing after an idle period with the drive powered: cache-related slowdowns recover after the drive has had time to flush, Trim starvation does not. Also check the enclosure temperature, because a hot bridge chip or NVMe module throttles hard and feels identical from the outside.
Small Files Are Slow But Large Files Are Fast
Problem: Copying a folder of thousands of small files takes far longer than copying one file of the same total size.
Solution: Not a Trim problem. Per-file overhead dominates small-file transfers, and Spotlight indexing or security software scanning each file as it lands makes it dramatically worse. Test with a single large file to get a clean throughput number. If large-file writes are normal, the flash is fine. To reduce the small-file penalty, consider excluding the drive from Spotlight in System Settings → Siri and Spotlight → Spotlight Privacy, or transferring the folder as a single archive.
Erasing Fixed It, But Only For A Few Months
Problem: A reformat restored full speed, and now, some months later, writes have degraded again on the same curve.
Solution: The reformat treated the symptom. The recurrence tells you Trim is genuinely not reaching this drive, so the block pool starves again as soon as you rebuild a history of writes and deletes. Confirm with the mount-time log check on the reformatted drive, looking for (no trims). If confirmed, your realistic options are to accept periodic reformatting as maintenance, or to move the SSD module into a Thunderbolt or NVMe enclosure and test that path. There is no software setting that will change the outcome.
The Drive Also Disconnects Randomly
Problem: Alongside the slow writes, the drive ejects itself, or you get repeated "Disk Not Ejected Properly" notifications.
Solution: Treat these as two separate faults and fix the disconnects first, because an unstable connection makes every measurement unreliable and can corrupt the volume mid-write. Disconnection is usually a power or bus problem rather than a flash problem: bus-powered drives on a hub, aggressive enclosure sleep, or a marginal cable. Our guide to disk not ejected properly errors and USB power covers the specific causes. Once the drive stays connected reliably, come back and redo the ratio test.
FAQ
Does sudo trimforce enable help an external USB SSD?
No. Its man page states it enables Trim for third-party drives attached to an AHCI controller, which is the SATA interface. A USB external drive reaches the Mac through a USB bridge, and an NVMe drive is not AHCI either. The command applies to third-party SATA SSDs installed inside older Macs, and nothing else.
Why does system_profiler SPSerialATADataType return nothing on my Mac?
Because Apple silicon Macs have no SATA controller, so that data type does not exist on them. Confirm it yourself with system_profiler -listDataTypes | grep -i sata, which returns no matches. The empty output is not a report that Trim is disabled. It is the absence of the hardware category entirely.
Can I check Trim status in Disk Utility or with diskutil?
No. diskutil info -all | grep -i trim returns nothing, because diskutil does not expose Trim status among the properties it reports, and Disk Utility's information panel does not show it either. Guides implying otherwise are describing something macOS does not provide. Use system_profiler SPNVMeDataType or the mount-time log check instead.
How can I tell a Trim problem from a bad cable?
Compare read speed against write speed on the same drive in the same session, using one file of at least 8 GB. A cable or port problem slows both directions by a similar factor. A Trim problem leaves reads at full speed while writes collapse. Howard Oakley's threshold is writes at 20% or less of reads.
Will erasing the drive permanently fix the slow writes?
It restores full speed immediately, because erasing returns the flash to a state where writes need no prior erase cycle. Whether it lasts depends on whether Trim reaches the drive during normal use. If it does, the problem should not return. If it does not, expect the same degradation again within months.
Is exFAT really that bad for an external SSD on a Mac?
For performance over time, yes. exFAT will not trim the drive, so an exFAT SSD is guaranteed to degrade as it accumulates write history, regardless of enclosure or connection. Choose exFAT only when you genuinely need native Windows access, and if you do, keep the drive well under capacity and reformat it periodically.
Conclusion
An external SSD that writes slowly while reading at full speed has told you what is wrong before you run a single command. That asymmetry is the fingerprint of a drive that has run out of pre-erased blocks and is not being told which blocks it may reclaim.
The reason this is hard to diagnose is not that the mechanism is subtle. It is that the two checks the internet has agreed on both fail silently on a modern Mac. system_profiler SPSerialATADataType queries a hardware category Apple silicon does not have and returns an empty result. sudo trimforce enable toggles a policy for AHCI-attached SATA drives and cannot touch a USB external, as its own man page says in its first paragraph. Neither reports an error. That silence is what keeps the bad advice circulating, and it is why we repeated it ourselves in an earlier guide.
What works is narrower. For internal drives and NVMe externals, system_profiler SPNVMeDataType reports TRIM Support directly. For anything formatted APFS, eject the drive, note the time, reconnect it, wait for it to mount, and read the unified log for spaceman_scan_free_blocks entries, looking for the (no trims) marker. Do it in that order and without delay, because those entries are written at mount time and nowhere else. On the machine we tested, with three weeks of uptime, a full week of logs contained none of them at all.
If the check comes back bad, the cure is a full erase and reformat, and no user-facing command substitutes for it. Whether that fix holds depends on the enclosure, and since Apple publishes no compatibility list for Trim on external enclosures, the only way to find out is to reformat, use the drive for a couple of months, and measure again. If it degrades on the same curve, the enclosure is dropping the command, and the durable answer is a Thunderbolt or native NVMe path rather than any change you can make in software.
Do three things this week. Run the ratio test on your main external drive with one large file in each direction. If the ratio looks wrong, run the mount-time log check while the drive is still in its degraded state, so you learn something rather than just fixing it. And format your Mac-only external drives as APFS rather than exFAT, because that one decision determines whether Trim is even attempted.
Related reading: macOS External SSD Troubleshooting Guide · Time Machine Complete Troubleshooting Guide