macOS Tahoe First 24 Hours: Essential Setup Checklist for New Users
Complete setup guide for macOS Tahoe 26. Essential settings, privacy configuration, performance optimization, and must-have apps for your first day.
Your brand-new macOS Tahoe installation is ready, and the excitement is palpable. But before you dive into using your Mac, spending your first 24 hours setting it up properly will save you countless hours of frustration later. This comprehensive macOS Tahoe setup checklist walks you through every essential configuration step, organized into manageable hour-long blocks.
Whether you're upgrading from an older macOS version, switching from Windows, or setting up your very first Mac, this guide ensures you don't miss critical settings that affect privacy, performance, and productivity.
Why Your First 24 Hours Matter
The initial setup period is crucial for three reasons:
Performance Foundation: Decisions you make now about animations, visual effects, and background processes affect your daily experience for years to come.
Privacy Protection: macOS Tahoe introduces new privacy features, but they need proper configuration. Default settings aren't always the most private.
Productivity Framework: Setting up your workspace, shortcuts, and workflows from day one prevents bad habits and inefficient workarounds.
Let's get started with your macOS Tahoe setup checklist.
Hour 1: Initial System Configuration
Apple ID Setup and Decision Points
Your Apple ID is the gateway to the entire Apple ecosystem, but you need to make informed decisions during setup:
Creating vs. Using Existing Apple ID: If you're new to Apple, create a new Apple ID using an email address you control long-term (not a work email). For existing users, sign in with your current Apple ID.
Two-Factor Authentication: Absolutely mandatory in 2025. During Apple ID setup, you'll configure trusted devices and phone numbers. Add at least two trusted phone numbers if possible—losing access to your only trusted device can lock you out completely.
Computer Name Configuration: Go to System Settings → General → About and click the small "i" button next to your computer name. Change it to something descriptive like "MacBook Pro - John" rather than the default "John's MacBook Pro." This matters when you see the device in network shares, AirDrop, and device management.
iCloud Configuration: Strategic Sync Decisions
Open System Settings → Apple ID and carefully review each iCloud service:
What to Enable:
- Contacts, Calendars, Reminders: Essential sync features that work flawlessly
- Safari: Syncs bookmarks, reading list, and passwords across devices
- Keychain: Your password manager—absolutely enable this
- Find My Mac: Critical for device security and recovery
- Photos (if you trust cloud storage): Convenient but uses significant iCloud storage
What to Disable or Think Twice About:
- iCloud Drive Desktop & Documents: This syncs your entire Desktop and Documents folders to iCloud. Great for continuity but can create confusion if you have multiple Macs. Files appear everywhere, which isn't always desirable.
- Mail: Unless you specifically use iCloud Mail as your primary email
- iCloud Private Relay: Apple's VPN-like service that requires iCloud+ subscription. Enable only if you understand the implications for network troubleshooting.
Storage Management: Click "Manage" next to your iCloud storage to see what's consuming space. The free 5GB fills up quickly with Photos and backups. Consider upgrading to 50GB (about $1 per month) for breathing room.
Critical System Update Check
Open System Settings → General → Software Update. You want to be on macOS Tahoe 26.1 or later, not the base 26.0 release.
Why 26.1 Matters: The initial macOS Tahoe 26.0 release had several performance and stability issues that 26.1 addressed:
- Fixed memory leaks in WindowServer affecting external monitors
- Resolved kernel panic issues on certain Intel Mac models
- Improved battery life optimization
- Fixed critical Bluetooth connectivity bugs
If an update is available, install it now before proceeding with the rest of your setup. The update requires a restart, so this is the perfect time for a coffee break.
After the update, verify your version: Click the Apple menu → About This Mac. You should see "macOS Tahoe 26.1" or higher.
Hour 2: Privacy & Security Setup
macOS Tahoe setup checklist wouldn't be complete without addressing privacy and security—areas where default settings often prioritize convenience over protection.
FileVault Disk Encryption
Open System Settings → Privacy & Security → FileVault.
Why FileVault is Non-Negotiable: If your Mac is lost or stolen, FileVault encryption is the only thing preventing someone from accessing your data by removing the drive or booting from an external device.
Click "Turn On FileVault" and follow the prompts. You'll choose between two recovery options:
iCloud Account Recovery (Recommended for most users): If you forget your password, you can reset it using your iCloud account. Convenient but requires trusting Apple's infrastructure.
Recovery Key: You get a 24-character code you must store safely. More secure but if you lose both your password and this key, your data is unrecoverable forever.
For most users, iCloud recovery strikes the right balance. If you handle extremely sensitive data, choose the recovery key option and store it in a password manager or secure physical location (not on the encrypted Mac itself).
FileVault encryption happens in the background and takes 30 minutes to several hours depending on drive size. Don't let this stop you from continuing the setup.
Firewall Configuration
In the same Privacy & Security section, scroll down to Firewall.
Click "Turn On" to enable the firewall. Then click "Options" to configure:
Recommended Settings:
- ✅ Block all incoming connections when in public locations (if you use public WiFi regularly)
- ✅ Enable stealth mode (makes your Mac invisible to port scans)
- ☐ Automatically allow built-in software to receive incoming connections (leave this OFF for maximum security; enable only as needed)
- ☐ Automatically allow downloaded signed software (leave OFF; you'll approve apps individually)
The firewall prevents unauthorized network access. On macOS Tahoe, you can create location-based firewall profiles, so your home network is trusted while coffee shop WiFi is locked down.
Privacy Permissions Audit
Navigate to System Settings → Privacy & Security and review each category:
Location Services: Click the details button. Disable location access for any app that doesn't have a legitimate need. Weather and Maps need it; your text editor doesn't.
Contacts, Calendars, Photos: Only grant access when apps explicitly request it and you understand why they need it.
Camera & Microphone: macOS Tahoe shows an orange indicator in the menu bar when these are active. Review which apps have access and remove any you don't recognize or trust.
Analytics & Improvements: Scroll to the bottom of Privacy & Security settings. Under "Analytics & Improvements," disable:
- Share Mac Analytics (sends usage data to Apple)
- Share iCloud Analytics
- Improve Siri & Dictation
These settings send telemetry data to Apple. Disabling them doesn't significantly reduce functionality but increases privacy.
Lock Screen and Security Settings
Go to System Settings → Lock Screen:
Recommended Configuration:
- Require password: Immediately (not 5 minutes later)
- Show password hints: OFF
- Login window shows: Name and password (not list of users, which reveals usernames)
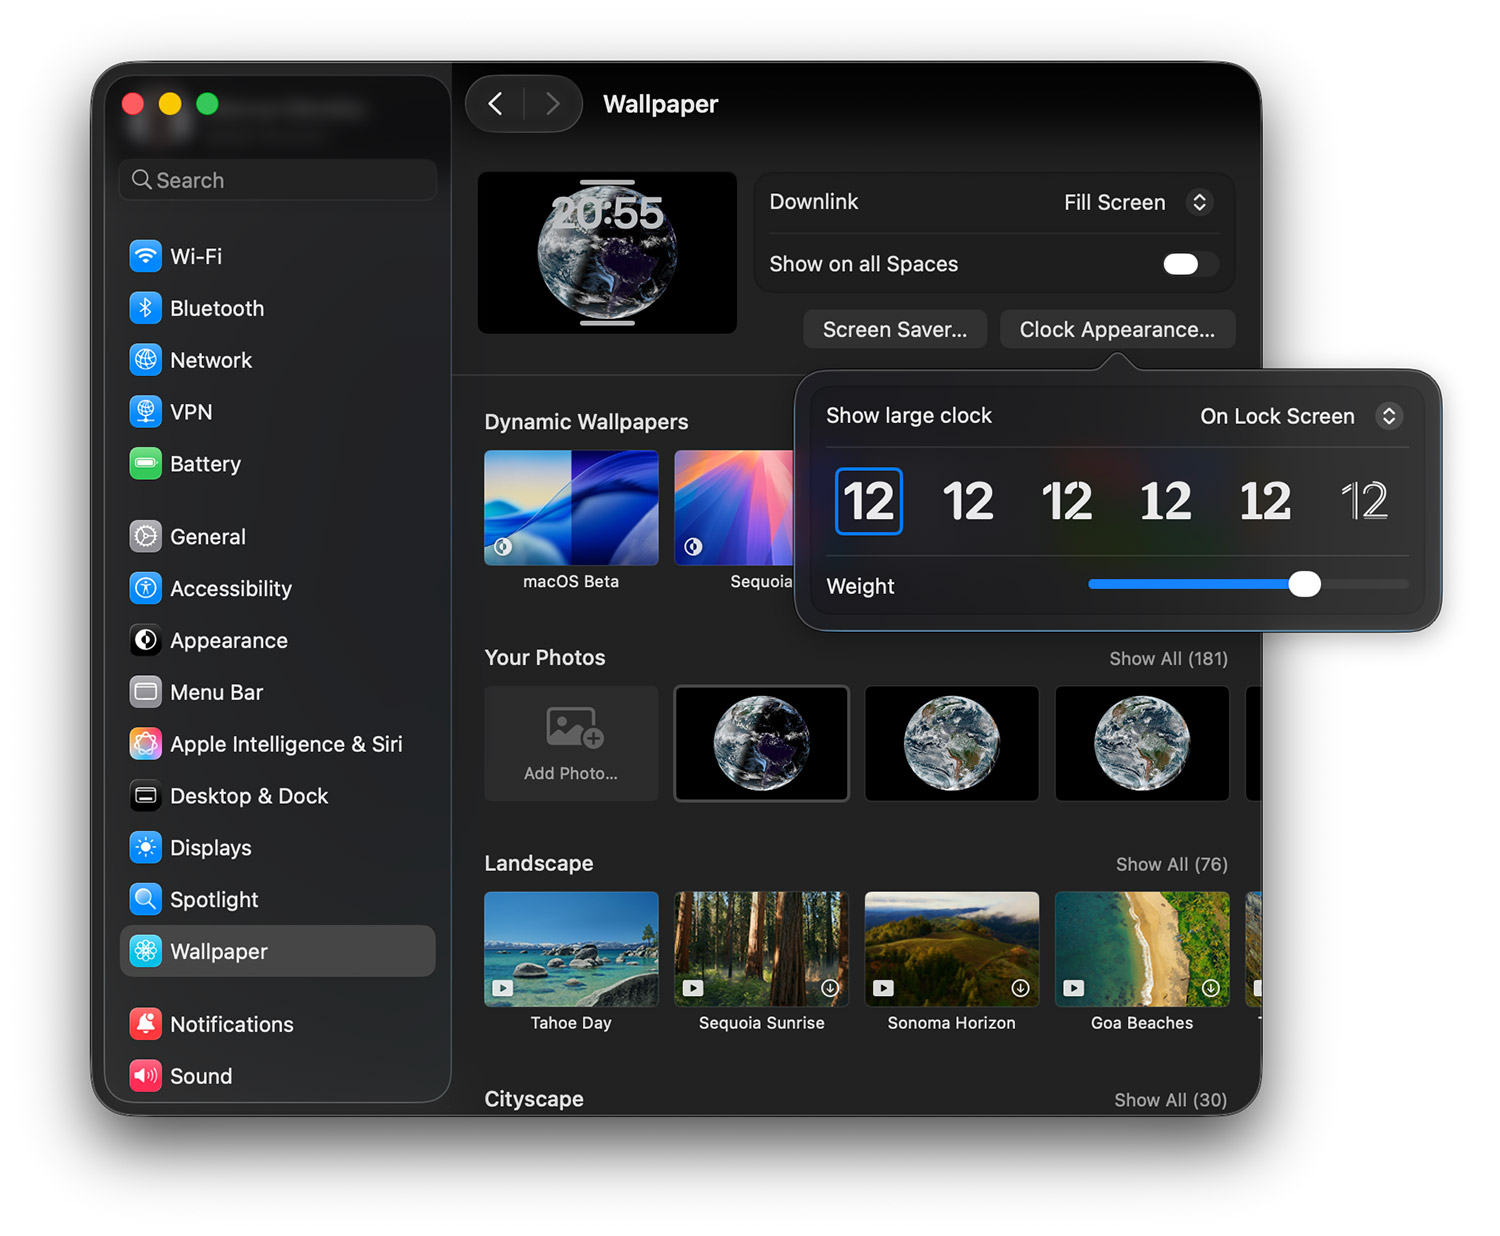
Enable "Show large clock" if you use your Mac as a desk clock when locked.
Hour 3: Display & Appearance Customization
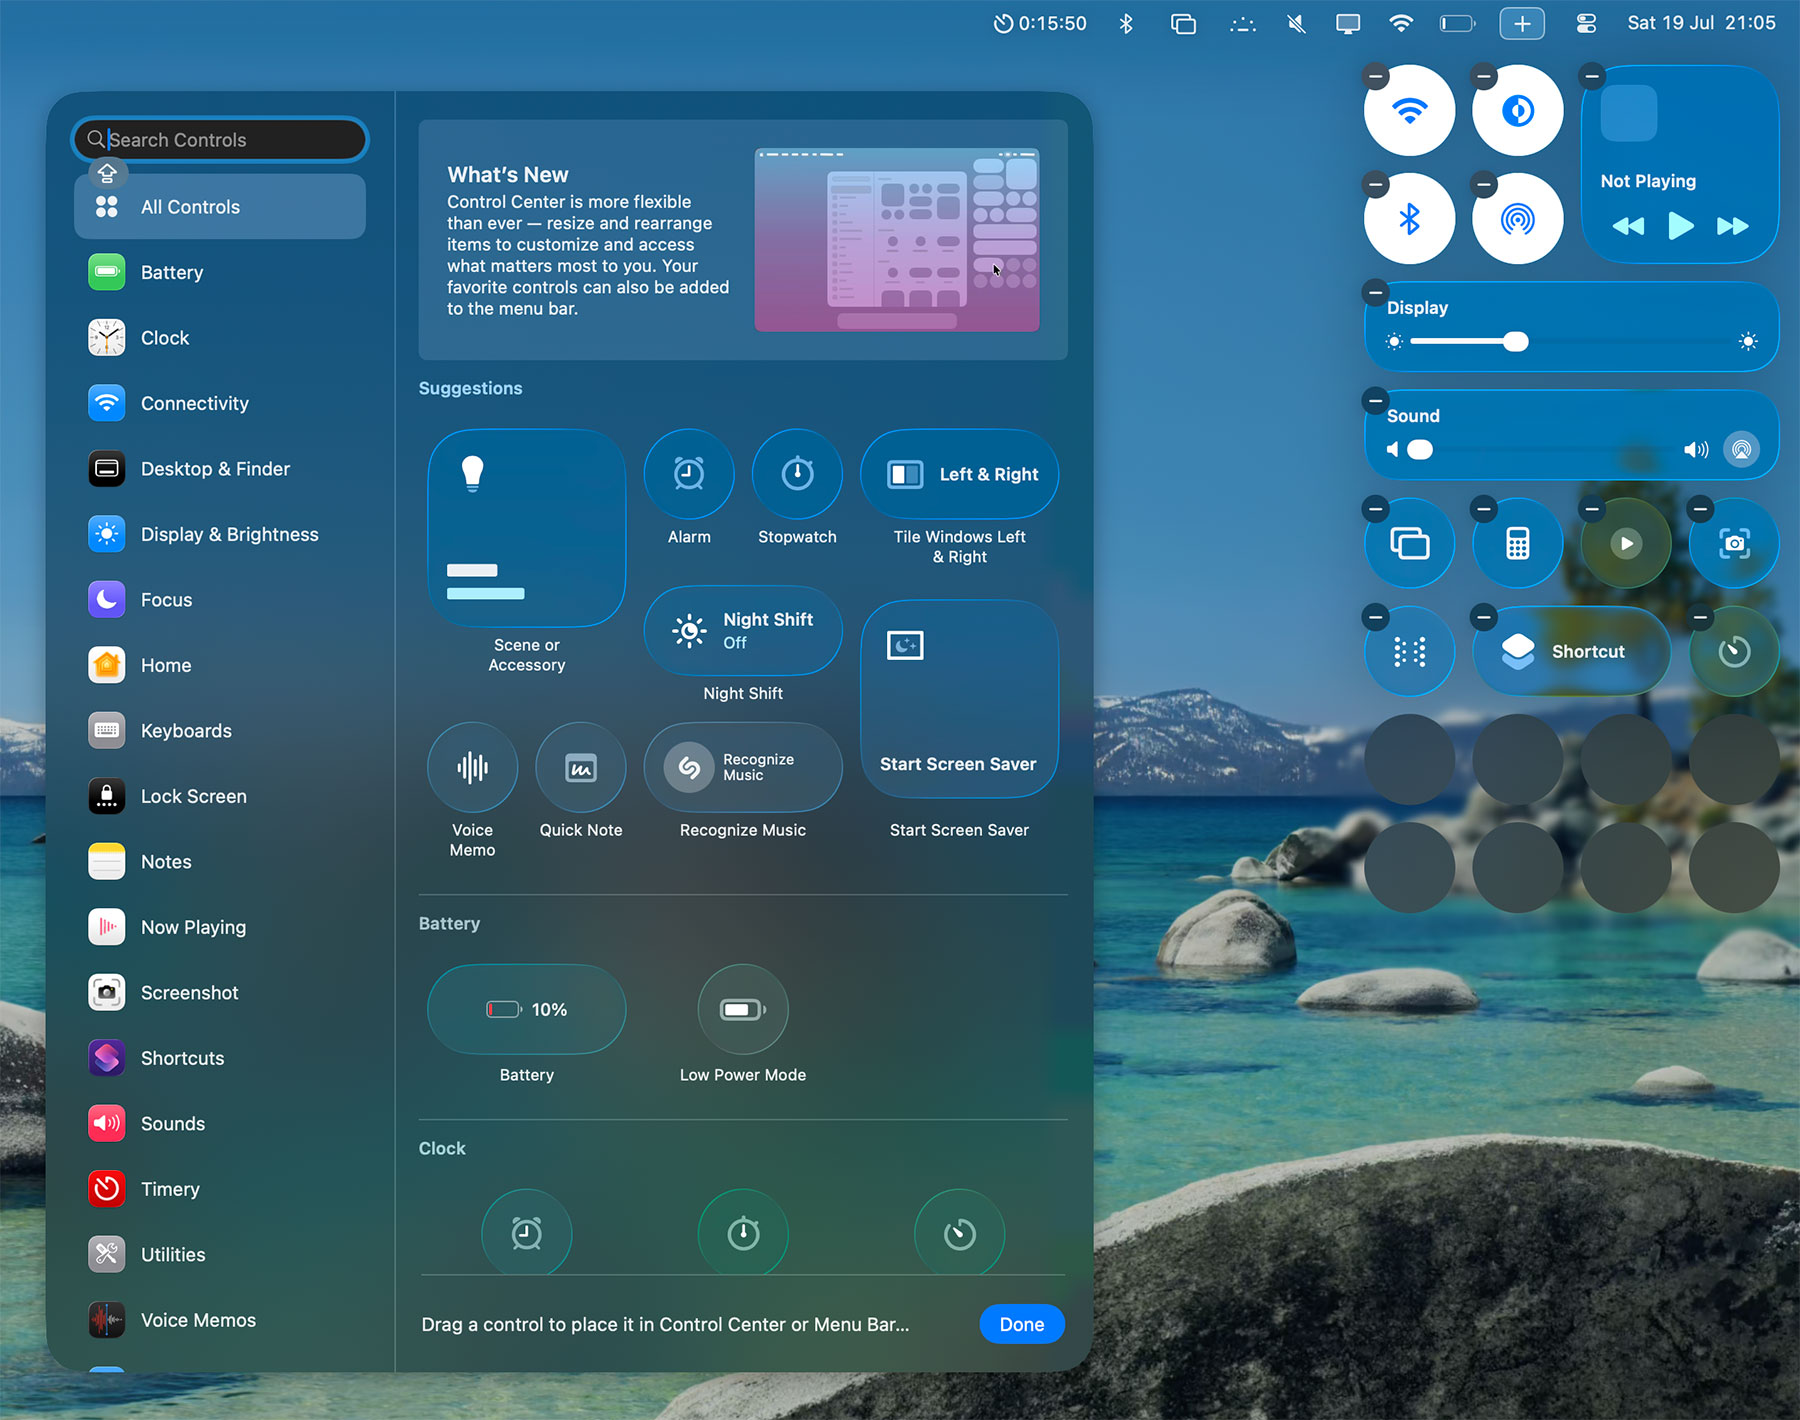
macOS Tahoe's visual identity centers on the Liquid Glass design language. Here's how to configure it for optimal aesthetics and performance.
Liquid Glass and Appearance Settings
Open System Settings → Appearance.
Appearance Mode: Choose between Light, Dark, or Auto. The Auto option switches based on time of day or sunset/sunrise at your location.
Dark Mode Recommendation: On MacBook Pros with OLED displays (if you have one), Dark Mode significantly improves battery life since black pixels are truly off. On LCD screens, the benefit is minimal but Dark Mode reduces eye strain in low-light environments.
Accent Color: macOS Tahoe offers seven accent colors: Blue (default), Purple, Pink, Red, Orange, Yellow, and Green. This affects button colors, selection highlights, and the overall system feel.
Choose based on personal preference, but note that Blue and Purple have the highest contrast and work best with both Light and Dark modes.
Highlight Color: Set to match your accent color for visual consistency.
Display Scaling and Resolution
Go to System Settings → Displays.
You'll see your current display with a "Use as" dropdown showing your current scaling setting:
Default for Display: Native resolution with macOS's recommended scaling More Space: Smaller UI elements, more screen real estate Larger Text: Bigger UI elements, less screen real estate
Recommendation for most users: Start with "Default for Display." macOS Tahoe's default scaling is well-optimized for readability and sharpness.
For external monitors: If you use a 4K monitor, try "More Space" to get the effective resolution you expect. Many 4K displays look too zoomed in at default settings.
Performance vs. Visual Effects Trade-offs
macOS Tahoe is visually stunning but the Liquid Glass effects consume GPU resources. If you're on an older Mac or an 8GB RAM model, these tweaks improve responsiveness:
Open System Settings → Accessibility → Display:
- Reduce motion: Minimizes animations when opening apps, switching spaces, and notifications
- Reduce transparency: Replaces translucent menu bars and backgrounds with solid colors (significant performance boost on older Macs)
For most 2021 or newer Macs with 16GB+ RAM, leave these disabled to enjoy the full Tahoe experience. On 2019 or older Intel Macs, enable both for noticeable performance improvements.
Hour 4: Dock & Desktop Organization

Your Dock and Desktop are where you'll spend most of your interaction time. Configuring them properly sets up your productivity workflow.
Dock Optimization
Right-click the Dock divider (the vertical line separating apps from folders) and explore options, or go to System Settings → Desktop & Dock.
Recommended Dock Settings:
Size: Drag the slider to make icons smaller. A smaller Dock gives you more screen space and encourages using Spotlight (Cmd+Space) for app launching instead of mouse clicking.
Magnification: Personal preference. Enable if you like the zoom effect when hovering; disable for a cleaner, more predictable Dock.
Position on screen: Bottom is standard, but Left or Right can be excellent for ultrawide monitors. Try Left position on a 16-inch MacBook Pro—it's surprisingly ergonomic.
Minimize windows using: Choose "Genie effect" (traditional) or "Scale effect" (faster, simpler). Scale effect is noticeably faster on older Macs.
Double-click a window's title bar to: Set to "Zoom" if you want macOS-style window maximizing (fills screen intelligently) or "Fill" for Windows-like full-screen maximize.
Minimize windows into application icon: Enable this. It keeps your Dock cleaner by minimizing windows into their parent app icon instead of creating separate Dock icons for minimized windows.
Automatically hide and show the Dock: Advanced users love this for maximum screen space. The Dock appears when you move your cursor to the screen edge. Takes getting used to but worth trying.
Show suggested and recent apps in Dock: Disable if you want full control over your Dock contents.
Default web browser: Set your preferred browser (Safari, Chrome, Firefox, Arc, etc.)
Dock App Organization
Remove apps you never use: Right-click and select "Remove from Dock." Removing an app from the Dock doesn't uninstall it.
Recommended Essential Apps in Dock:
- Finder (always first)
- Safari or your preferred browser
- Mail (if you use it)
- Messages
- Your most-used productivity app (Notes, Things, Notion, etc.)
- System Settings (for quick access during this setup period)
Keep your Dock under 10 apps. Use Spotlight (Cmd+Space) or Launchpad for everything else.
Desktop Widget Configuration
macOS Tahoe enhances desktop widgets from previous versions. Right-click on your Desktop and select "Edit Widgets."
Useful Widgets for New Installs:
- Weather: Stay informed about local conditions
- Calendar: See upcoming events at a glance
- Clock: Multiple time zones if you work internationally
- Stocks: If you track markets (easily removable if not)
Don't overload your Desktop with widgets. 3-5 functional widgets provide information without distraction.
Stage Manager Decision
Stage Manager is polarizing. Some users love it; others find it confusing.
Try it for a day: Go to System Settings → Desktop & Dock and enable "Stage Manager."
How Stage Manager Works: Open apps appear as thumbnail groups on the left side of your screen. Your current app is large in the center; others are minimized thumbnails. Click thumbnails to switch.
Who Benefits: Users who keep many apps open simultaneously and think in terms of task-based groupings.
Who Dislikes It: Users comfortable with traditional window management, multi-monitor setups (Stage Manager can be awkward with external displays), and those who use Cmd+Tab app switching extensively.
Give it a fair trial. You can always disable it if it doesn't match your workflow.
Hot Corners Configuration
System Settings → Desktop & Dock → Hot Corners.
Hot Corners trigger actions when you move your cursor to a screen corner.
Recommended Setup:
- Top-left: Mission Control (see all open windows)
- Top-right: Desktop (hide all windows to access Desktop)
- Bottom-left: Nothing (prevents accidental triggers)
- Bottom-right: Quick Note (if you use Apple Notes)
Hold modifier keys (Shift, Control, Option, Command) to require that key + corner movement, preventing accidental triggers.
Hour 5: Finder & File Management

Finder is your file system interface. macOS Tahoe's defaults prioritize simplicity over power, but power users need different settings.
Essential Finder Preferences
Open Finder and press Cmd+, (Command+Comma) to open Preferences.
General Tab:
- Show these items on the desktop: Disable "Hard disks" and "External disks" for a cleaner Desktop. Access drives through Finder sidebar instead.
- New Finder windows show: Change from "Recents" to your Home folder or Documents. "Recents" mixes files from everywhere, making organization difficult.
Sidebar Tab: Enable these:
- Your home folder (your username)
- Documents
- Downloads
- Desktop
- External disks
- Your Mac
Disable:
- Recents (redundant and cluttered)
- AirDrop (unless you use it constantly)
- Tags (if you don't use tag organization)
Advanced Tab: Enable these power-user features:
- ✅ Show all filename extensions (reveals .jpg, .pdf, etc.)
- ✅ Show warning before changing an extension
- ✅ Show warning before removing from iCloud Drive
- ☐ Show warning before emptying the Bin (disable if you find it annoying)
- ✅ Remove items from the Bin after 30 days
- When performing a search: Change to "Search the Current Folder" instead of "Search This Mac"
Finder View Options
Open a Finder window and press Cmd+J to open View Options.
For your Documents folder:
- Sort by: Date Modified (most recent files appear first)
- Show Library Folder: Enable this (very important for troubleshooting and advanced usage)
Apply these settings to your Documents folder, then click "Use as Defaults" to apply to all folders.
Tags Organization System
If you plan to use Finder tags (macOS's labeling system), set them up now:
Open Finder → Settings → Tags. You'll see default colors: Red, Orange, Yellow, Green, Blue, Purple, Gray.
Rename tags to functional categories:
- Red → Urgent
- Orange → Work
- Yellow → Personal
- Green → Archive
- Blue → Projects
Add tags by right-clicking files and selecting Tags. Search tagged files using the Finder sidebar or Spotlight.
Tags work across iCloud Drive, making them powerful for organization if you commit to using them consistently.
Quick Actions Customization
Quick Actions appear when you right-click files in Finder. macOS Tahoe includes several:
- Rotate images
- Create PDF
- Markup (annotate PDFs and images)
- Convert Image
If you use these frequently, great. If not, go to System Settings → Extensions → Finder to disable unwanted Quick Actions, reducing right-click menu clutter.
Hour 6: Safari & Browser Setup

Safari is deeply integrated with macOS Tahoe and offers excellent battery life, but it requires configuration for privacy and functionality.
Safari Privacy & Security Settings
Open Safari → Settings (Cmd+,).
General Tab:
- Safari opens with: Choose "All windows from last session" to restore your browsing on restart
- Remove history items: Set to "After one year" (good privacy/convenience balance)
- Remove download list items: "Upon successful download"
AutoFill Tab:
- Enable "User names and passwords" (uses Keychain)
- Disable "Credit cards" unless you specifically want this convenience
- Disable "Other forms" for maximum privacy
Passwords Tab: Safari uses iCloud Keychain as a password manager. It's competent but less feature-rich than 1Password or Bitwarden.
Search Tab:
- Search engine: Google (default), DuckDuckGo (privacy-focused), or Ecosia (plants trees)
- Enable "Include Safari Suggestions"
- Disable "Preload Top Hit in the background" (reduces data usage)
Privacy Tab (Critical):
- Website tracking: Enable "Prevent cross-site tracking"
- Hide IP address: Enable "Trackers and websites" (requires iCloud Private Relay subscription for full protection)
- Enable "Block all cookies" only if you're comfortable with sites breaking. "Allow from websites I visit" is the sweet spot.
Advanced Tab:
- Enable "Show full website address" (reveals full URLs in address bar)
- Enable "Show Develop menu in menu bar" (unlocks developer tools)
Essential Safari Extensions
Click Safari → Safari Extensions to browse the Mac App Store for extensions.
Recommended Extensions:
- 1Password or Bitwarden: Password managers more powerful than Keychain
- AdGuard: Content blocker that speeds up browsing and protects privacy
- Dark Reader: Forces dark mode on websites that don't support it
- Vinegar: Replaces YouTube's default player with Safari's native video player (better battery life)
Extensions can impact performance. Install selectively and remove any that slow browsing.
Alternative Browser Considerations
Safari is excellent for battery life, but you might prefer alternatives:
Chrome: Best extension ecosystem, Google service integration, but significantly worse battery life on MacBooks
Firefox: Privacy-focused, open-source, good middle ground between Safari and Chrome
Arc: Innovative interface with vertical tabs, spaces, and built-in split-view. Worth trying if you want to rethink browser workflows.
Brave: Privacy-focused Chromium browser with built-in ad blocking
Install browsers now if you plan to use them. Most users benefit from having Safari for battery-intensive sessions and Chrome/Firefox for web development or specific extensions.
Hour 7: Email & Communication Setup

Mail App Configuration
Open Mail. If you used Migration Assistant or iCloud sync, your accounts might already be configured. If not:
Mail → Settings → Accounts → Add Account.
Select your email provider or choose "Other Mail Account" for custom IMAP/SMTP setup.
Mail Settings Recommendations:
General:
- Check for new messages: Every 5 minutes (balance between timeliness and battery life)
- New message notifications: "VIPs and contacts only" to reduce noise
Viewing:
- Show most recent message at the top: Enable (conversation view feels more natural with newest first)
- Use classic layout: Personal preference; classic layout is more compact
Composing:
- Message format: Rich Text (allows formatting; Plain Text for maximum compatibility)
- Check spelling: "As I type"
- Send new messages from: Choose your primary email if you have multiple accounts
Signatures: Create professional signatures for work accounts. Keep them simple—over-designed signatures often break on mobile devices.
Smart Mailboxes: Set up smart mailboxes for automated organization:
- Unread from VIPs
- Emails with attachments from the last week
- Flagged messages
Messages and FaceTime
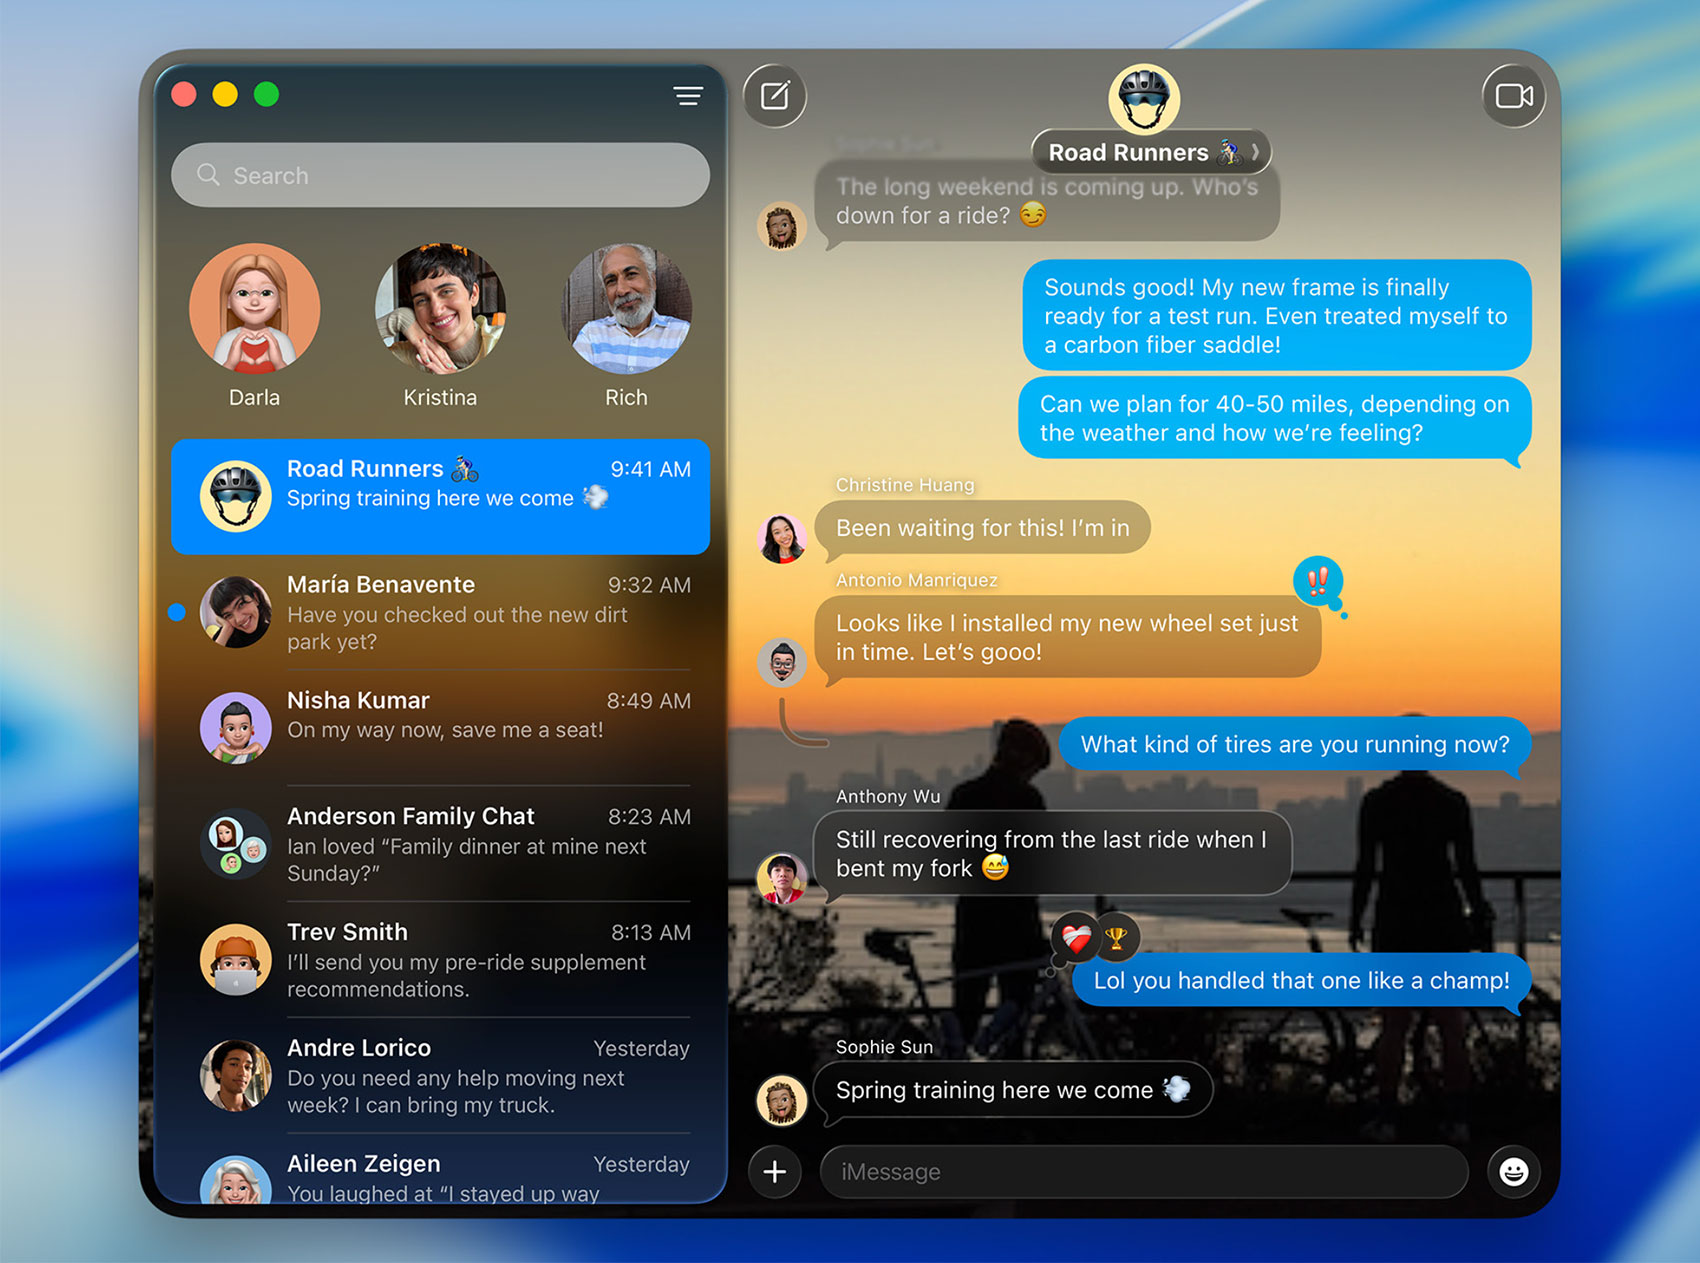
Open Messages → Settings:
iMessage: Sign in with your Apple ID to enable iMessage (blue bubbles) with other Apple users.
Send & Receive: Choose which email addresses and phone numbers can reach you via iMessage.
Critical Setting: "Start new conversations from" should be your phone number if you have one associated with your Apple ID. Using email addresses confuses recipients.
Open FaceTime → Settings:
Enable "Calls from iPhone" if you have an iPhone. This allows you to take phone calls on your Mac—convenient but can be distracting during focus sessions.
Hour 8: Productivity Apps Setup
Notes, Reminders, and Calendar Sync
These apps sync via iCloud and work best when properly configured.
Apple Notes: Open Notes and verify iCloud sync is enabled (Settings → iCloud → Notes should be ON).
Create folders for organization:
- Quick Notes
- Work Projects
- Personal
- Archive
Enable password-protected notes: Create a note → View → Lock Note. This uses your Notes password (separate from login password).
Reminders: Create lists:
- Today
- This Week
- Work
- Personal
- Someday/Maybe
Enable "Show List Count" badges in Settings to see pending tasks in the Dock icon.
Calendar: Add your calendars: File → New Calendar Subscription for shared calendars.
Useful settings:
- Show 7 days at a time (in Week view)
- Start week on Monday or Sunday based on preference
- Default alerts: 15 minutes before events
Focus Modes Configuration
Focus Modes are macOS Tahoe's solution for managing notifications and reducing distractions.
Open System Settings → Focus.
You'll see predefined modes:
- Do Not Disturb
- Personal
- Sleep
- Work
Customize Work Focus:
- Click Work
- Choose which people can reach you (family, certain coworkers)
- Select which apps can send notifications (Slack, Messages, Calendar)
- Link to a specific Home Screen on iPhone (if applicable)
- Set an automatic schedule (e.g., Weekdays 9 AM - 5 PM)
Share Focus Status: Enable this to show contacts when you're in focus mode. They see "You have notifications silenced" when messaging you.
Focus Filters: Advanced feature that changes app behavior during focus. Example: Work focus shows only work email accounts in Mail, hiding personal accounts.
Create at least one custom focus mode during your first 24 hours. You can refine it later based on actual usage patterns.
Shortcuts Exploration
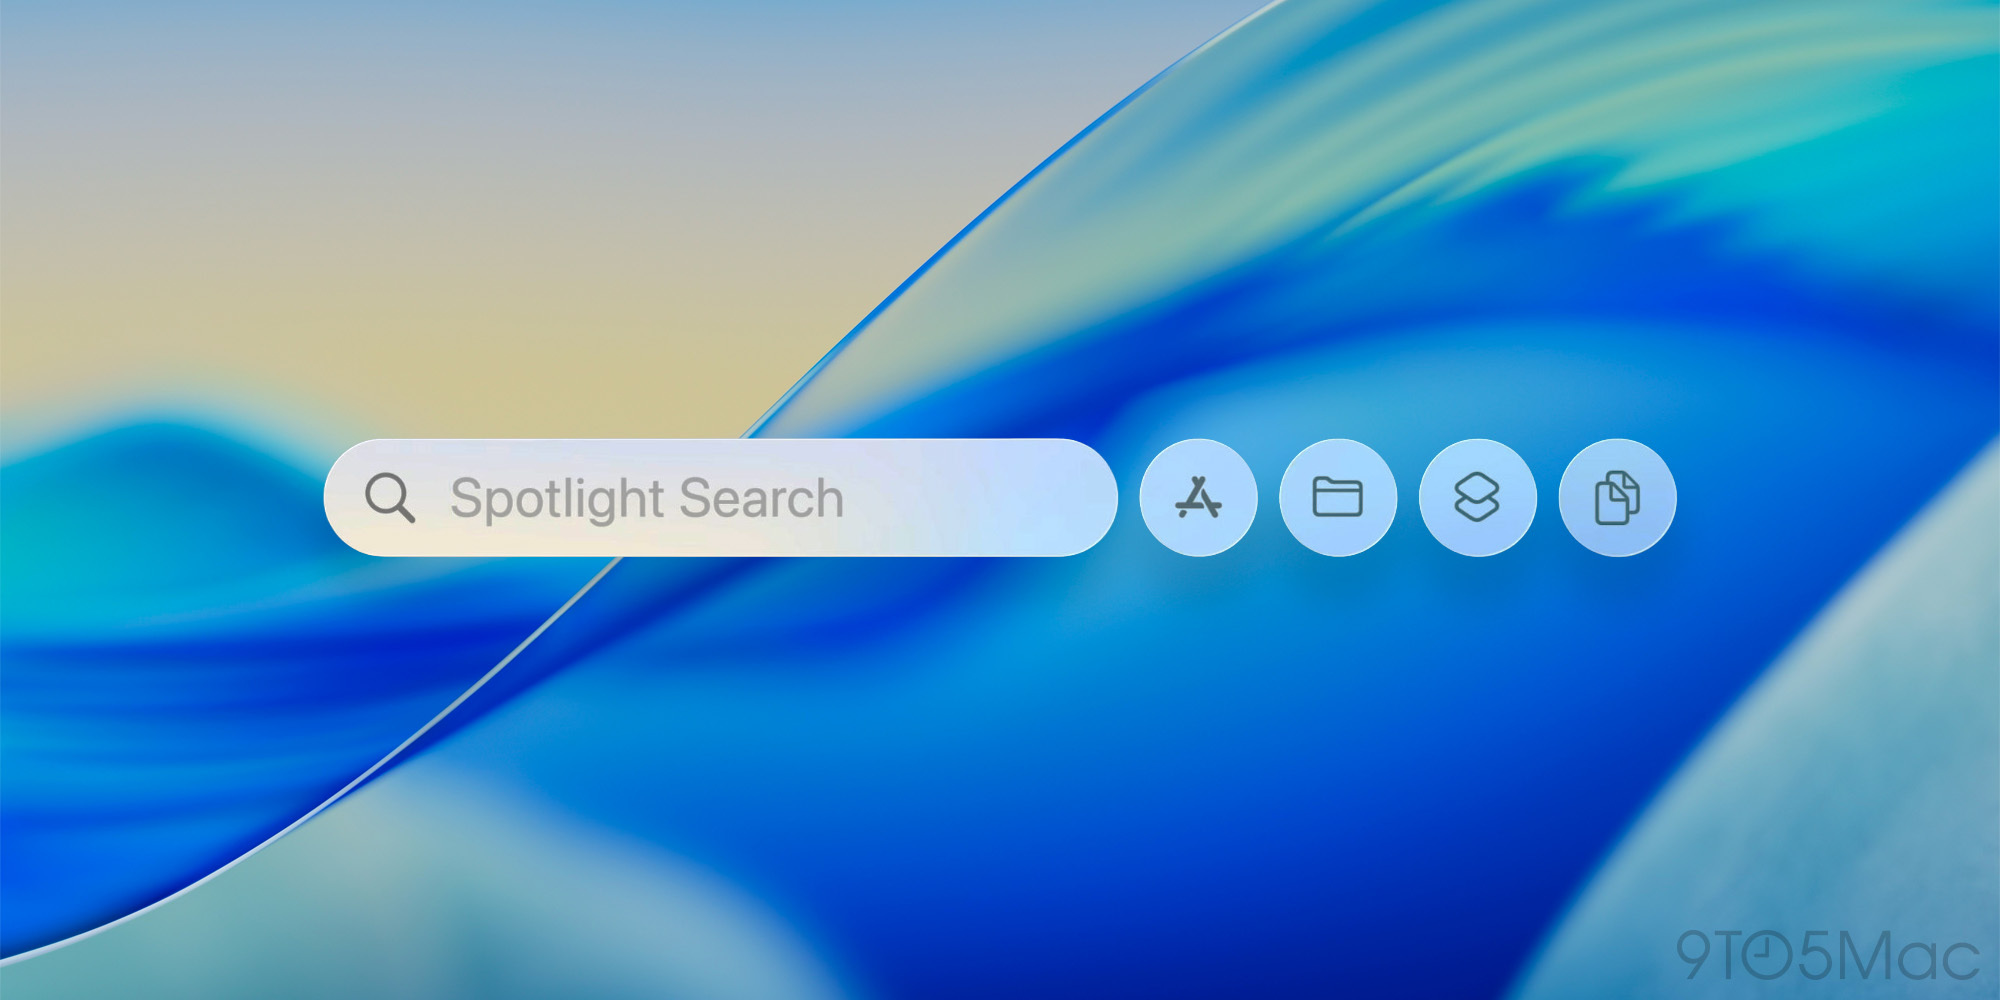
Open Shortcuts app (search in Spotlight if you can't find it).
Shortcuts is macOS's automation tool, similar to Automator but more modern.
Useful Starter Shortcuts:
- Text Cleanup: Removes formatting from copied text
- Make GIF: Converts videos to GIFs
- Combine Images: Stitches screenshots together
Browse the Gallery tab for pre-built shortcuts. Don't go overboard during initial setup—add shortcuts organically as you identify repetitive tasks.
Essential Third-Party Apps
No macOS Tahoe setup checklist is complete without third-party apps that fill gaps in Apple's ecosystem.
Productivity Applications
Rectangle (Free): Window management tool that lets you snap windows to screen edges using keyboard shortcuts.
Download from rectangleapp.com, install, and grant Accessibility permissions when prompted.
Essential shortcuts:
- Ctrl+Opt+Left: Snap window to left half
- Ctrl+Opt+Right: Snap window to right half
- Ctrl+Opt+F: Maximize window
- Ctrl+Opt+C: Center window
Rectangle dramatically improves multitasking on macOS.
Alfred or Raycast (Freemium): Spotlight replacements with superpowers.
Alfred (free, Power Pack $59): Customizable workflows, clipboard history, text expansion, file navigation.
Raycast (free): Modern UI, built-in productivity tools, API integrations, extensions ecosystem.
Download one (not both) and try it for a week. Both offer significantly more power than Spotlight once you learn their features.
Utility Applications
iStat Menus ($18): Menu bar system monitor showing CPU, memory, network, battery, and temperature.
Useful during your first 24 hours to monitor if background processes are consuming resources. After initial setup, you might not need constant monitoring.
The Unarchiver (Free): Handles ZIP, RAR, 7Z, and dozens of archive formats macOS can't natively open.
Download from App Store. Set as default app for archive files: Right-click a .zip file → Get Info → Open with: The Unarchiver → Change All.
Amphetamine (Free): Prevents your Mac from sleeping, dimming display, or starting screensavers.
Essential for presentations, large downloads, or overnight processes. More reliable than Terminal commands like caffeinate.
Menu Bar Management
After installing several apps, your menu bar becomes cluttered. Install Bartender 5 ($16) or Hidden Bar (free) to organize menu bar icons.
Hidden Bar: Simple, free, open-source. Hides icons you don't need constant access to.
Bartender: More powerful with triggers, search, and icon customization.
Performance Optimization Checklist
Even on a fresh install, macOS Tahoe runs background processes that consume resources. Optimize them during initial setup.
Disable Unnecessary Visual Effects
System Settings → Accessibility → Display:
- ✅ Reduce motion (if you want faster animations)
- ✅ Reduce transparency (improves performance on older Macs)
Login Items Cleanup
System Settings → General → Login Items & Extensions.
Review three sections:
Open at Login: Apps that launch automatically when you log in. Remove anything you don't need immediately on startup.
Allow in Background: Apps with background processes. Disable apps that don't need constant background access (many apps add themselves here unnecessarily).
Login Items: Legacy system extensions. Usually only Dropbox, Google Drive, or security software appear here.
After 24 hours, revisit this section. Many apps you install will automatically add themselves.
Spotlight Indexing Management
Spotlight indexes your entire drive for fast searching. During initial setup or after migration, indexing can peg CPU for hours.
Check indexing status: Open Terminal (Applications → Utilities → Terminal) and run:
mdutil -s /If it says "Indexing enabled," check Activity Monitor (Applications → Utilities) for process "mds_stores." High CPU usage is normal for the first few hours.
Exclude folders you don't need searchable: System Settings → Siri & Spotlight → Spotlight Privacy
Click the "+" button and add:
- Development folders with thousands of files (node_modules, build directories)
- Large media archives you won't search
- External backup drives
Excluding these speeds up indexing and prevents irrelevant Spotlight results.
Disk Space Verification
Click Apple menu → About This Mac → Storage.
Verify you have adequate free space. macOS needs at least 15% free space for optimal performance. If you're under 20 GB free on a 256 GB drive, consider:
- Emptying Trash
- Checking Downloads folder for large files
- Reviewing ~/Library/Caches (can grow to tens of GB)
- Using Storage Management to identify space hogs (click the "i" button next to storage bar)
Backup Strategy Setup
Losing data due to hardware failure, theft, or accidental deletion is preventable with proper backups.
Time Machine Configuration
Connect an external drive with at least 2x your Mac's internal storage capacity.
Open System Settings → General → Time Machine.
Click "Add Backup Disk" and select your external drive.
Time Machine Options:
- ☐ Back up automatically (Enable this)
- ☐ Back up frequency: Automatic (hourly backups when drive is connected)
Time Machine creates:
- Hourly backups for the past 24 hours
- Daily backups for the past month
- Weekly backups until the drive is full
Important: Time Machine is local backup only. If your house floods or burns, you lose both your Mac and the Time Machine drive. Combine with cloud backup.
Cloud Backup Options
iCloud Backup: Limited to iCloud Drive, Photos, and Documents/Desktop if enabled. Not a complete system backup.
Backblaze ($9/month): Unlimited cloud backup. Runs continuously in background. Industry standard for Mac users.
Arq Premium ($60/year): Backs up to your choice of cloud storage (AWS, Google Drive, Dropbox, etc.). More control but more complex setup.
Set up at least Time Machine during your first 24 hours. Add cloud backup within your first week.
Common First-Day Issues & Fixes
Slow Performance After Migration
If you used Migration Assistant to transfer from an old Mac, slowness is common in the first 24-48 hours.
Causes:
- Spotlight reindexing entire file system
- Photos analyzing faces and scenes
- iCloud Drive syncing files
Fixes:
- Check Activity Monitor for "mds_stores" (Spotlight) and "photoanalysisd" (Photos)
- Leave Mac plugged in overnight; most processing happens when idle
- Don't force-quit these processes; they'll restart and begin from scratch
Performance normalizes after indexing completes (usually 4-24 hours depending on data volume).
Excessive Battery Drain in First 48 Hours
New installs or migrations trigger intensive background processes.
Expected Battery Impact:
- Spotlight indexing: Moderate CPU usage
- Photos analysis: High CPU and GPU usage
- iCloud syncing: Network and disk activity
Verification: Open Activity Monitor → Energy tab. Sort by "Energy Impact." Processes under 20 are normal; over 50 are significant.
Solution: Let the Mac complete background tasks while plugged in. Battery life normalizes after 48-72 hours.
If battery drain persists beyond 3 days, check for:
- Rogue browser tabs (web pages with auto-refreshing content)
- Backup software stuck in sync loops
- Cloud storage clients (Dropbox, Google Drive) continuously syncing
Spotlight Not Finding Files
Immediately after setup, Spotlight might return incomplete results.
Cause: Indexing in progress.
Verification: System Settings → Siri & Spotlight → Spotlight Privacy shows indexing status at the bottom.
Force Reindex (if needed):
- System Settings → Siri & Spotlight → Spotlight Privacy
- Click "+" and add your Macintosh HD
- Remove it immediately
- Spotlight will reindex from scratch (takes 30 minutes to several hours)
External Monitor Not Detected
Common issue on macOS Tahoe, especially with USB-C hubs.
Troubleshooting:
- Update to macOS 26.1 (fixed many monitor detection bugs)
- Try different USB-C ports on your Mac
- Connect monitor directly to Mac, bypassing hub
- Restart Mac with monitor connected
- Reset NVRAM: Shut down, then hold Option+Command+P+R during startup until you hear the second chime
If the monitor still isn't detected, check cable quality. Cheap USB-C cables often lack DisplayPort Alt Mode support.
WiFi Connection Dropping
Quick Fixes:
- Turn WiFi off and on (click WiFi icon in menu bar)
- Forget the network and reconnect: System Settings → Network → WiFi → Details → Forget This Network
- Renew DHCP lease: System Settings → Network → WiFi → Details → TCP/IP → Renew DHCP Lease
- Reset network settings: Delete
/Library/Preferences/SystemConfiguration/com.apple.airport.preferences.plist(requires admin password and restart)
Persistent Issues:
- Update router firmware
- Change WiFi channel (2.4 GHz works better through walls; 5 GHz is faster but shorter range)
- Disable Bluetooth (rare interference with WiFi on 2.4 GHz)
Frequently Asked Questions
Do I need to install antivirus software on macOS Tahoe?
For most users, no. macOS has built-in protections:
- XProtect: Apple's malware detection system, updated automatically
- Gatekeeper: Blocks unsigned apps from unknown developers
- Malware Removal Tool: Automatically removes known malware
Third-party antivirus often causes more problems than it solves, slowing performance and interfering with system operations. Practice good security hygiene instead: don't download software from untrusted sources, keep macOS updated, and use strong unique passwords.
Exception: If you frequently download files from sketchy sources or open email attachments from unknown senders, consider Malwarebytes (on-demand scanner, not always-on protection).
Should I enable FileVault if I use a desktop Mac that never leaves my house?
Yes, unless you live alone and have zero concern about physical access to your Mac. FileVault protects against:
- Theft during home burglaries
- Unauthorized access by repair technicians
- Data recovery if you sell or dispose of the Mac
- Protection if someone boots your Mac from an external drive
The performance impact is negligible on modern Macs (especially Apple Silicon). Enable it.
How do I transfer data from my Windows PC to my new Mac?
Option 1: Migration Assistant (Windows version)
- Download Migration Assistant for Windows from Apple's website
- Run it on your Windows PC while both computers are on the same network
- Open Migration Assistant on your Mac (Applications → Utilities)
- Follow prompts to wirelessly transfer files, documents, and some settings
Option 2: Manual Transfer
- Copy files to external drive or cloud storage (Google Drive, Dropbox)
- Download to Mac
- Manually install Mac versions of your Windows applications
Migration Assistant doesn't transfer applications (you need Mac versions) but handles documents, photos, music, and browser bookmarks.
Can I use my Windows keyboard and mouse with macOS?
Yes, but the Windows key becomes the Command key, and Alt becomes Option. This can be confusing when using keyboard shortcuts.
Remap keys: System Settings → Keyboard → Keyboard Shortcuts → Modifier Keys. You can swap Command and Control to match Windows muscle memory (Ctrl+C for copy instead of Cmd+C).
Mouse: Works natively but scroll direction is reversed. Disable "Natural scrolling" in System Settings → Trackpad if you prefer Windows-style scrolling.
Better Option: Consider a Mac-specific keyboard or universal keyboards like Logitech MX Keys that support Mac layout.
What's the difference between closing a window and quitting an app?
Clicking the red X button closes the window but doesn't quit the app. The app remains running (you'll see a dot under its Dock icon).
To fully quit: Press Cmd+Q or right-click the Dock icon and select Quit.
Why this matters: Running apps consume RAM and may use CPU in the background. If you're done with an app, quit it completely rather than just closing windows.
Exception: Frequently used apps like Mail, Messages, or Spotify can stay running for quick access.
Should I shut down my Mac every night or use Sleep mode?
Sleep mode for most scenarios. Modern Macs are designed to sleep when not in use:
- Nearly instant wake-up
- Minimal battery drain (under 5% overnight on MacBooks)
- Background tasks can complete while sleeping (Time Machine backups, iCloud sync)
Shut down when:
- You won't use the Mac for several days
- Troubleshooting persistent issues (restart can resolve software glitches)
- Performing system updates that require restart
Daily shutdowns aren't necessary and actually reduce productivity by adding startup time each morning.
How do I uninstall applications completely?
Simple method: Drag the app from Applications folder to Trash, empty Trash.
Problem: This leaves preference files, caches, and support files in Library folders.
Complete removal:
- Use the app's built-in uninstaller if provided (often in the DMG file)
- Or use a third-party uninstaller app:
- AppCleaner (free): Drag app to AppCleaner, it finds and removes all associated files
- CleanMyMac X ($40): Commercial solution with additional maintenance tools
For most apps, simple deletion is sufficient. Only use complete removal for large apps like Adobe Creative Suite or when troubleshooting.
What's the best way to take screenshots on macOS Tahoe?
Built-in Screenshot Tool (Shift+Cmd+5):
- Capture entire screen
- Capture selected window
- Capture selected portion
- Record screen video
- Set timer delay
- Choose save location
Quick shortcuts:
- Shift+Cmd+3: Capture entire screen immediately
- Shift+Cmd+4: Capture selected portion (drag to select area)
- Shift+Cmd+4, then Space: Capture selected window
Screenshots save to Desktop by default. Change location in Screenshot tool options (Shift+Cmd+5 → Options → Save to).
How do I access hidden files and folders?
In Finder: Press Shift+Cmd+. (period) to toggle hidden file visibility.
Hidden files appear dimmed. Press the shortcut again to hide them.
Permanently show hidden files: Open Terminal and run:
defaults write com.apple.finder AppleShowAllFiles YES
killall Finder
Most users should keep hidden files hidden to avoid accidentally modifying system files. Toggle visibility only when you need access to Library folders or hidden configuration files.
Is it safe to install apps from outside the Mac App Store?
Yes, if you download from the developer's official website. Many professional apps aren't available in the Mac App Store due to Apple's restrictions.
Safe sources:
- Developer's official website (e.g., google.com/chrome)
- Established download repositories (MacUpdate, but verify it redirects to official sources)
- GitHub releases from verified developers
Unsafe sources:
- Torrent sites
- Random download portals
- Links in unsolicited emails
First launch: macOS will warn "App is from an unidentified developer." Open System Settings → Privacy & Security, scroll down, and click "Open Anyway" to approve the app.
Never disable Gatekeeper system-wide. Approve apps individually.
How much free storage space should I maintain?
Minimum: 15% of total drive capacity Recommended: 20-25% for optimal performance
Why this matters:
- macOS uses free space for virtual memory (swap files)
- Time Machine local snapshots store temporary backups
- System updates need several GB of temporary space
- SSD performance degrades when over 80% full
Storage management: Click Apple menu → About This Mac → Storage → Manage to see:
- Store in iCloud (offload files to cloud storage)
- Optimize Storage (removes watched TV shows and movies)
- Empty Bin Automatically (deletes items over 30 days old)
- Reduce Clutter (reviews large and old files)
Can I run Windows on macOS Tahoe?
On Intel Macs: Yes, using Boot Camp (dual-boot Windows natively) or virtualization (Parallels Desktop, VMware Fusion, VirtualBox).
On Apple Silicon Macs (M1, M2, M3, M4): No native Boot Camp support. Windows on ARM can run via:
- Parallels Desktop ($100/year): Official Microsoft-supported solution for Windows 11 ARM on Apple Silicon
- UTM (Free): Open-source virtualization using QEMU
Performance Note: Windows on ARM has compatibility limitations. Many Windows apps are x86/x64 only and won't run on ARM. Check software compatibility before committing to this workflow.
Alternative: Use cloud-based Windows (Azure Virtual Desktop, Shadow PC) for occasional Windows app access without local installation.
Your Next Steps
Congratulations—you've completed the essential macOS Tahoe setup checklist for your first 24 hours. Your Mac is now configured with:
✅ Optimized privacy and security settings ✅ Personalized appearance and display preferences ✅ Efficient Finder and Desktop organization ✅ Essential productivity apps and workflows ✅ Backup strategy to protect your data ✅ Performance optimizations for smooth operation
Immediate Actions (Do Before Day 2)
- Verify Time Machine backup started if you connected an external drive
- Install one productivity enhancement: Rectangle for window management or Alfred/Raycast for advanced search
- Create your first Focus Mode for work or deep focus sessions
- Test your backup: Open Time Machine and verify files are being backed up
Week 1 Refinements
As you use your Mac over the next week:
- Monitor battery life and identify energy-hungry apps in Activity Monitor
- Refine your Dock by removing apps you don't actually use
- Explore Shortcuts for repetitive tasks you notice yourself doing
- Review Login Items again after installing more apps
- Adjust Focus Modes based on actual notification needs
Month 1 Deep Dive
After 30 days of real-world usage:
- Evaluate cloud storage strategy: Are you using iCloud Drive effectively, or should you consider alternatives?
- Review app subscriptions: Unsubscribe from trials you're not using
- Optimize Finder tags if you adopted them, or remove tag clutter if you didn't
- Audit accessibility permissions: System Settings → Privacy & Security → Accessibility should only show apps you actively use
- Consider advanced workflows: Keyboard Maestro, Hazel, or other automation tools for power users
Keep Learning
macOS Tahoe is deep—you'll discover new features and optimizations for months. Bookmark these resources:
- Apple Support (support.apple.com): Official documentation and troubleshooting
- MacRumors Forums: Active community for macOS discussions
- /r/macOS on Reddit: User tips, issue discussions, and workflow ideas
- Mac Power Users Podcast: Advanced productivity workflows
Final Thoughts
Your first 24 hours with macOS Tahoe establish the foundation for years of productivity. The time invested in this setup checklist pays dividends daily through:
- Better privacy: You've disabled tracking, enabled encryption, and controlled app permissions
- Improved performance: Reduced visual effects, optimized login items, and managed background processes
- Enhanced productivity: Customized Dock, Finder, and Focus Modes match your workflow
- Data protection: Time Machine and optional cloud backups safeguard against loss
macOS adapts to your habits over time, but starting with intentional configuration prevents bad defaults and frustrating behaviors.
Your Mac is ready. Now go build something amazing, write something meaningful, or simply enjoy the refined experience of macOS Tahoe done right from day one.
Welcome to the macOS ecosystem. Your journey is just beginning.