Apple Time Capsule End of Support: Complete Migration Guide 2026 - Move to NAS Before macOS 27 Drops AFP Support
Critical migration guide for Apple Time Capsule users. Learn why Time Capsule support ends with macOS 26 Tahoe, how to migrate your backups to Synology, QNAP, or other NAS solutions, and alternative backup strategies before macOS 27 removes AFP protocol support.
Apple Time Capsule, the beloved backup device that combined AirPort router functionality with Time Machine storage, is entering its final chapter. With macOS 27 set to remove AFP protocol support entirely, Time Capsule users face an urgent migration deadline. This comprehensive guide provides everything you need to safely migrate your backups to modern NAS solutions before your Time Capsule becomes incompatible with your Mac.
Executive Summary: The Time Capsule Sunset
Critical Timeline You Need to Know
Important Dates:
| Date | Event | Impact |
|---|---|---|
| April 2018 | Apple discontinues AirPort/Time Capsule line | No new devices |
| September 2025 | macOS Tahoe 26 released | Last version supporting Time Capsule |
| January 2026 | Now | Final migration window |
| Fall 2026 | macOS 27 expected release | AFP support removed |
| Post-macOS 27 | Time Capsule incompatible | Cannot create new backups |
What This Means:
- macOS Tahoe 26 is the final macOS version that supports Time Capsule
- macOS 27 will remove AFP (Apple Filing Protocol) support
- Time Capsule uses AFP exclusively - it cannot use SMB
- You have approximately 8-10 months to migrate
Bottom Line: If you use an Apple Time Capsule for Time Machine backups, you must migrate to a new backup solution before upgrading to macOS 27. Continuing to use Time Capsule after macOS 27 is not possible.
Why Apple Is Ending Time Capsule Support
Technical Reasons:
- AFP is Legacy Technology: Apple Filing Protocol dates back to 1986
- SMB is the Modern Standard: Windows compatibility and better performance
- Security Concerns: AFP lacks modern encryption standards
- Maintenance Burden: Supporting two network protocols is costly
Business Reasons:
- iCloud Focus: Apple pushes iCloud as primary backup solution
- Third-Party NAS Ecosystem: Mature alternatives exist
- Hardware Discontinuation: No new Time Capsules since 2018
- Simplification: Reducing legacy technology support
Understanding Your Current Backup Situation
Time Capsule Inventory Check
Before migrating, assess your current Time Capsule setup:
Check Your Time Capsule Model:
| Model | Release Year | Max Storage | Identifier |
|---|---|---|---|
| 1st Gen | 2008 | 1TB | A1254 |
| 2nd Gen | 2009 | 2TB | A1302 |
| 3rd Gen | 2011 | 3TB | A1355 |
| 4th Gen | 2013 | 2TB | A1409 |
| 5th Gen | 2013 | 3TB | A1470 |
Verify Current Backup Status:
- Open System Settings > Time Machine
- Check backup destination shows your Time Capsule
- Note the backup size and date of last backup
- Review backup history for completeness
Check Time Capsule Health:
- Open AirPort Utility app
- Select your Time Capsule
- Check for:
- Disk health status
- Available storage space
- Connection quality
- Firmware version
Common Time Capsule Issues in macOS Tahoe
Recent forum discussions reveal specific issues affecting Time Capsule users:
Issue 1: Non-ASCII Character Backup Failures
Problem: Time Machine backups fail if your Mac's computer name, backup folder name, or file paths contain non-ASCII characters (accented letters, Chinese/Japanese/Korean characters, special symbols).
Symptoms:
- "Backup failed" error messages
- Backups start but never complete
- Verification errors
Solution:
1. Open System Settings > General > About
2. Click on your Mac's name
3. Change to ASCII-only name (A-Z, 0-9, hyphens)
   - Bad: "陈明的MacBook" or "José's-MacBook"
   - Good: "Chen-Ming-MacBook" or "Jose-MacBook"
4. Rename Time Machine backup folder on Time Capsule
5. Start fresh backup
Issue 2: Sparse Bundle Corruption
Problem: Time Capsule backups use sparse bundle disk images that can become corrupted, especially after power outages or network interruptions.
Symptoms:
- "Backup verification failed" errors
- Unable to restore from backup
- Time Machine suggests starting new backup
Solution: Unfortunately, corrupted sparse bundles often require starting fresh. This is another reason to migrate to a more robust solution.
Issue 3: Slow Backup Speeds
Problem: Time Capsule's aging hardware and AFP protocol result in increasingly slow backup speeds compared to modern alternatives.
Typical Speed Comparison:
| Solution | Initial Backup (100GB) | Incremental (1GB) |
|---|---|---|
| Time Capsule | 8-12 hours | 15-30 minutes |
| Modern NAS (SMB) | 2-4 hours | 3-8 minutes |
| Direct USB SSD | 30-60 minutes | 1-2 minutes |
Migration Options: Choosing Your New Backup Solution
Option 1: Network Attached Storage (NAS)
Best For: Users who want similar functionality to Time Capsule
Popular NAS Options for Time Machine:
Synology DiskStation (Recommended)
| Model | Price | Drives | Best For |
|---|---|---|---|
| DS124 | $170 | 1 bay | Single user |
| DS224+ | $300 | 2 bay | Home/Small office |
| DS423+ | $500 | 4 bay | Large libraries |
| DS923+ | $600 | 4 bay | Power users |
Synology Advantages:
- Excellent macOS integration
- Native Time Machine support via SMB
- Synology Drive for iCloud-like sync
- Hybrid backup to cloud services
- Mobile apps for remote access
- Regular security updates
QNAP NAS
| Model | Price | Drives | Best For |
|---|---|---|---|
| TS-233 | $180 | 2 bay | Budget option |
| TS-464 | $450 | 4 bay | Creative pros |
| TS-673A | $750 | 6 bay | Enterprise |
QNAP Advantages:
- Often better hardware specs per dollar
- HDMI output for media playback
- Extensive app ecosystem
- PCIe expansion on higher models
TrueNAS (DIY Option)
For technically inclined users:
- Free, open-source NAS software
- Run on existing hardware or dedicated mini PC
- ZFS file system for data integrity
- Unlimited scalability
Cost: Hardware only (~$300-500 for capable mini PC)
Option 2: External Drive with Time Machine
Best For: Users who want simplicity without network complexity
Recommended External Drives:
| Type | Capacity | Speed | Price | Best For |
|---|---|---|---|---|
| USB-C SSD | 1TB | 1000 MB/s | $80-120 | Portability |
| USB-C SSD | 2TB | 1000 MB/s | $150-200 | Most users |
| Thunderbolt SSD | 4TB | 2800 MB/s | $400-500 | Large libraries |
| USB HDD | 4TB | 150 MB/s | $80-100 | Budget backup |
Advantages:
- Fastest backup speeds
- No network configuration
- Most reliable (direct connection)
- Simplest setup
Disadvantages:
- Must physically connect for backups
- No wireless backup capability
- Only one Mac per drive (without partitioning)
Option 3: iCloud + Local Backup Hybrid
Best For: Users invested in Apple ecosystem
Setup:
- Enable iCloud Drive with Desktop & Documents Folders
- Use iCloud Photos for photo library
- Use external drive for full Time Machine backup
Monthly Costs:
| Storage | Price | Best For |
|---|---|---|
| 50GB | $0.99 | Light users |
| 200GB | $2.99 | Most users |
| 2TB | $9.99 | Power users |
| 12TB | $59.99 | Professionals |
Advantages:
- Automatic cloud backup
- Access from any device
- No hardware to maintain
- Apple-integrated experience
Disadvantages:
- Ongoing monthly cost
- Slower than local backup
- Requires internet connection
- Privacy concerns for some users
Option 4: Third-Party Backup Services
Best For: Users wanting offsite backup without hardware management
Popular Services:
| Service | Type | Price | Best For |
|---|---|---|---|
| Backblaze | Cloud backup | $9/month | Simple offsite |
| Backblaze B2 | Cloud storage | $6/TB/month | Advanced users |
| Arq + Cloud | Backup software | $50 + cloud costs | Maximum control |
| Carbon Copy Cloner | Clone software | $50 one-time | Bootable backups |
Step-by-Step Migration Guide
Preparation Phase
Step 1: Document Current Backup
Before making any changes, document your current setup:
Information to record:
- Time Capsule name: _____________
- Time Capsule IP: _____________
- Current backup size: _____________
- Last successful backup: _____________
- Number of backups in history: _____________
- Mac's computer name: _____________
Step 2: Verify Backup Integrity
Ensure your current Time Capsule backup is healthy:
- Open System Settings > Time Machine
- Click Options... (gear icon)
- Select Verify Backups
- Wait for verification to complete (may take hours)
If verification fails, your backup may be corrupted. Note this for later decision-making.
Step 3: Create Local Emergency Backup
Before migrating, create a safety backup:
- Connect external USB drive to Mac
- Open System Settings > Time Machine
- Click + to add backup destination
- Select external drive
- Complete full backup to external drive
This ensures you have a known-good backup regardless of migration outcome.
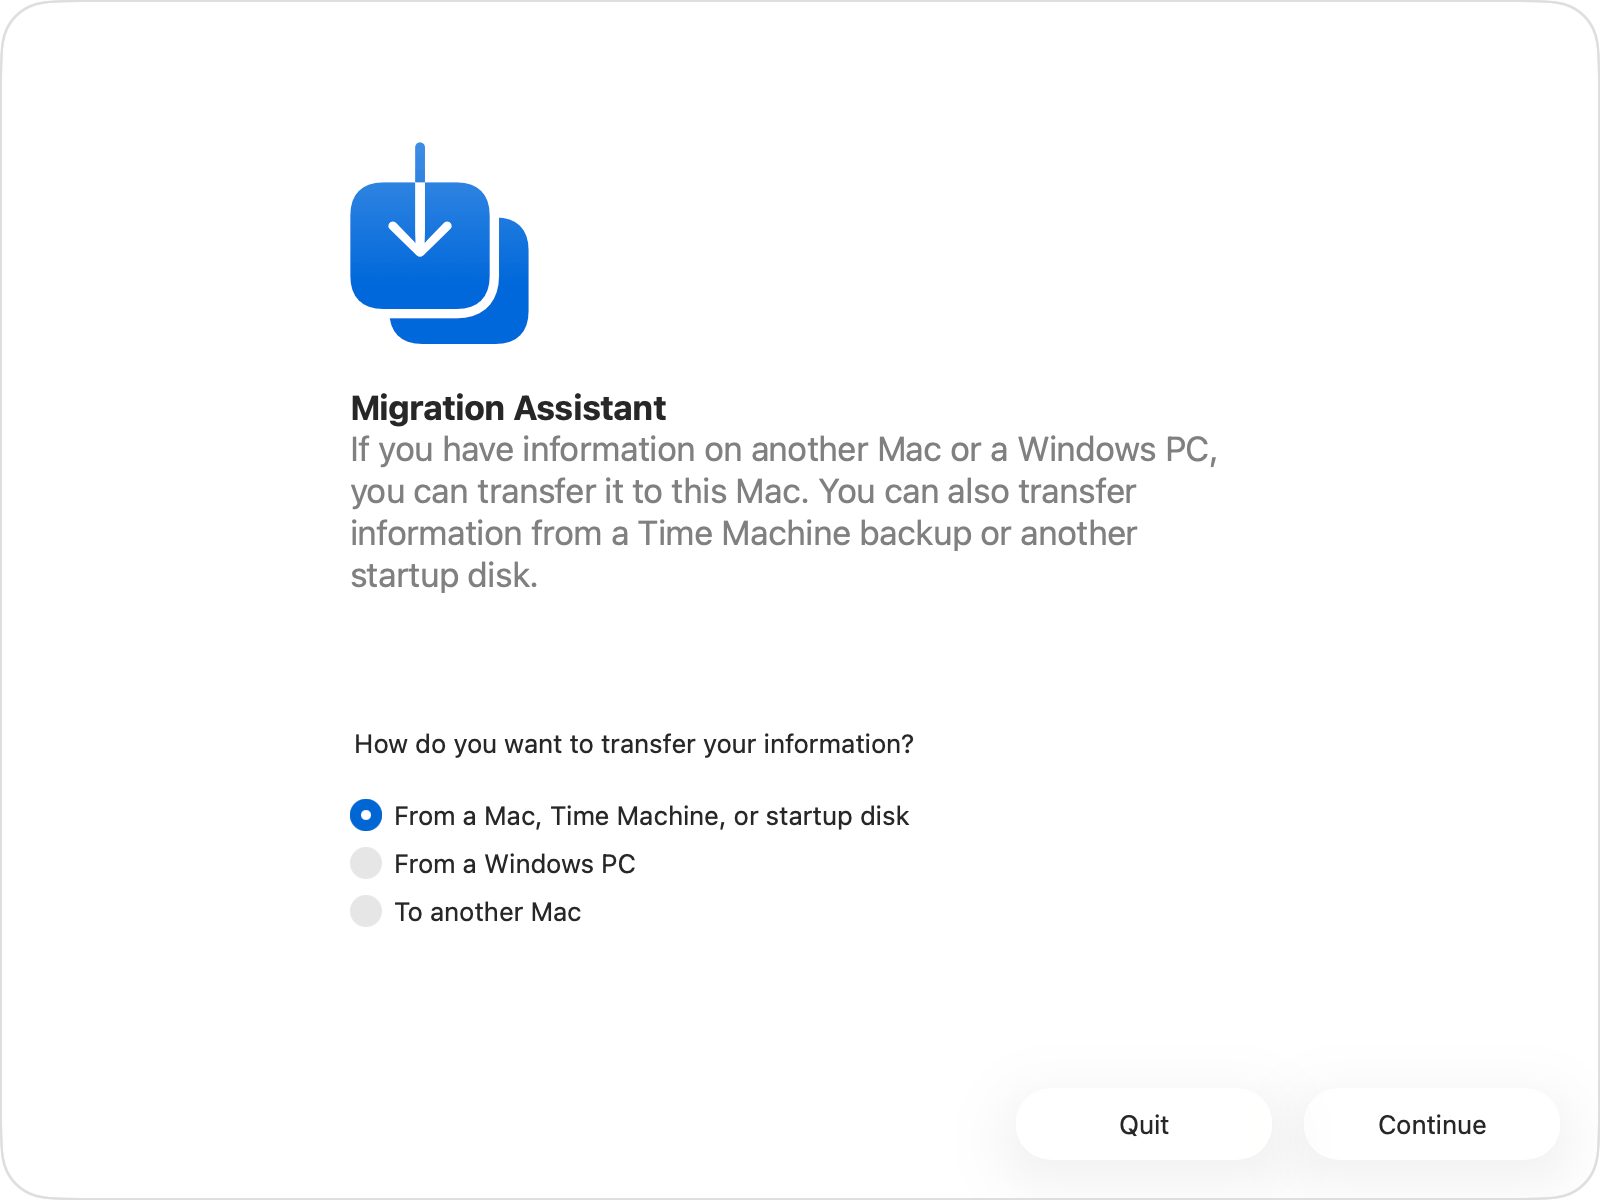
NAS Migration Process
If Migrating to Synology NAS:
Phase 1: NAS Setup (30-60 minutes)
-
Physical Setup
- Unbox Synology NAS
- Install hard drives in bays
- Connect power and Ethernet
- Power on device
-
Initial Configuration
- Navigate to find.synology.com
- Follow setup wizard
- Create admin account
- Configure storage pool and volume
-
Enable Time Machine Support
Steps in DSM: 1. Open Control Panel 2. Go to File Services 3. Click SMB tab 4. Enable SMB service 5. Click Advanced Settings 6. Enable "Enable Bonjour Time Machine broadcast via SMB" 7. Click "Set Time Machine Folders" 8. Select or create shared folder for backups 9. Set quota if desired (recommended) 10. Click OK -
Configure Backup User
Recommended security setup:
1. Open Control Panel > Users & Groups
2. Create new user "timemachine"
3. Set strong password
4. Assign permissions only to Time Machine folder
5. Deny access to other shared folders
Phase 2: Connect Mac to NAS (15 minutes)
-
Add NAS as Time Machine Destination
Steps: 1. Open System Settings > Time Machine 2. Click "+" to add backup destination 3. Your Synology should appear in the list 4. Select it and click "Set Up Disk..." 5. Enter credentials (timemachine user) 6. Click "Use Disk" -
Configure Backup Settings
- Set backup frequency (hourly recommended)
- Configure backup exclusions if needed
- Enable encryption (strongly recommended)
-
Start Initial Backup
- Click "Back Up Now"
- Initial backup may take many hours
- Keep Mac awake and connected
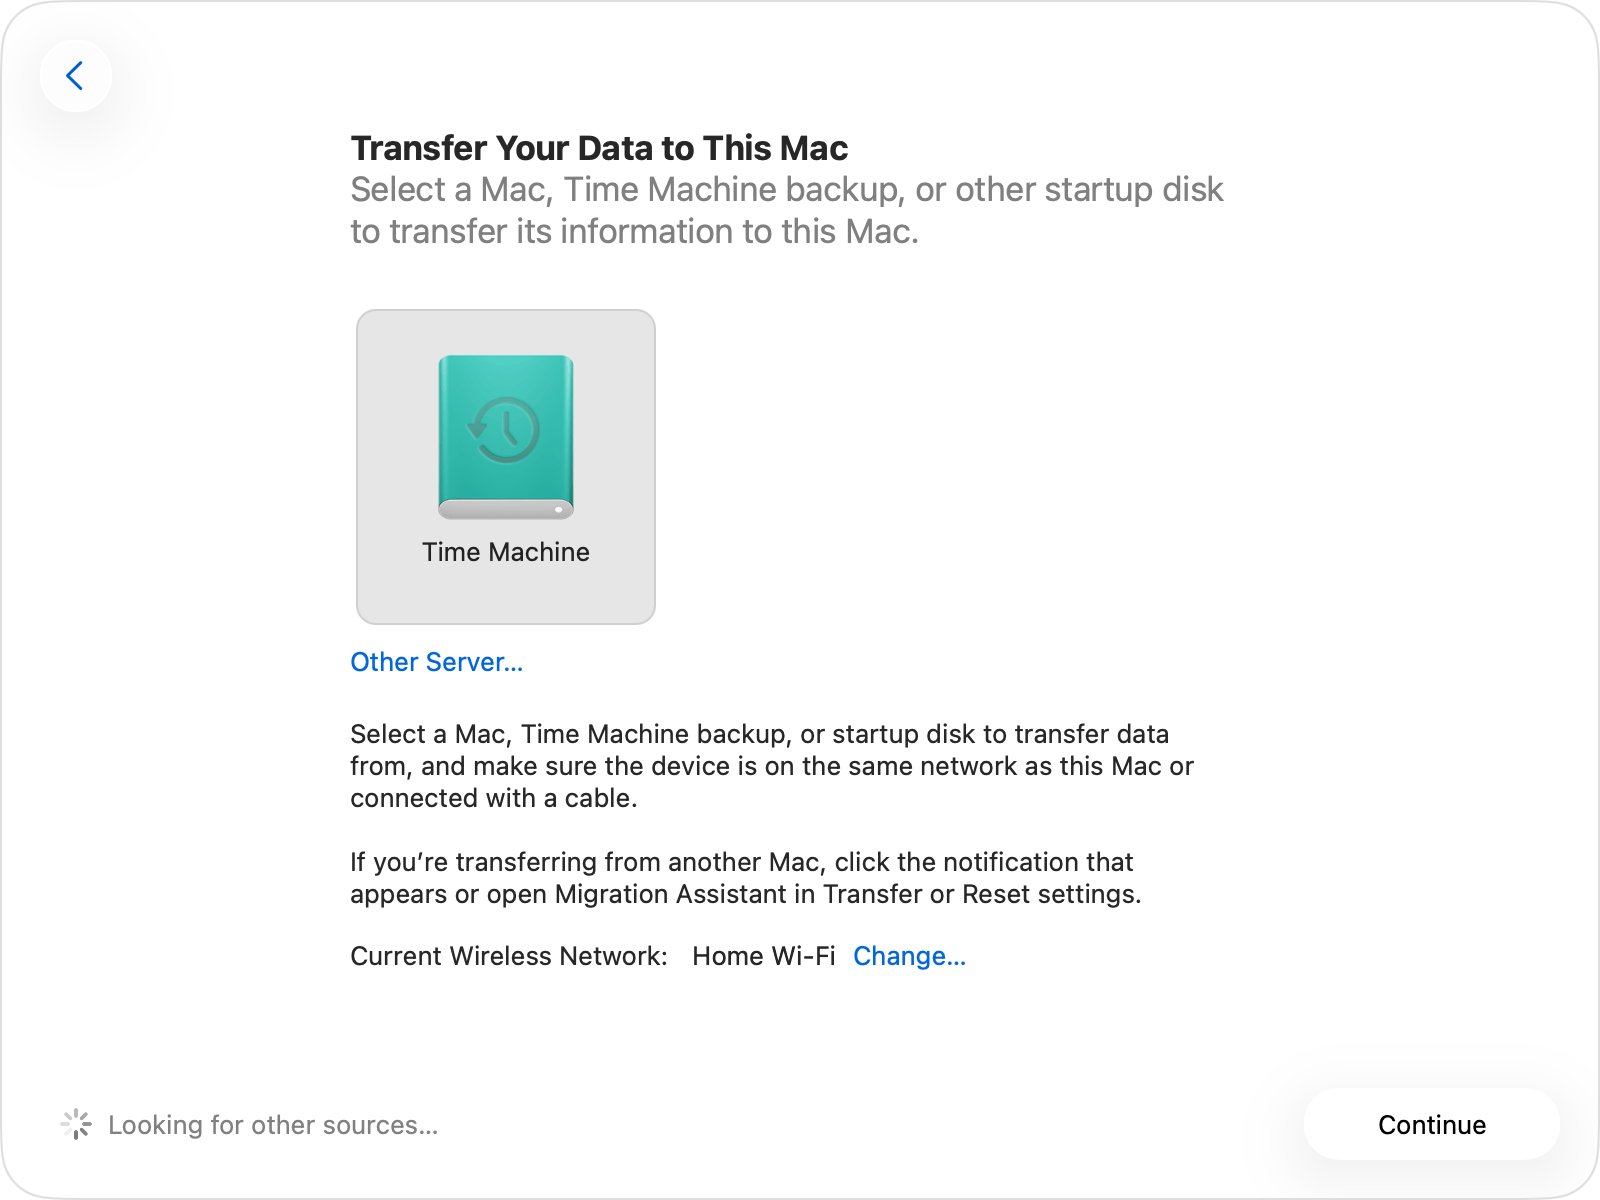
Phase 3: Verify and Decommission Time Capsule
-
Verify New Backup Works
- Wait for initial backup to complete
- Check backup appears in Time Machine browser
- Test restore of a single file
-
Monitor Subsequent Backups
- Let system run for 1 week
- Verify incremental backups succeeding
- Check backup size is growing appropriately
-
Decommission Time Capsule
Only after confirming new backup works:
1. Open System Settings > Time Machine
2. Select Time Capsule from destinations
3. Click "-" to remove
4. Confirm removal
5. Optionally: erase Time Capsule data
6. Repurpose or recycle Time Capsule hardware
External Drive Migration Process
If Using External Drive:
Phase 1: Drive Preparation (10 minutes)
-
Connect Drive
- Connect external drive via USB-C or Thunderbolt
- Wait for drive to mount
-
Format for Time Machine
Steps in Disk Utility: 1. Open Disk Utility 2. Select external drive (entire drive, not partition) 3. Click "Erase" 4. Name: "Time Machine Backup" 5. Format: APFS (recommended) or Mac OS Extended (Journaled) 6. Scheme: GUID Partition Map 7. Click "Erase" -
Enable Encryption (Optional but Recommended)
- Right-click drive in Finder
- Select "Encrypt..."
- Choose strong password
- Store password securely
Phase 2: Configure Time Machine (5 minutes)
-
Add as Backup Destination
Steps: 1. Open System Settings > Time Machine 2. Click "+" to add backup destination 3. Select external drive 4. Check "Encrypt Backups" if not already encrypted 5. Click "Use Disk" -
Start Backup
- Click "Back Up Now"
- Keep drive connected until complete
Migration Troubleshooting
Common Migration Issues
Issue 1: NAS Not Appearing in Time Machine
Symptoms:
- Synology/QNAP not visible when adding backup destination
- "No disks available" message
Solutions:
1. Verify NAS and Mac on same network
2. Check Bonjour/mDNS enabled on NAS
3. Check SMB service running on NAS
4. Verify firewall not blocking (ports 445, 139, 5353)
5. Try manual connection:
   - In Finder, press ⌘+K
   - Enter: smb://NAS-IP-ADDRESS
   - Connect with credentials
   - Then try Time Machine setup again
Issue 2: Backup Fails with Permission Error
Symptoms:
- "The backup disk could not be accessed"
- "Operation not permitted"
Solutions:
1. Verify user has write permission to share
2. Check quota not exceeded on NAS
3. Verify no special characters in folder name
4. Try creating new shared folder
5. Check NAS logs for specific errors
Issue 3: Extremely Slow Initial Backup
Symptoms:
- Backup progress shows days remaining
- Transfer rate below 10 MB/s
Solutions:
1. Use Ethernet instead of Wi-Fi for initial backup
2. Temporarily disable other network traffic
3. Check NAS isn't under heavy load
4. Verify gigabit connection (not 100 Mbps)
5. Consider initial backup via direct USB to NAS
Issue 4: Time Capsule Backup Won't Transfer
Note: You cannot directly transfer Time Capsule backups to a new destination. Apple does not support migrating sparse bundle backups between different storage systems.
What This Means:
- You must start fresh with new backup destination
- Old Time Capsule backups remain accessible on Time Capsule
- Consider keeping Time Capsule powered on (read-only) until comfortable with new backups
Data Recovery from Time Capsule
Before Decommissioning:
If you need to restore files from Time Capsule backup after setting up new destination:
-
Restore from Time Capsule (while still accessible)
Steps: 1. Click Time Machine icon in menu bar 2. Select "Browse Time Machine Backups" 3. Choose Time Capsule from source selector 4. Navigate to files you need 5. Click "Restore" -
Keep Time Capsule Accessible
- Consider keeping Time Capsule running as read-only archive
- Allows access to old backup history
- Can mount via AFP until you upgrade to macOS 27
Alternative Backup Strategies for the Post-Time Capsule Era
The 3-2-1 Backup Strategy
The Rule:
- 3 copies of your data
- 2 different storage types
- 1 offsite copy
Implementation for Mac Users:
Recommended Setup:
Copy 1: Original data on Mac
Copy 2: Time Machine to NAS or external drive
Copy 3: Cloud backup (iCloud, Backblaze, or Arq)

This protects against:
- Hardware failure (local backups)
- Theft/fire/disaster (offsite cloud)
- Ransomware (versioned backups)
- Accidental deletion (Time Machine history)
Recommended Backup Configurations by User Type
Home User (Simple Setup)
Budget: $150-300
- External USB SSD (2TB): $150
- iCloud 200GB: $2.99/month

Backup Flow:
- Time Machine → External SSD (weekly connect)
- Desktop/Documents → iCloud (continuous)
- Photos → iCloud Photos (continuous)
Professional User (Balanced Setup)
Budget: $400-600
- Synology DS224+ NAS: $300
- 2x 4TB drives: $200
- Backblaze: $9/month

Backup Flow:
- Time Machine → NAS (hourly, automatic)
- Full system → Backblaze (continuous)
- Working files → iCloud/Dropbox (continuous)
Creative Professional (Maximum Protection)
Budget: $800-1200
- Synology DS423+ NAS: $500
- 4x 4TB drives: $400
- Backblaze B2: Variable
- Carbon Copy Cloner: $50

Backup Flow:
- Time Machine → NAS (hourly)
- Bootable clone → External SSD (weekly)
- Media archive → B2 cloud (nightly)
- Active projects → Creative Cloud/Dropbox
Frequently Asked Questions
General Questions
Q: How long do I have before Time Capsule stops working?
A: Time Capsule will continue working with macOS Tahoe 26 indefinitely. However, once you upgrade to macOS 27 (expected Fall 2026), Time Capsule backups will no longer function due to AFP removal.
Q: Can I still use Time Capsule as a router?
A: Yes, Time Capsule's router functionality uses standard Wi-Fi protocols and will continue working. However, Apple no longer updates the firmware, so security vulnerabilities won't be patched.
Q: Why can't Apple just add SMB support to Time Capsule?
A: Time Capsule hardware was discontinued in 2018 and Apple has stopped all firmware development. Adding SMB support would require significant engineering investment in end-of-life hardware.
Q: Can I extract the hard drive from Time Capsule and use it elsewhere?
A: Technically yes, but the drives are formatted with Apple's proprietary sparse bundle format. You would need to reformat the drive to use it with a new NAS, losing all existing backups.
Migration Questions
Q: Can I transfer my Time Capsule backup history to a new NAS?
A: No, Time Machine backups cannot be migrated between storage systems. You must start fresh with a new backup destination.
Q: How long should I keep Time Capsule running after migrating?
A: We recommend keeping Time Capsule accessible for at least 1-2 months after establishing reliable new backups. This gives you access to historical versions if needed.
Q: Should I wait until macOS 27 to migrate?
A: No, migrate now while Time Capsule is still functional. If you wait until macOS 27, you'll lose access to Time Capsule backups entirely.
NAS Questions
Q: How does NAS compare to Time Capsule for Time Machine?
A: Modern NAS devices offer significant advantages:
- Faster backup speeds (Gigabit Ethernet, link aggregation)
- More storage capacity (4+ drive bays)
- Better reliability (RAID protection)
- Additional features (file sharing, media streaming, cloud sync)
- Ongoing updates and support
Q: Do I need special NAS models for Time Machine?
A: Most modern NAS devices from Synology, QNAP, and others support Time Machine via SMB. Look for "Time Machine support" in specifications.
Q: How much storage do I need on my NAS?
A: General rule: 2-3x your Mac's total storage. For example:
- 256GB Mac → 512GB-1TB NAS storage
- 1TB Mac → 2-3TB NAS storage
- 2TB Mac → 4-6TB NAS storage
This allows for multiple backup versions in Time Machine history.
Conclusion: Taking Action Before It's Too Late
The end of Time Capsule support represents the close of an era for Apple backup solutions. While Time Capsule served millions of users reliably for over a decade, modern alternatives offer superior performance, reliability, and features.
Action Plan Summary:
Immediate (This Week):
- Verify current Time Capsule backup is healthy
- Create emergency backup to external drive
- Decide on replacement solution
Short-Term (This Month):
- Purchase replacement backup solution
- Configure new backup destination
- Complete initial backup to new destination
Medium-Term (Before macOS 27):
- Verify new backup system working reliably
- Consider keeping Time Capsule as read-only archive
- Plan Time Capsule decommissioning
Key Takeaways:
- macOS 27 will remove AFP support, making Time Capsule incompatible
- Migration cannot transfer existing backup history
- Modern NAS solutions offer significant improvements over Time Capsule
- Start migration now while Time Capsule is still functional
- Implement 3-2-1 backup strategy for comprehensive protection
Don't wait until the last minute. Begin your migration today to ensure continuous backup protection for your Mac.
Need help with your new backup setup? Check our Time Machine Complete Troubleshooting Guide for setup tips, or visit our External Storage & Backup Guide for comprehensive storage recommendations.