createinstallmedia Complete Guide 2025: Make macOS Bootable USB Installer (Tahoe, Sequoia, Sonoma)
Step-by-step guide to creating bootable macOS USB installers using Apple's createinstallmedia command. Covers macOS Tahoe 26, Sequoia 15, Sonoma 14, and older versions. Includes USB formatting, troubleshooting common errors, and our free command generator tool.
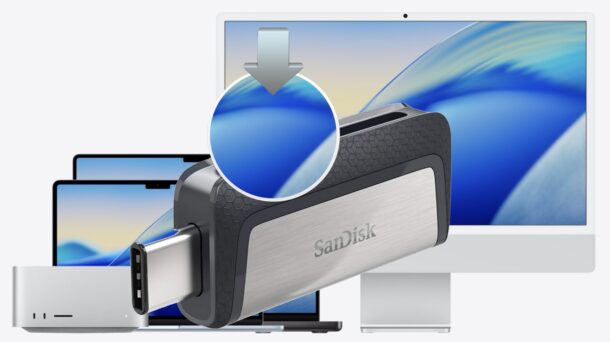
Creating a bootable macOS USB installer is essential for clean installations, system recovery, troubleshooting startup issues, or setting up multiple Mac computers. This comprehensive guide covers Apple's official createinstallmedia command-line tool, supporting all macOS versions from High Sierra (10.13) to the latest Tahoe (26).
Quick Summary
What you need: A 16GB+ USB flash drive (32GB for Tahoe), a downloaded macOS installer from App Store, and Terminal access.
Time required: 5-15 minutes depending on USB drive speed.
Difficulty: Beginner-friendly with copy-paste commands.
Want to skip the manual work? Use our createinstallmedia Command Generator to instantly generate the correct command for any macOS version.
Why Create a Bootable macOS USB Installer?
Before diving into the technical steps, let's understand when and why you'd need a bootable USB installer:
Common Use Cases
| Scenario | Why USB Installer Helps |
|---|---|
| Clean Installation | Wipe your Mac completely and start fresh without leftover files or settings |
| Multiple Mac Setup | Install macOS on several Macs without downloading the installer repeatedly |
| System Recovery | Boot and repair a Mac that won't start normally |
| Downgrade macOS | Roll back to a previous macOS version if the new one causes problems |
| Offline Installation | Install macOS without internet connection (useful in areas with slow/no WiFi) |
| IT Administration | Deploy standardized macOS installations across an organization |
Why Not Just Use Internet Recovery?
While Internet Recovery (Command + Option + R at startup) works, a USB installer offers significant advantages:
- Speed: USB installation is 2-5x faster than downloading over the internet
- Reliability: No dependency on network conditions or Apple's servers
- Flexibility: Choose exactly which macOS version to install
- Troubleshooting: Boot into a working macOS environment to repair drives
Prerequisites: What You Need
1. USB Flash Drive
Minimum Size by macOS Version:
| macOS Version | Minimum USB Size | Recommended Size |
|---|---|---|
| macOS Tahoe (26) | 16GB | 32GB |
| macOS Sequoia (15) | 16GB | 32GB |
| macOS Sonoma (14) | 16GB | 32GB |
| macOS Ventura (13) | 16GB | 16GB |
| macOS Monterey (12) | 16GB | 16GB |
| macOS Big Sur (11) | 16GB | 16GB |
| macOS Catalina (10.15) | 16GB | 16GB |
| macOS Mojave (10.14) | 16GB | 16GB |
| macOS High Sierra (10.13) | 8GB | 16GB |
Important: The USB drive will be completely erased during the process. Back up any important files first!
USB Drive Recommendations:
- Use USB 3.0 or higher for faster speeds
- SanDisk Ultra Flair, Samsung BAR Plus, or Kingston DataTraveler are reliable choices
- Avoid cheap no-name drives that may fail during the process
2. macOS Installer Application
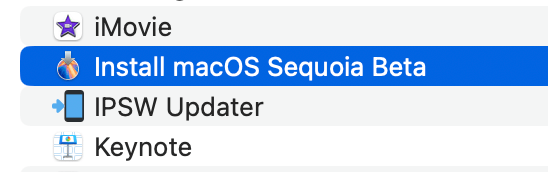
You need the full macOS installer app in your Applications folder. The installer is typically 12-16GB depending on the version.
3. Administrator Access
You'll need to enter your Mac's administrator password in Terminal.
Step 1: Download the macOS Installer
There are three ways to get the macOS installer:
Method A: Mac App Store (Recommended)
The simplest method for most users:
- Open the App Store on your Mac
- Search for the macOS version you want (e.g., "macOS Tahoe", "macOS Sequoia")
- Click Get or Download
- The installer will download to your Applications folder
Direct App Store Links:
Method B: Terminal Command (softwareupdate)
For users comfortable with Terminal, this method is reliable:
# For macOS Tahoe
softwareupdate --fetch-full-installer --full-installer-version 26

# For macOS Sequoia
softwareupdate --fetch-full-installer --full-installer-version 15

# For macOS Sonoma
softwareupdate --fetch-full-installer --full-installer-version 14.7

# For macOS Ventura
softwareupdate --fetch-full-installer --full-installer-version 13.7
The installer will download directly to /Applications/.
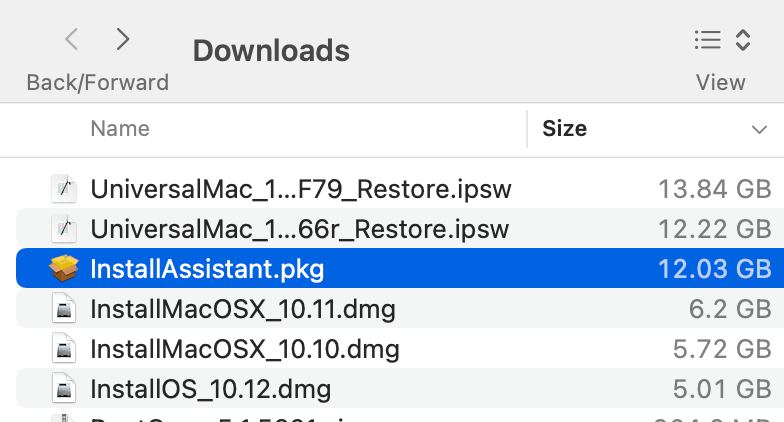
Method C: InstallAssistant.pkg (Direct Download)
For IT professionals or when other methods fail:
- Download the InstallAssistant.pkg from Apple's servers
- Double-click to install
- The installer app appears in Applications
Apple's Official Download Links:
- Visit Apple Support HT211683 for direct download links
Step 2: Format Your USB Drive
Before running createinstallmedia, you should format your USB drive with the correct settings. While createinstallmedia will reformat the drive automatically, pre-formatting ensures compatibility.
Using Disk Utility
- Connect your USB drive to your Mac
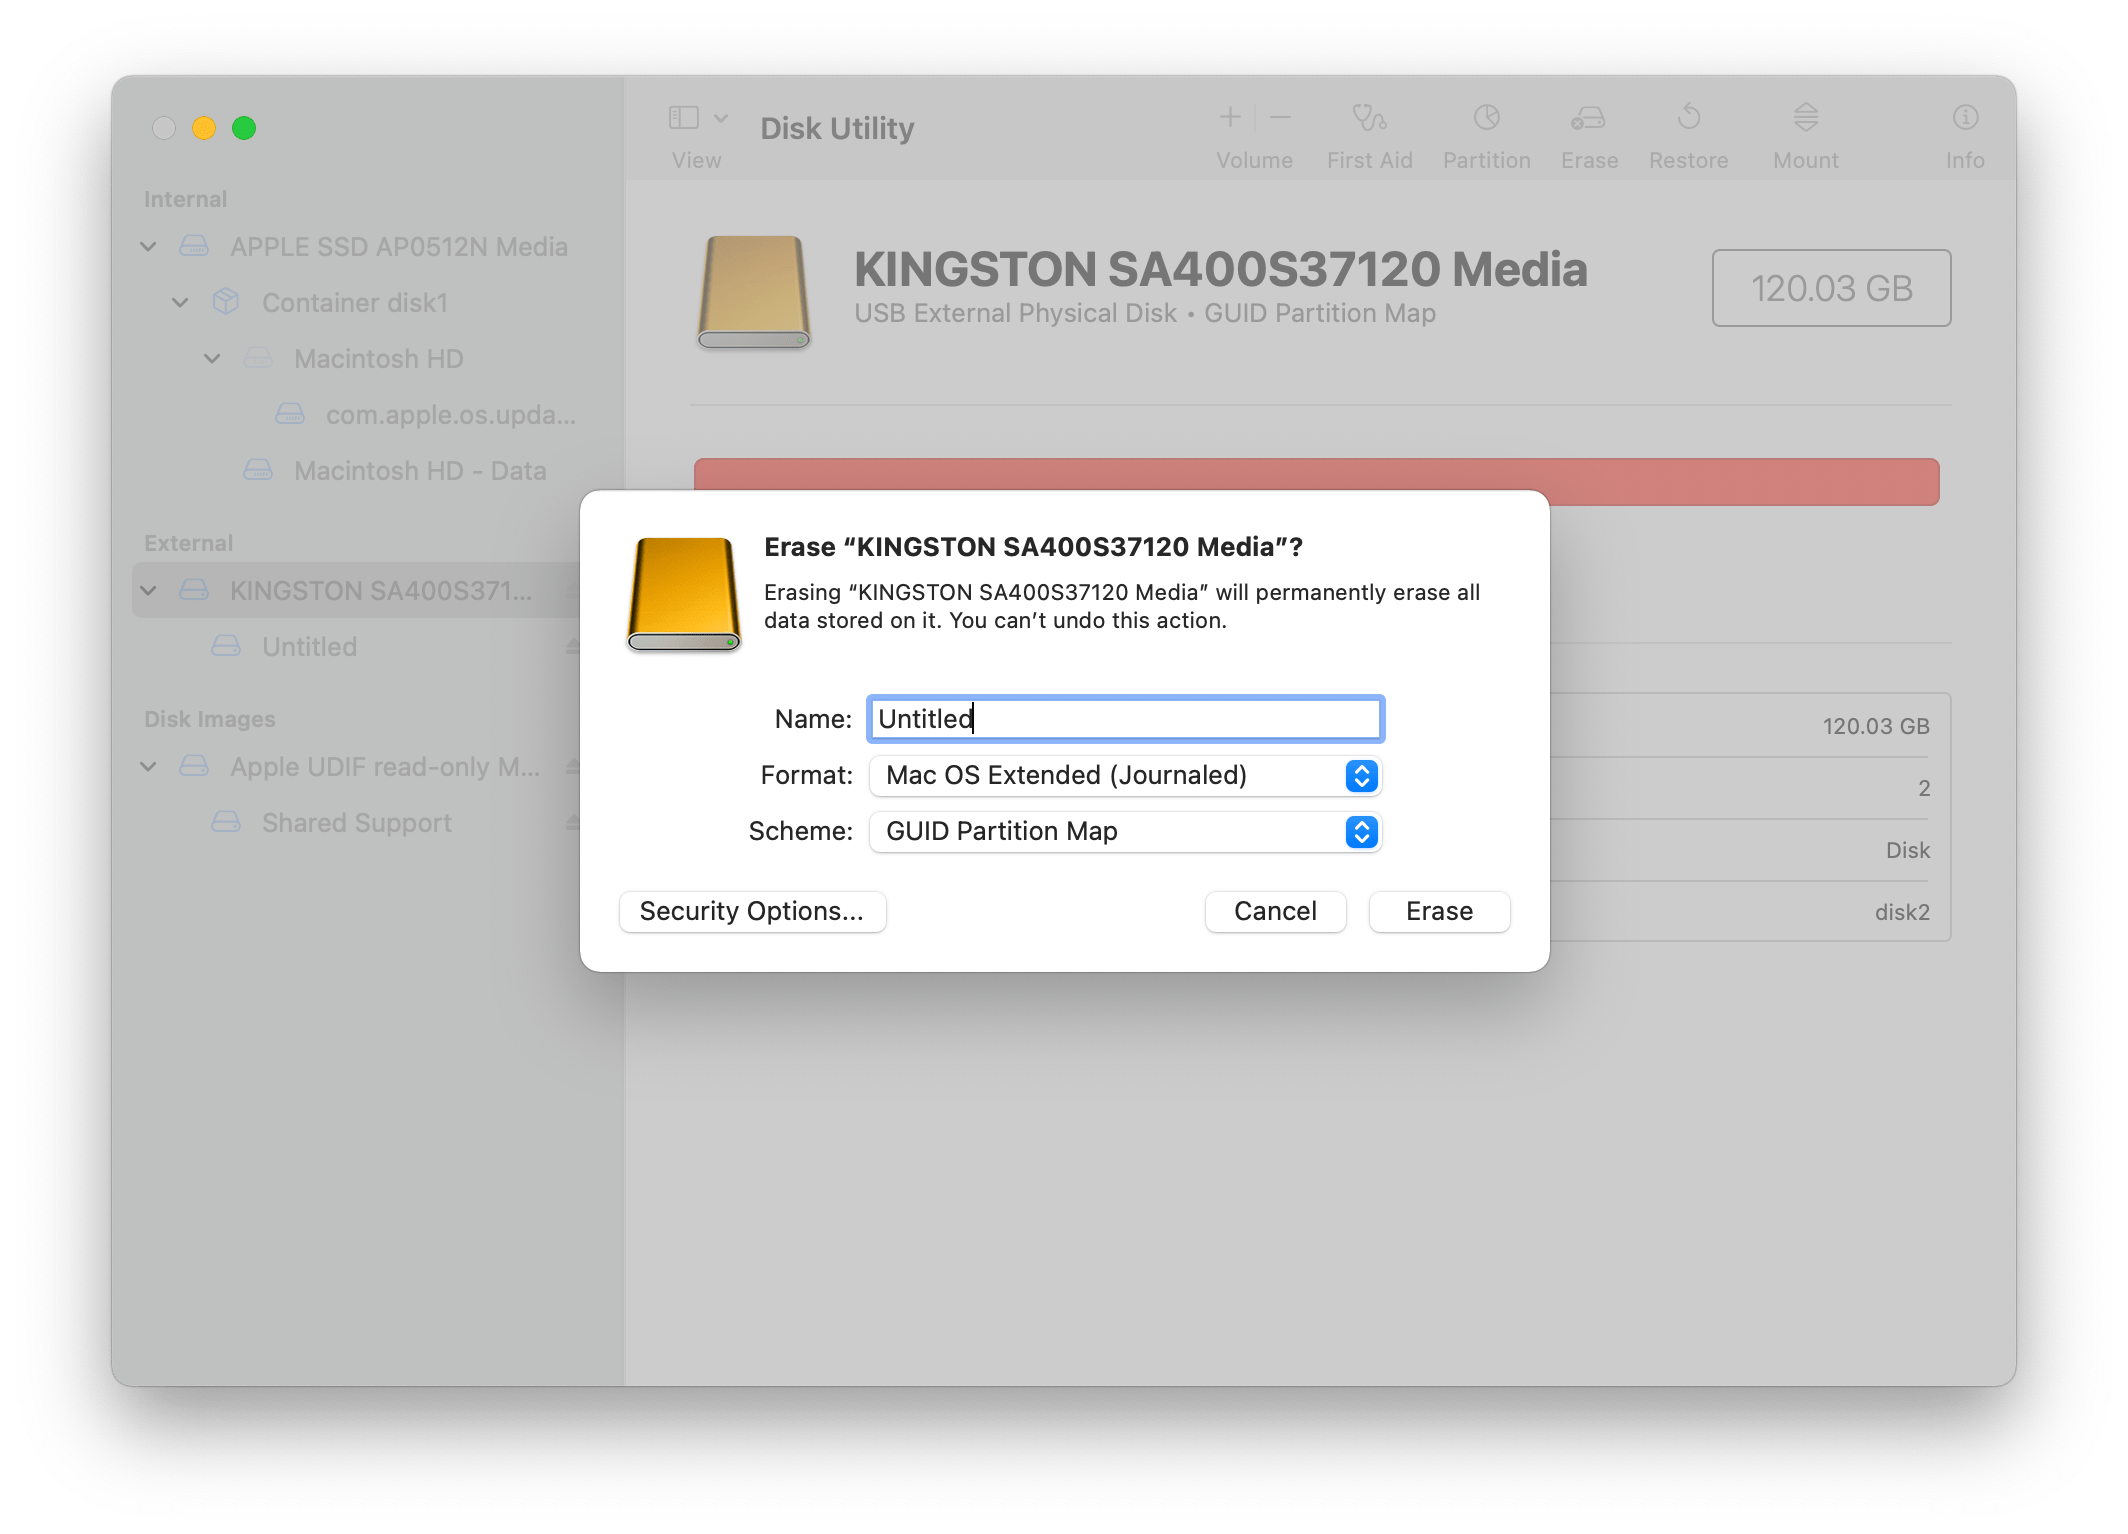
- Open Disk Utility (Applications > Utilities > Disk Utility)
- Select your USB drive in the sidebar (select the drive, not the volume)
- Click Erase in the toolbar
- Configure these settings:
- Name:
MyVolume(or any name you prefer) - Format:
Mac OS Extended (Journaled) - Scheme:
GUID Partition Map
- Name:
- Click Erase
Important Notes:
- Always select GUID Partition Map for the scheme
- The name
MyVolumeis used in the default createinstallmedia command - If you use a different name, you'll need to modify the command accordingly
Using Terminal (Alternative)
# List available disks to find your USB drive
diskutil list

# Erase and format (replace diskX with your USB drive identifier)
diskutil eraseDisk JHFS+ MyVolume GPT /dev/diskX
Warning: Double-check the disk identifier! Erasing the wrong disk will result in data loss.
Step 3: Run the createinstallmedia Command
Now for the main event—creating the bootable installer using Apple's createinstallmedia tool.
Open Terminal
- Press
Command + Spaceto open Spotlight - Type
Terminaland press Enter - Or navigate to Applications > Utilities > Terminal
Copy and Run the Command
Choose the command for your macOS version:
macOS Tahoe (26):
sudo /Applications/Install\ macOS\ Tahoe.app/Contents/Resources/createinstallmedia --volume /Volumes/MyVolume --nointeractionmacOS Sequoia (15):
sudo /Applications/Install\ macOS\ Sequoia.app/Contents/Resources/createinstallmedia --volume /Volumes/MyVolume --nointeractionmacOS Sonoma (14):
sudo /Applications/Install\ macOS\ Sonoma.app/Contents/Resources/createinstallmedia --volume /Volumes/MyVolume --nointeractionmacOS Ventura (13):
sudo /Applications/Install\ macOS\ Ventura.app/Contents/Resources/createinstallmedia --volume /Volumes/MyVolume --nointeractionmacOS Monterey (12):
sudo /Applications/Install\ macOS\ Monterey.app/Contents/Resources/createinstallmedia --volume /Volumes/MyVolume --nointeractionmacOS Big Sur (11):
sudo /Applications/Install\ macOS\ Big\ Sur.app/Contents/Resources/createinstallmedia --volume /Volumes/MyVolume --nointeractionmacOS Catalina (10.15):
sudo /Applications/Install\ macOS\ Catalina.app/Contents/Resources/createinstallmedia --volume /Volumes/MyVolume --nointeractionmacOS Mojave (10.14):
sudo /Applications/Install\ macOS\ Mojave.app/Contents/Resources/createinstallmedia --volume /Volumes/MyVolume --nointeractionmacOS High Sierra (10.13):
sudo /Applications/Install\ macOS\ High\ Sierra.app/Contents/Resources/createinstallmedia --volume /Volumes/MyVolume --nointeractionPro Tip: Use our createinstallmedia Command Generator to automatically generate the correct command with your custom USB drive name!
What the Command Options Mean
| Option | Purpose |
|---|---|
sudo | Run with administrator privileges |
/Applications/Install\ macOS\ [Version].app/... | Path to the createinstallmedia tool inside the installer |
--volume /Volumes/MyVolume | Target USB drive to use |
--nointeraction | Skip confirmation prompts (optional but recommended) |
During the Process
- Enter your password: Type your Mac administrator password (characters won't display) and press Enter
- Wait for completion: The process takes 5-15 minutes depending on your USB drive speed

Terminal Output You'll See:
Erasing disk: 0%... 10%... 20%... 30%... 100%
Copying to disk: 0%... 10%... 20%... 30%... 40%... 50%... 60%... 70%... 80%... 90%... 100%
Making disk bootable...
Copying boot files...
Install media now available at "/Volumes/Install macOS Tahoe"
When you see "Install media now available", your bootable USB installer is ready!
Step 4: Boot from Your USB Installer
The boot process differs between Apple Silicon (M1/M2/M3/M4) and Intel Macs.
For Apple Silicon Macs (M1, M2, M3, M4)
- Shut down your Mac completely
- Connect the USB installer
- Press and hold the power button until you see "Loading startup options"
- Select the USB installer volume (e.g., "Install macOS Tahoe")
- Click Continue
For Intel-Based Macs
- Shut down your Mac completely
- Connect the USB installer
- Turn on your Mac while holding the Option (⌥) key
- Release when you see the Startup Manager
- Select the USB installer volume
- Click the arrow or press Enter
After Booting
Once booted from the USB installer, you'll see the macOS Utilities window with options to:
- Install macOS: Perform a clean or upgrade installation
- Disk Utility: Erase/partition drives before installation
- Terminal: Access command line tools
- Restore from Time Machine: Recover from a backup
Troubleshooting Common Errors
Error: "Mount point is not valid"
Cause: The USB drive name doesn't match the command, or the drive isn't properly mounted.
Solutions:
- Check the exact volume name in Finder's sidebar
- If your drive is named "USB Drive", use:
--volume /Volumes/USB\ Drive - Escape spaces with backslash (
\) or use quotes:--volume "/Volumes/USB Drive"
Error: "Command not found"
Cause: The macOS installer app isn't in the Applications folder or has a different name.
Solutions:
- Verify the installer is in
/Applications/ - Check the exact app name (sometimes it includes version numbers)
- Re-download the installer from the App Store
Error: "This copy of the Install macOS application is damaged"
Cause: Certificate issues or corrupted download.
Solutions:
- Delete the installer and re-download from App Store
- Check your Mac's date/time settings are correct
- Use the
softwareupdateTerminal method instead
Error: "Failed to start erase of disk"
Cause: Permission issues or the USB drive is in use.
Solutions:
- Close all applications that might be using the USB drive
- Eject and reconnect the USB drive
- Try a different USB port
- Use Disk Utility to manually erase the drive first
Error: "Not enough space on disk"
Cause: USB drive is too small for the macOS installer.
Solutions:
- Use a larger USB drive (32GB recommended for recent macOS versions)
- Make sure the drive is properly formatted (no hidden partitions)
Process Hangs at "Copying boot files"
Cause: Slow USB drive or connection issues.
Solutions:
- Use a USB 3.0+ drive
- Connect directly to Mac (not through a hub)
- Try a different USB port
- Be patient—this step can take several minutes on slow drives
Advanced Options
Using createinstallmedia with Custom Installer Path
If your installer is in a non-standard location:
sudo /path/to/Install\ macOS\ Tahoe.app/Contents/Resources/createinstallmedia --volume /Volumes/MyVolumeCreating Installer for Older Macs
For Intel Macs that require older macOS versions:
- Download the specific version using
softwareupdate:softwareupdate --fetch-full-installer --full-installer-version 10.15.7 - Follow the same createinstallmedia process
Automating with Scripts
For IT administrators deploying multiple installers:
#!/bin/bash
# Automated macOS installer creation script

INSTALLER_PATH="/Applications/Install macOS Tahoe.app"
VOLUME_NAME="MyVolume"

# Check if installer exists
if [ ! -d "$INSTALLER_PATH" ]; then
    echo "Error: Installer not found at $INSTALLER_PATH"
    exit 1
fi

# Check if volume exists
if [ ! -d "/Volumes/$VOLUME_NAME" ]; then
    echo "Error: Volume $VOLUME_NAME not found"
    exit 1
fi

# Create installer
sudo "$INSTALLER_PATH/Contents/Resources/createinstallmedia" \
    --volume "/Volumes/$VOLUME_NAME" \
    --nointeraction

echo "Bootable installer created successfully!"
Use Our Free Command Generator Tool
Manually typing the createinstallmedia command can be error-prone, especially with escaped spaces and version-specific paths. We've built a free tool that generates the exact command for any macOS version:
→ createinstallmedia Command Generator
Features:
- Support for macOS Tahoe (26) through High Sierra (10.13)
- Custom USB volume name support
- One-click copy to clipboard
- Download links for each macOS version
- USB formatting instructions
- Boot instructions for Intel and Apple Silicon Macs
Simply select your macOS version, enter your USB drive name, and copy the generated command!
Frequently Asked Questions
How long does createinstallmedia take?
The process typically takes 5-15 minutes depending on:
- USB drive write speed (USB 3.0+ is much faster)
- macOS version (larger installers take longer)
- Mac's processing power
Can I use USB 2.0 drives?
Yes, but USB 2.0 drives are significantly slower. Expect 20-30+ minutes for the process. USB 3.0 or higher is strongly recommended.
Does this work on Intel Macs?
Yes! The createinstallmedia command works on both Intel and Apple Silicon Macs. The boot process differs (Option key vs. Power button), but the installer creation is identical.
Can I create an installer on one Mac and use it on another?
Yes, as long as:
- The target Mac supports the macOS version on the USB
- Both Macs use compatible architectures (some older installers don't support Apple Silicon)
Will this erase my Mac's internal drive?
No. The createinstallmedia command only erases the USB drive. Your Mac's internal storage remains untouched until you explicitly choose to install macOS.
Can I create installers for beta versions?
Yes, the same process works for macOS beta versions. Download the beta installer from Apple's Developer portal or Beta Software Program.
What if my USB drive has multiple partitions?
createinstallmedia will use the specified volume. However, for best results, erase the entire drive with Disk Utility first and create a single partition.
How do I verify the installer was created correctly?
- Check that the USB drive's name changed to "Install macOS [Version]"
- Open the drive in Finder and verify you see the installer contents
- Try booting from it to confirm it works
Complete createinstallmedia Command Reference
For quick reference, here are all supported macOS versions and their commands:
| macOS Version | Command |
|---|---|
| Tahoe (26) | sudo /Applications/Install\ macOS\ Tahoe.app/Contents/Resources/createinstallmedia --volume /Volumes/MyVolume |
| Sequoia (15) | sudo /Applications/Install\ macOS\ Sequoia.app/Contents/Resources/createinstallmedia --volume /Volumes/MyVolume |
| Sonoma (14) | sudo /Applications/Install\ macOS\ Sonoma.app/Contents/Resources/createinstallmedia --volume /Volumes/MyVolume |
| Ventura (13) | sudo /Applications/Install\ macOS\ Ventura.app/Contents/Resources/createinstallmedia --volume /Volumes/MyVolume |
| Monterey (12) | sudo /Applications/Install\ macOS\ Monterey.app/Contents/Resources/createinstallmedia --volume /Volumes/MyVolume |
| Big Sur (11) | sudo /Applications/Install\ macOS\ Big\ Sur.app/Contents/Resources/createinstallmedia --volume /Volumes/MyVolume |
| Catalina (10.15) | sudo /Applications/Install\ macOS\ Catalina.app/Contents/Resources/createinstallmedia --volume /Volumes/MyVolume |
| Mojave (10.14) | sudo /Applications/Install\ macOS\ Mojave.app/Contents/Resources/createinstallmedia --volume /Volumes/MyVolume |
| High Sierra (10.13) | sudo /Applications/Install\ macOS\ High\ Sierra.app/Contents/Resources/createinstallmedia --volume /Volumes/MyVolume |
Conclusion
Creating a bootable macOS USB installer with createinstallmedia is a straightforward process once you understand the steps:
- Download the macOS installer from the App Store or via Terminal
- Format your USB drive with Mac OS Extended (Journaled) and GUID Partition Map
- Run the createinstallmedia command in Terminal
- Boot from the USB using Option key (Intel) or Power button (Apple Silicon)
Having a bootable USB installer on hand is invaluable for clean installations, system recovery, and Mac troubleshooting. With the commands provided in this guide—or our convenient command generator tool—you'll be ready for any macOS installation scenario.
Related Resources
- createinstallmedia Command Generator - Generate commands instantly
- Apple Official Documentation - Create a bootable installer for macOS
- How to Download macOS - Apple's guide to downloading macOS installers
Need help with other macOS Tahoe features? Explore our complete macOS Tahoe guide or check out our macOS tools collection.