macOS Tahoe 开发者终极指南 2025:Xcode 16、SwiftUI Liquid Glass、Foundation Models 与 Apple Intelligence 集成
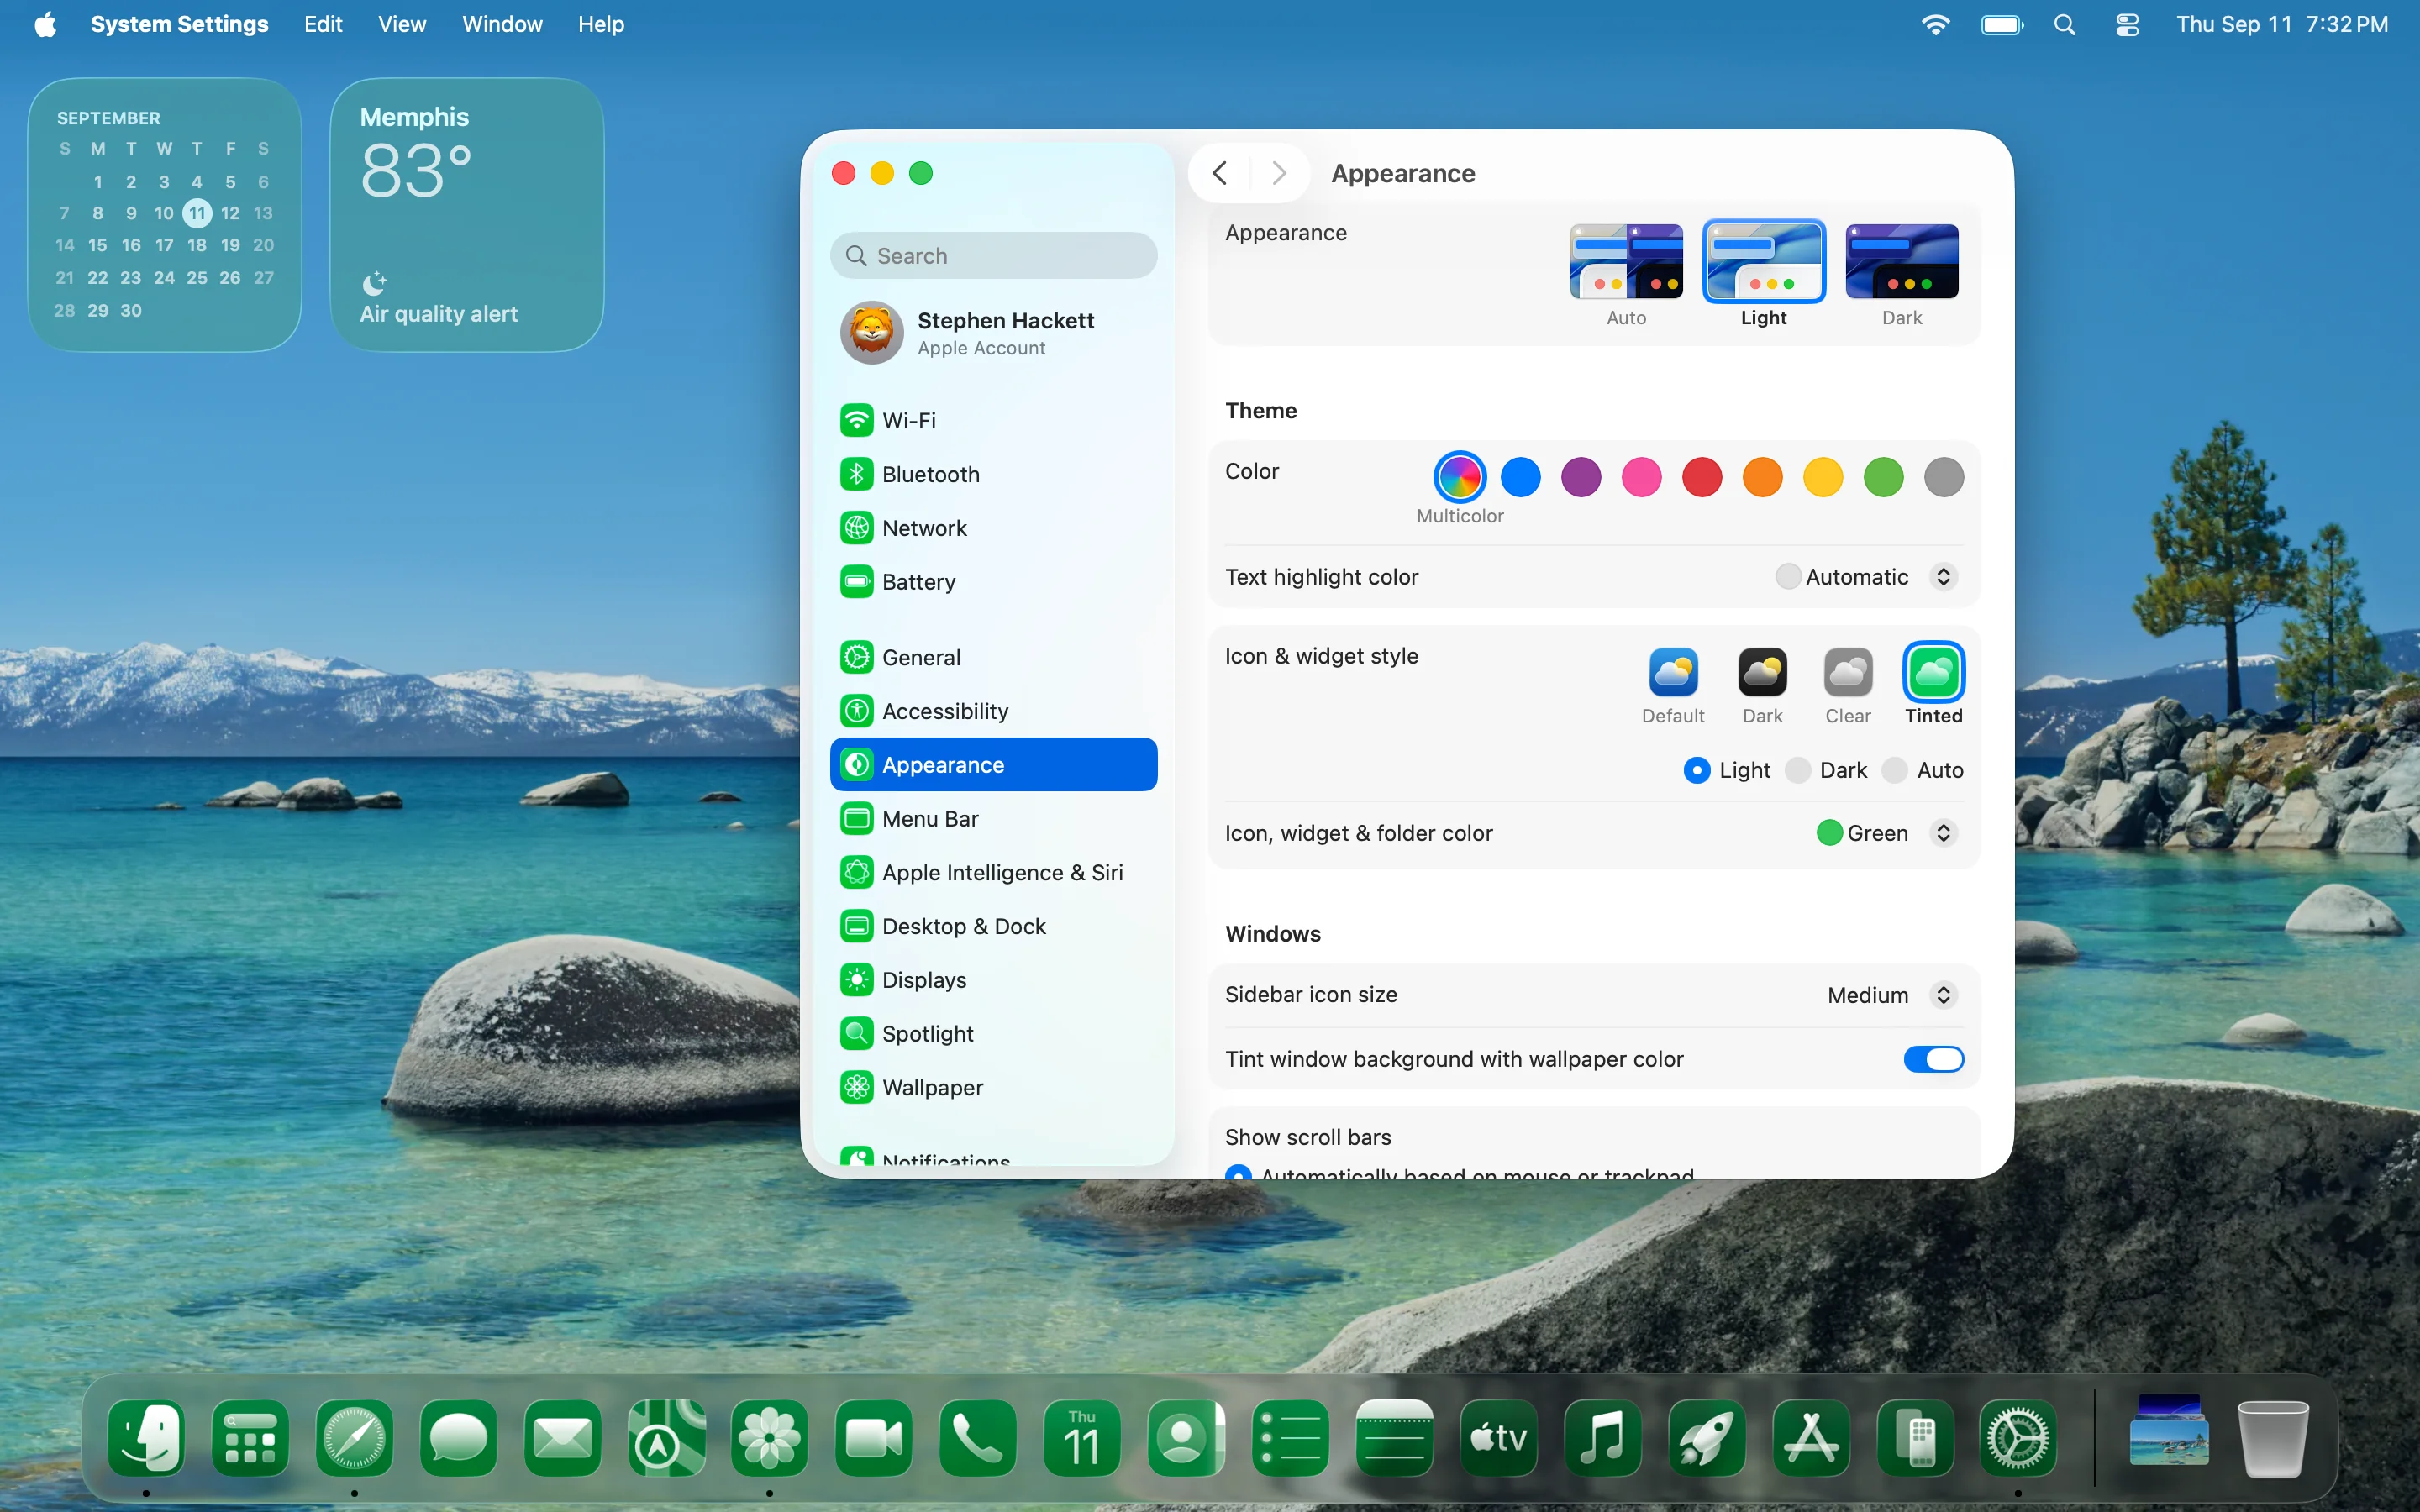
macOS Tahoe 26 完整开发者指南,涵盖 Xcode 16 AI 集成、SwiftUI Liquid Glass 设计系统、Foundation Models 框架、新 API、性能工具以及苹果革命性操作系统的跨平台开发策略。
macOS Tahoe 26 代表了自 SwiftUI 引入以来苹果开发生态系统最重要的演进。这份综合指南探索了开发者需要了解的有关 macOS Tahoe 革命性工具、框架和功能的一切,从 Xcode 16 的 AI 集成到突破性的 Liquid Glass 设计系统和设备上 Foundation Models 框架。
执行摘要:macOS Tahoe 26 开发革命
macOS Tahoe 26 对开发者的突破性意义
macOS Tahoe 26 引入了苹果开发的范式转变,将革命性的视觉设计与强大的人工智能功能相结合。作为最后一个支持 Intel 硬件的 macOS 版本,Tahoe 既代表着结束也代表着开始——标志着向 Apple Silicon 优化的完全过渡,同时引入了将定义下一个十年 Mac 开发的技术。
关键开发变化:
- Xcode 16 (Xcode 26):原生 ChatGPT 集成与 AI 驱动的编程辅助
- Liquid Glass 设计系统:跨所有苹果平台的革命性半透明 UI 框架
- Foundation Models 框架:具有 Swift 集成的设备上 30 亿参数语言模型
- Metal 4 图形:具有帧插值和降噪功能的高级图形能力
- 增强性能工具:具有函数级分析的 Processor Trace 工具
- 跨平台统一:iOS、iPadOS、macOS、watchOS 和 tvOS 一致的开发体验
战略影响:
- 最终的 Intel 兼容性为 Apple Silicon 过渡规划创造了紧迫性
- AI 优先的开发工作流程从根本上改变了编码实践
- 统一设计系统降低了跨平台开发复杂性
- 设备上智能消除了 AI 功能对外部 API 的依赖
开发环境要求
系统兼容性:
- Apple Silicon Mac:完整功能访问,包括 AI 集成和性能工具
- Intel Mac(最终支持):精选 2019-2020 型号的有限兼容性
- 内存要求:专业开发最低 16GB RAM,推荐 32GB+
- 存储:推荐 1TB+ SSD 以获得最佳 Xcode 性能和 AI 模型缓存
支持的 Intel 型号(最后一代):
- Mac Pro (2019)
- MacBook Pro 16 英寸 (2019)
- MacBook Pro 13 英寸 (2020,四个 Thunderbolt 3 端口)
- iMac 27 英寸 (2020)
Xcode 16:AI 驱动的开发革命
ChatGPT 集成和编程智能
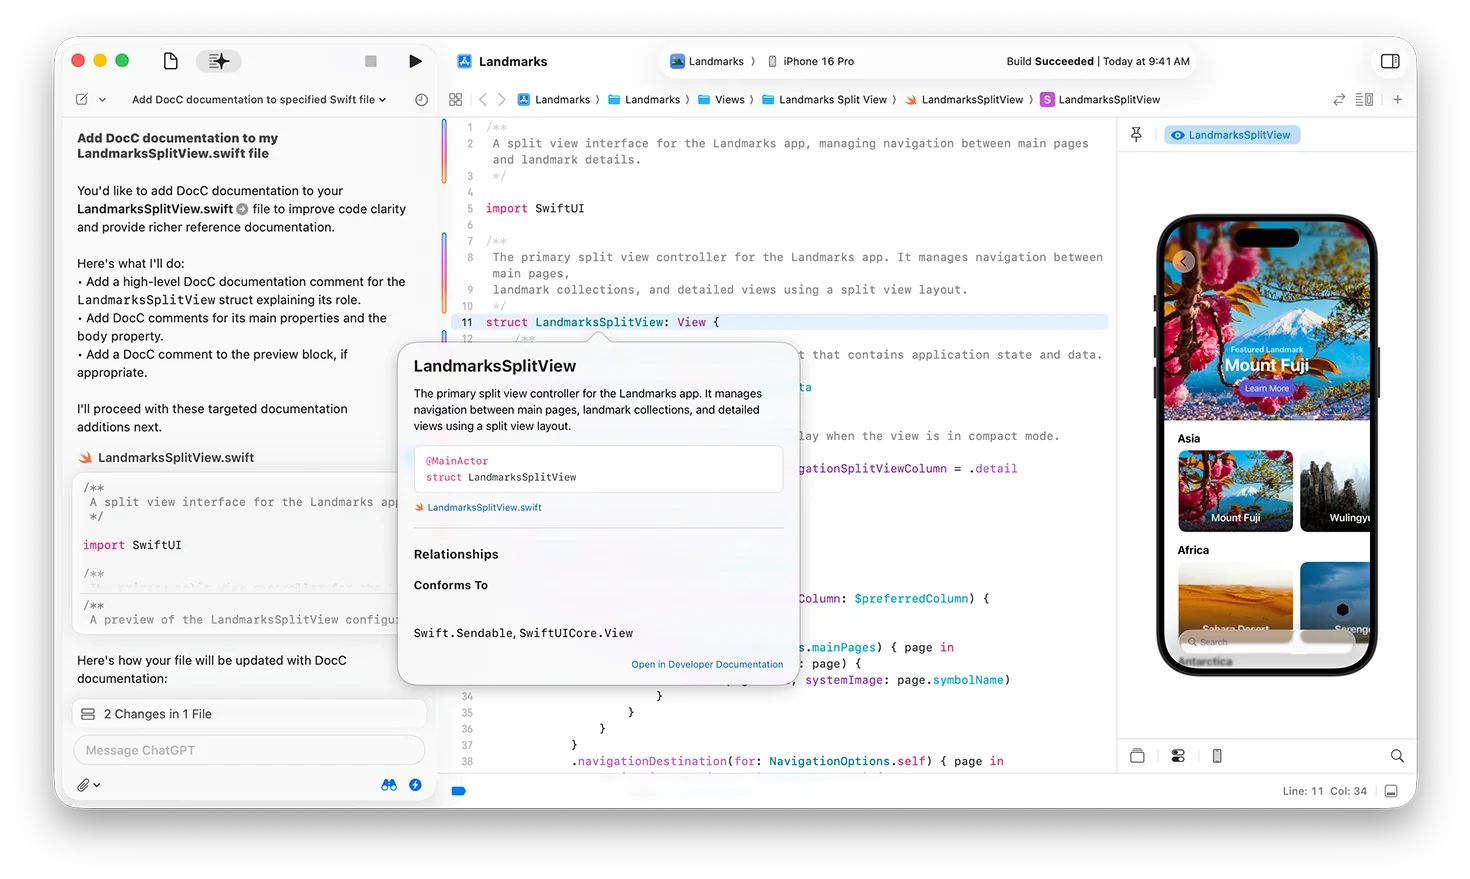
Xcode 16 通过原生大语言模型集成引入了 IDE 历史上最重要的生产力提升。AI 驱动的编程辅助从根本上改变了开发工作流程,提供了理解整个项目的上下文帮助。
核心 AI 功能:
上下文代码生成:
// AI 可以从注释生成完整函数
// TODO: 创建一个使用正则表达式验证电子邮件地址的函数
func validateEmail(_ email: String) -> Bool {
    let emailRegex = "^[A-Z0-9a-z._%+-]+@[A-Za-z0-9.-]+\\.[A-Za-z]{2,64}$"
    let emailPredicate = NSPredicate(format:"SELF MATCHES %@", emailRegex)
    return emailPredicate.evaluate(with: email)
}
智能文档:
- 自动文档注释:AI 为函数和类生成综合文档
- 代码解释:复杂代码段的实时解释
- API 文档:苹果框架和第三方库的上下文帮助
- 最佳实践:代码改进和优化建议
错误解决和调试:
// AI 可以建议编译错误的修复方案
struct ContentView: View {
    @State private var isPresented = false

    var body: some View {
        VStack {
            Text("Hello, World!")
            Button("Show Sheet") {
                isPresented = true
            }
        }
        // AI 建议:.sheet(isPresented: $isPresented) { }
        .sheet(isPresented: $isPresented) {
            DetailView()
        }
    }
}
性能要求:
- macOS Tahoe 26:ChatGPT 集成必需
- Apple Silicon:专用神经引擎的最佳性能
- 互联网连接:基于云的 AI 功能必需
- 本地处理:某些 AI 功能使用设备上模型离线工作
增强的开发工具和界面
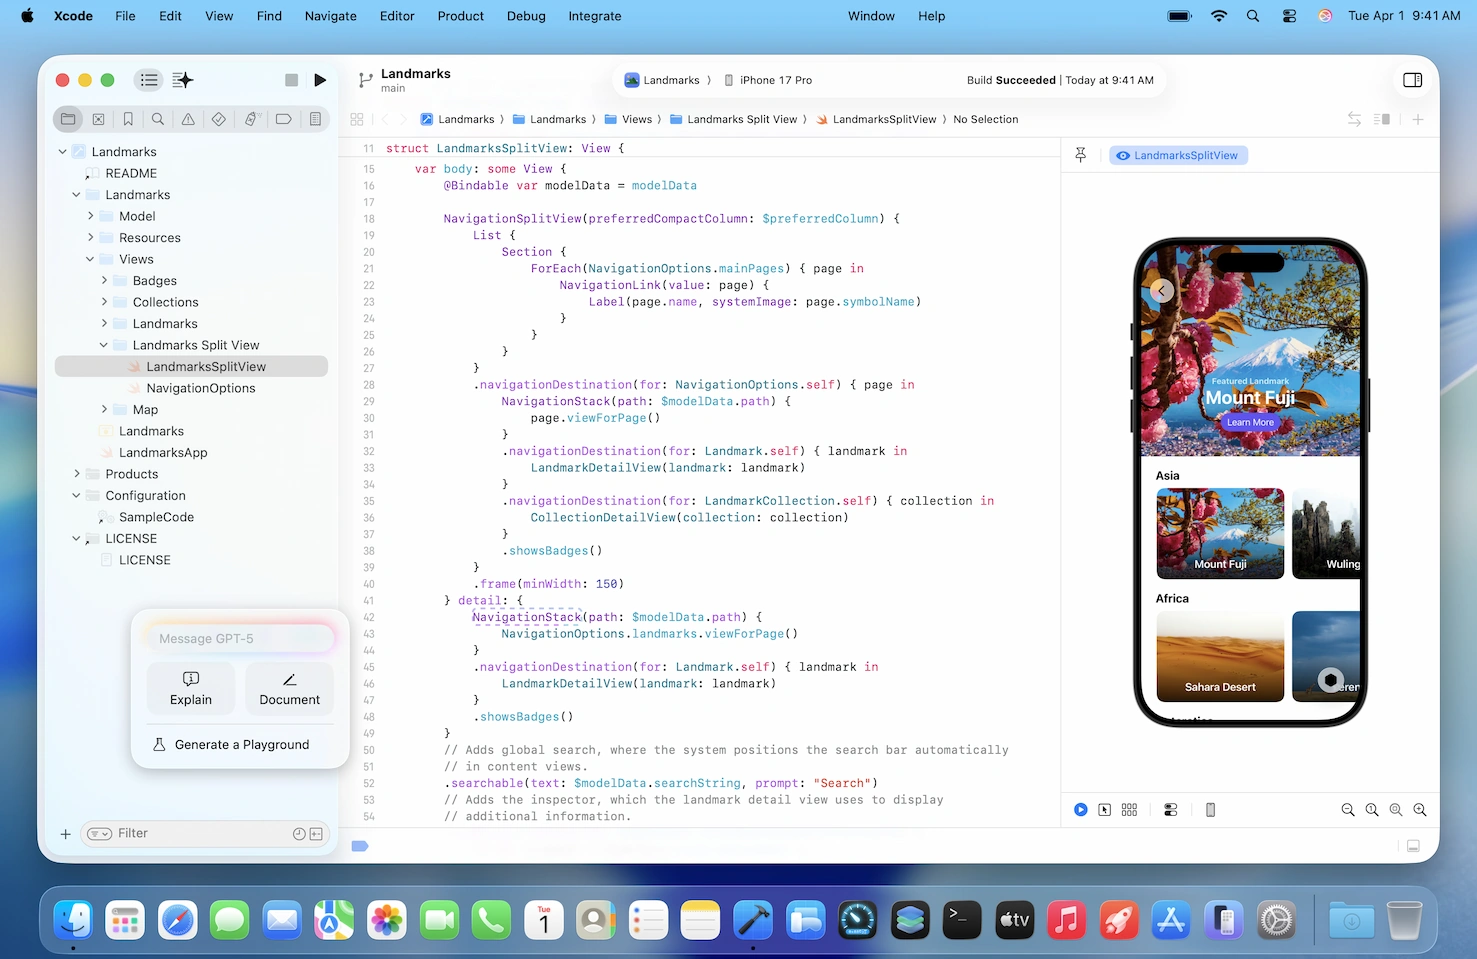
重新设计的导航系统:
- 增强标签页体验:改进的标签页管理与页内导航
- 固定功能:固定常用文件和资源
- 上下文导航:AI 驱动的相关文件和资源建议
- 快速操作:更快访问常见开发任务
编译和构建改进:
- 编译缓存:切换分支时加速构建时间
- 清洁构建优化:通过智能缓存实现更快的清洁构建
- 增量编译:大型项目的增强增量编译
- 后台处理:非阻塞编译改善工作流程
语音控制集成:
# Xcode 导航的语音命令
"导航到 ContentView"
"添加 import Foundation"
"构建并运行"
"显示预览"
"注释这一行"
图标编辑器工具:
- 单一设计输入:从一个设计文件创建图标
- 可调节深度:动态深度和光照效果
- 平台优化:iPhone、iPad、Mac、Apple Watch 的自动优化
- Liquid Glass 集成:半透明图标效果的原生支持
Swift 6.1 语言增强
增强的生产力功能:
- 改进的诊断:具有建议修复的更好错误消息
- 增强的包管理:更好依赖管理的包特性
- 数据竞争安全:编译时安全改进
- 跨平台支持:更好的多平台开发支持
Foundation Models 集成:
import FoundationModels

struct AIAssistant {
    let model = FoundationModel.shared

    func generateResponse(to prompt: String) async throws -> String {
        let response = try await model.generate(
            prompt: prompt,
            maxTokens: 150,
            temperature: 0.7
        )
        return response.text
    }
}
SwiftUI 和 Liquid Glass 设计系统
革命性设计语言实现
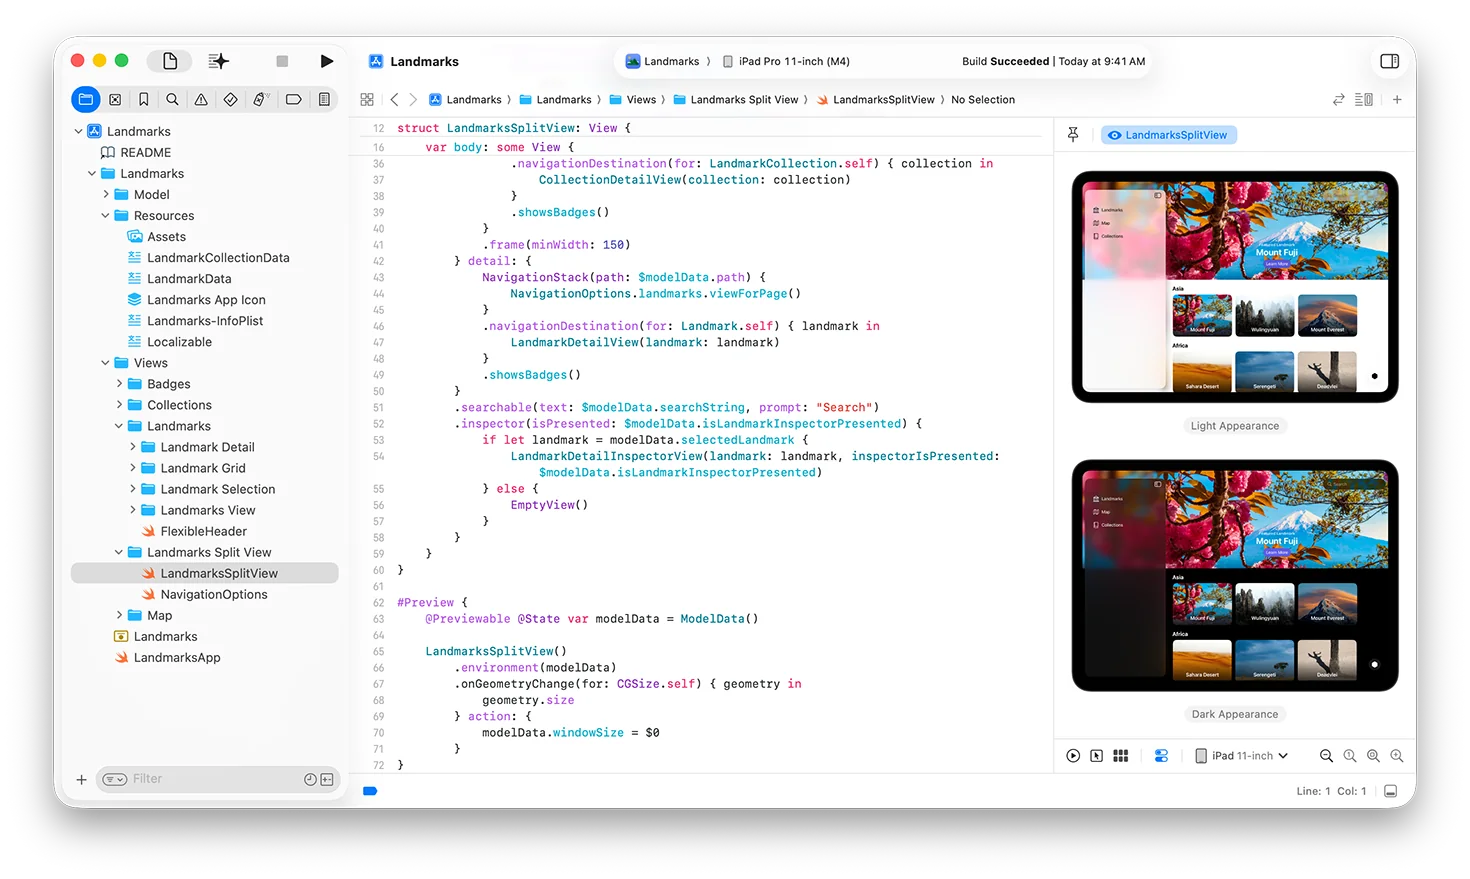
Liquid Glass 代表了自扁平设计引入以来最重要的设计演进。这种半透明材料系统创造了深度和视觉层次,同时保持苹果对清晰度和功能性的承诺。
核心 Liquid Glass 原则:
- 半透明性:反射和折射底层内容的玻璃效果
- 动态适应:基于内容的自动浅色到深色过渡
- 深度感知:多层视觉层次
- 交互响应性:用户交互期间的玻璃变形
SwiftUI 实现:
基本玻璃效果:
struct GlassCard: View {
    var body: some View {
        VStack {
            Text("玻璃效果")
                .font(.headline)
            Text("具有半透明背景的内容")
                .font(.body)
        }
        .padding()
        .glassEffect() // SwiftUI 中的新修饰符
        .cornerRadius(12)
    }
}
高级玻璃自定义:
struct CustomGlassView: View {
    var body: some View {
        Rectangle()
            .fill(.clear)
            .glassEffect(
                style: .prominent,
                blendMode: .overlay,
                opacity: 0.8
            )
            .overlay {
                VStack {
                    Image(systemName: "star.fill")
                        .font(.largeTitle)
                    Text("高级功能")
                        .font(.headline)
                }
                .foregroundStyle(.primary)
            }
    }
}
交互式玻璃组件:
struct LiquidGlassButton: View {
    @State private var isPressed = false

    var body: some View {
        Button("Liquid Glass 按钮") {
            // 操作
        }
        .padding()
        .glassEffect(
            style: isPressed ? .regular : .prominent,
            animated: true
        )
        .scaleEffect(isPressed ? 0.95 : 1.0)
        .onPressGesture(
            pressing: { pressing in
                withAnimation(.easeInOut(duration: 0.1)) {
                    isPressed = pressing
                }
            },
            perform: {}
        )
    }
}
跨平台设计一致性
统一玻璃框架:
// 单一实现适用于所有平台
struct UniversalGlassContainer<Content: View>: View {
    let content: Content

    init(@ViewBuilder content: () -> Content) {
        self.content = content()
    }

    var body: some View {
        content
            .padding()
            .glassEffect()
            .cornerRadius(platformSpecificRadius())
    }

    private func platformSpecificRadius() -> CGFloat {
        #if os(iOS)
        return 16
        #elseif os(macOS)
        return 12
        #elseif os(watchOS)
        return 8
        #else
        return 12
        #endif
    }
}
平台自适应组件:
- 导航栏:具有平台适当行为的浮动玻璃导航
- 标签栏:iPhone 上的紧凑外观,iPad 和 Mac 上的扩展外观
- 工具栏:状态转换期间的动态玻璃变形
- 侧边栏:适应内容密度的半透明侧边栏
高级玻璃效果和动画
角落同心性:
struct ConcentricGlassView: View {
    var body: some View {
        RoundedRectangle(cornerRadius: 16)
            .fill(.clear)
            .glassEffect()
            .overlay {
                RoundedRectangle(cornerRadius: 12)
                    .stroke(.white.opacity(0.2), lineWidth: 1)
                    .padding(4)
            }
            .overlay {
                RoundedRectangle(cornerRadius: 8)
                    .stroke(.white.opacity(0.1), lineWidth: 0.5)
                    .padding(8)
            }
    }
}
动态玻璃过渡:
struct TransitioningGlass: View {
    @State private var isExpanded = false

    var body: some View {
        VStack {
            if isExpanded {
                DetailContent()
                    .transition(.glassSlide)
            }
        }
        .glassEffect(
            style: isExpanded ? .prominent : .regular,
            animated: true
        )
        .animation(.glassSpring(duration: 0.6), value: isExpanded)
    }
}

extension AnyTransition {
    static var glassSlide: AnyTransition {
        .asymmetric(
            insertion: .move(edge: .top).combined(with: .opacity),
            removal: .move(edge: .bottom).combined(with: .opacity)
        )
    }
}

extension Animation {
    static func glassSpring(duration: Double) -> Animation {
        .interpolatingSpring(
            mass: 0.8,
            stiffness: 100,
            damping: 10,
            initialVelocity: 0
        )
        .speed(1 / duration)
    }
}
Foundation Models 框架:设备上 AI 集成
框架架构和功能
Foundation Models 框架代表了苹果对隐私优先人工智能的承诺,在不损害用户数据安全的情况下提供强大的设备上语言理解。
技术规格:
- 模型大小:为 Apple Silicon 优化的约 30 亿参数
- 性能:0.6ms 首令牌延迟,30 令牌/秒生成
- 压缩:使用高级 LoRA 适配器的 3.7 位/权重
- 平台:macOS、iOS、iPadOS、visionOS(需要 Apple Silicon)
核心框架功能:
基本文本生成:
import FoundationModels

class AITextGenerator {
    private let model = FoundationModel.shared

    func generateText(prompt: String) async throws -> String {
        let request = TextGenerationRequest(
            prompt: prompt,
            maxTokens: 200,
            temperature: 0.7,
            topP: 0.9
        )

        let response = try await model.generateText(request)
        return response.generatedText
    }
}
带约束的引导生成:
@Generable
struct EmailResponse {
    let subject: String
    let body: String
    let tone: EmailTone
    let priority: Priority
}

enum EmailTone: String, CaseIterable {
    case formal, casual, friendly, professional
}

enum Priority: String, CaseIterable {
    case low, medium, high, urgent
}

class EmailAssistant {
    func generateEmail(context: String) async throws -> EmailResponse {
        let prompt = "为以下内容生成电子邮件回复:\(context)"
        return try await FoundationModel.shared.generate(
            EmailResponse.self,
            prompt: prompt
        )
    }
}
工具调用实现:
protocol AITool {
    var name: String { get }
    var description: String { get }
    func execute(parameters: [String: Any]) async throws -> String
}

struct WeatherTool: AITool {
    let name = "get_weather"
    let description = "获取位置的当前天气"

    func execute(parameters: [String: Any]) async throws -> String {
        guard let location = parameters["location"] as? String else {
            throw AIError.invalidParameters
        }

        // 与天气服务集成
        let weather = try await WeatherService.current(for: location)
        return "\(location) 的当前天气:\(weather.description)"
    }
}

class AIAssistantWithTools {
    private let tools: [AITool] = [WeatherTool()]

    func processRequest(_ input: String) async throws -> String {
        let response = try await FoundationModel.shared.processWithTools(
            input: input,
            availableTools: tools
        )
        return response.finalAnswer
    }
}
多模态功能和图像理解
图像分析集成:
import Vision
import FoundationModels

class MultimodalAI {
    func analyzeImage(_ image: UIImage, question: String) async throws -> String {
        // 将图像转换为适当格式
        guard let imageData = image.jpegData(compressionQuality: 0.8) else {
            throw AIError.imageProcessingFailed
        }

        let request = MultimodalRequest(
            image: imageData,
            prompt: question,
            maxTokens: 150
        )

        let response = try await FoundationModel.shared.processMultimodal(request)
        return response.analysis
    }
}

// 使用示例
let imageAnalyzer = MultimodalAI()
let result = try await imageAnalyzer.analyzeImage(
    userImage,
    question: "这栋建筑展示了什么建筑风格?"
)
自定义模型训练:
// Swift 中的 Python 风格训练配置
struct CustomTrainingConfig {
    let baseModel: String = "foundation-3b"
    let trainingData: URL
    let rank: Int = 32
    let learningRate: Double = 0.0001
    let epochs: Int = 10
}

class CustomModelTrainer {
    func trainSpecializedModel(config: CustomTrainingConfig) async throws -> URL {
        let trainer = FoundationModelTrainer(config: config)

        // 训练在设备上进行以保护隐私
        let modelURL = try await trainer.train()

        // 保存以供后续使用
        try await FoundationModel.shared.loadCustomModel(from: modelURL)

        return modelURL
    }
}
隐私和性能优化
隐私优先实现:
- 无外部 API 调用:所有处理完全在设备上进行
- 数据安全:用户输入永不离开设备
- 模型更新:模型改进的差分隐私
- 缓存管理:临时数据的自动清理
性能优化策略:
class OptimizedAIService {
    private let cache = NSCache<NSString, AIResponse>()
    private let queue = DispatchQueue(label: "ai.processing", qos: .userInitiated)

    func processWithCaching(_ input: String) async throws -> String {
        let cacheKey = NSString(string: input.hash.description)

        if let cachedResponse = cache.object(forKey: cacheKey) {
            return cachedResponse.text
        }

        let response = try await FoundationModel.shared.generate(
            prompt: input,
            cachePolicy: .preferCache
        )

        cache.setObject(response, forKey: cacheKey)
        return response.text
    }
}
Metal 4 图形和性能增强
高级图形功能
Metal 4 引入了革命性的图形功能,从根本上改变了 macOS 应用程序的可能性,从实时光线追踪到高级机器学习加速。
主要 Metal 4 功能:
- MetalFX 帧插值:AI 驱动的帧率增强
- MetalFX 降噪:光线追踪的实时噪声减少
- 增强光线追踪:Apple Silicon 上的硬件加速光线追踪
- 机器学习集成:与 Core ML 和 Foundation Models 的无缝集成
MetalFX 实现:
import Metal
import MetalFX

class MetalFXRenderer {
    private var device: MTLDevice
    private var upscaler: MTLFXTemporalScaler?

    init() {
        guard let device = MTLCreateSystemDefaultDevice() else {
            fatalError("Metal 不可用")
        }
        self.device = device
        setupUpscaler()
    }

    private func setupUpscaler() {
        let descriptor = MTLFXTemporalScalerDescriptor()
        descriptor.colorTextureFormat = .bgra8Unorm
        descriptor.depthTextureFormat = .depth32Float
        descriptor.motionVectorTextureFormat = .rg16Float
        descriptor.outputTextureFormat = .bgra8Unorm
        descriptor.inputWidth = 1920
        descriptor.inputHeight = 1080
        descriptor.outputWidth = 3840
        descriptor.outputHeight = 2160

        upscaler = descriptor.makeTemporalScaler(device: device)
    }

    func renderFrame(commandBuffer: MTLCommandBuffer,
                    colorTexture: MTLTexture,
                    depthTexture: MTLTexture,
                    motionTexture: MTLTexture) -> MTLTexture? {

        guard let upscaler = upscaler else { return nil }

        let outputTexture = createOutputTexture()

        upscaler.colorTexture = colorTexture
        upscaler.depthTexture = depthTexture
        upscaler.motionVectorTexture = motionTexture
        upscaler.outputTexture = outputTexture

        upscaler.encode(commandBuffer: commandBuffer)

        return outputTexture
    }
}
实时光线追踪:
import MetalPerformanceShaders

class RayTracingRenderer {
    private var device: MTLDevice
    private var raytracer: MPSRayIntersector?
    private var accelerationStructure: MPSTriangleAccelerationStructure?

    func setupRayTracing() {
        raytracer = MPSRayIntersector(device: device)
        raytracer?.rayDataType = .originMaskDirectionMaxDistance
        raytracer?.rayStride = MemoryLayout<Ray>.stride

        // 为场景几何设置加速结构
        accelerationStructure = MPSTriangleAccelerationStructure(device: device)
        accelerationStructure?.rebuild()
    }

    func renderRayTracedFrame() {
        guard let commandBuffer = commandQueue.makeCommandBuffer() else { return }

        // 生成主光线
        generatePrimaryRays(commandBuffer: commandBuffer)

        // 光线与场景相交
        raytracer?.encodeIntersection(
            commandBuffer: commandBuffer,
            intersectionType: .nearest,
            rayBuffer: rayBuffer,
            rayBufferOffset: 0,
            intersectionBuffer: intersectionBuffer,
            intersectionBufferOffset: 0,
            rayCount: rayCount,
            accelerationStructure: accelerationStructure!
        )

        // 着色相交点
        shadeIntersections(commandBuffer: commandBuffer)

        commandBuffer.commit()
    }
}
性能分析和优化
Processor Trace 集成:
import os.signpost

class PerformanceProfiler {
    private let subsystem = "com.app.performance"
    private let category = "rendering"

    func profileRenderingPerformance() {
        let log = OSLog(subsystem: subsystem, category: category)
        let signpostID = OSSignpostID(log: log)

        os_signpost(.begin, log: log, name: "帧渲染", signpostID: signpostID)

        // 这里是渲染代码
        renderFrame()

        os_signpost(.end, log: log, name: "帧渲染", signpostID: signpostID)
    }

    func profileWithProcessorTrace<T>(_ operation: () throws -> T) rethrows -> T {
        // 在 Instruments 中启用时,Processor Trace 自动捕获函数调用
        return try operation()
    }
}
GPU 性能优化:
class GPUOptimizer {
    private var device: MTLDevice
    private var commandQueue: MTLCommandQueue

    func optimizeForThermalState() {
        let thermalState = ProcessInfo.processInfo.thermalState

        switch thermalState {
        case .nominal:
            // 全性能模式
            setRenderQuality(.high)
            setFrameRate(120)

        case .fair:
            // 平衡性能
            setRenderQuality(.medium)
            setFrameRate(60)

        case .serious, .critical:
            // 节能模式
            setRenderQuality(.low)
            setFrameRate(30)

        @unknown default:
            setRenderQuality(.medium)
        }
    }

    private func setRenderQuality(_ quality: RenderQuality) {
        // 调整着色器复杂度、纹理分辨率等
    }

    private func setFrameRate(_ fps: Int) {
        // 调整渲染循环时序
    }
}
高级开发工具和调试
Instruments 和性能分析
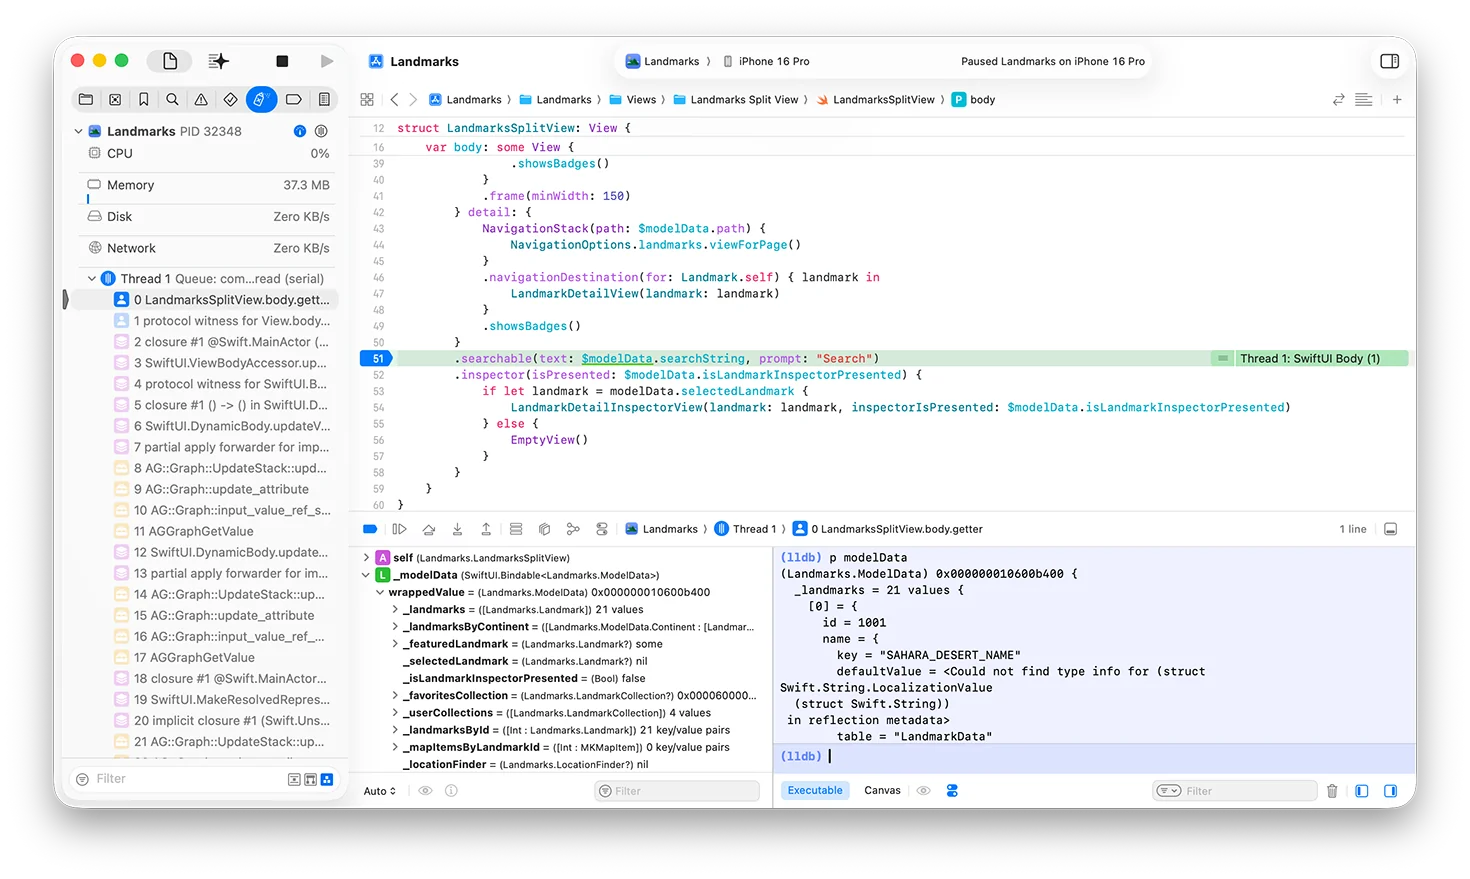
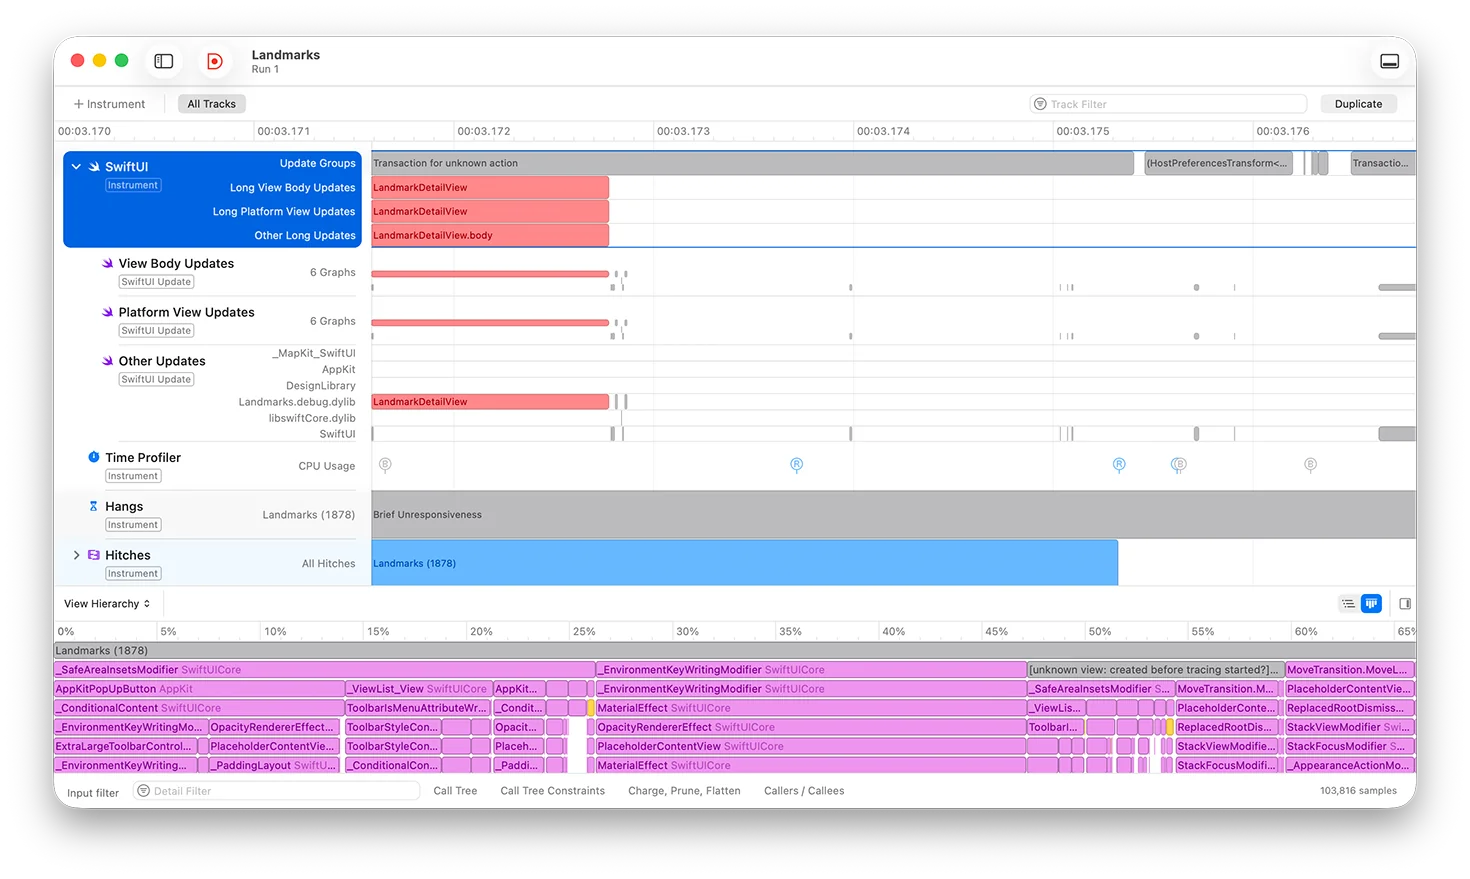
macOS Tahoe 26 引入了革命性的调试和性能分析工具,为应用程序行为和性能特征提供了前所未有的洞察。
Tahoe 中的新 Instruments:
Processor Trace 工具:
// 在应用中启用处理器跟踪
class ProcessorTraceProfiler {
    func enableHighFidelityProfiling() {
        // Processor Trace 在 M4 和 iPhone 16 上以最小开销捕获每个函数调用

        #if DEBUG
        // 为开发构建启用详细跟踪
        os_trace_set_mode(.enabled)
        #endif
    }

    func profileCriticalPath() {
        // 此块中的所有函数调用都将被跟踪
        performCriticalOperation()
    }
}
SwiftUI 视图分析:
import SwiftUI

struct OptimizedListView: View {
    @State private var items: [Item] = []

    var body: some View {
        List(items) { item in
            ItemRow(item: item)
                .id(item.id) // 帮助 SwiftUI 优化更新
        }
        .animation(.default, value: items)
        // SwiftUI Instrument 跟踪视图更新性能
        .task {
            await loadItems()
        }
    }
}

// 为最小视图更新优化
struct ItemRow: View {
    let item: Item

    var body: some View {
        HStack {
            AsyncImage(url: item.imageURL) { image in
                image
                    .resizable()
                    .aspectRatio(contentMode: .fill)
            } placeholder: {
                RoundedRectangle(cornerRadius: 8)
                    .fill(.gray.opacity(0.3))
            }
            .frame(width: 50, height: 50)
            .clipped()

            VStack(alignment: .leading) {
                Text(item.title)
                    .font(.headline)
                Text(item.subtitle)
                    .font(.caption)
                    .foregroundColor(.secondary)
            }
        }
    }
}
功耗和热量分析:
import IOKit.ps

class PowerProfiler {
    func monitorPowerConsumption() {
        let thermalNotificationCenter = NotificationCenter.default

        thermalNotificationCenter.addObserver(
            forName: ProcessInfo.thermalStateDidChangeNotification,
            object: nil,
            queue: .main
        ) { _ in
            self.adjustPerformanceForThermalState()
        }
    }

    private func adjustPerformanceForThermalState() {
        let state = ProcessInfo.processInfo.thermalState

        switch state {
        case .critical:
            // 立即减少 CPU/GPU 使用
            reduceBackgroundProcessing()
            lowerRenderQuality()

        case .serious:
            // 适度性能降低
            optimizeForEfficiency()

        default:
            // 正常操作
            restoreFullPerformance()
        }
    }

    func measureBatteryImpact() {
        // 监控特定操作期间的电池消耗
        let startLevel = getBatteryLevel()

        performOperation()

        let endLevel = getBatteryLevel()
        let consumption = startLevel - endLevel

        logPowerConsumption(consumption)
    }
}
增强的调试功能
LLDB 改进:
# Tahoe 调试的增强 LLDB 命令
(lldb) po yourSwiftUIView.body
# 现在显示包含 Liquid Glass 效果的完整视图层次

(lldb) memory read --format instruction --count 20 $pc
# Processor Trace 集成显示执行路径

(lldb) script
# 自定义调试工作流的 Python 脚本
import lldb
import os

def print_view_hierarchy(debugger, command, result, internal_dict):
    target = debugger.GetSelectedTarget()
    process = target.GetProcess()
    thread = process.GetSelectedThread()
    frame = thread.GetSelectedFrame()

    # 自定义视图层次分析
    print("SwiftUI 视图层次:")
    # 实现细节...

lldb.debugger.HandleCommand('command script add -f custom_debug.print_view_hierarchy vh')
实时视图调试:
#if DEBUG
extension View {
    func debugViewHierarchy() -> some View {
        self.overlay(
            Rectangle()
                .stroke(Color.red, lineWidth: 1)
                .opacity(0.3)
        )
        .onTapGesture(count: 2) {
            // 双击在调试模式下检查视图
            print("调试视图:\(String(describing: type(of: self)))")
            print("框架:\(UIScreen.main.bounds)")
        }
    }
}
#endif
内存调试:
import os

class MemoryProfiler {
    private let logger = Logger(subsystem: "com.app.memory", category: "profiling")

    func trackMemoryUsage() {
        let memoryInfo = mach_task_basic_info()
        var count = mach_msg_type_number_t(MemoryLayout<mach_task_basic_info>.size)/4

        let kerr: kern_return_t = withUnsafeMutablePointer(to: &memoryInfo) {
            $0.withMemoryRebound(to: integer_t.self, capacity: 1) {
                task_info(mach_task_self_, task_flavor_t(MACH_TASK_BASIC_INFO), $0, &count)
            }
        }

        if kerr == KERN_SUCCESS {
            let memoryUsage = memoryInfo.resident_size
            logger.info("内存使用:\(memoryUsage / 1024 / 1024) MB")
        }
    }

    func detectMemoryLeaks() {
        // 与 Instruments 集成进行泄露检测
        #if DEBUG
        if let leakDetection = NSClassFromString("MallocStackLogging") {
            // 启用 malloc 堆栈日志记录进行调试
            setenv("MallocStackLogging", "1", 1)
        }
        #endif
    }
}
跨平台开发策略
统一开发方法
macOS Tahoe 26 的跨平台功能使开发者能够在所有苹果设备上创建一致的体验,同时针对平台特定功能和用户期望进行优化。
平台自适应架构:
import SwiftUI

struct AdaptiveContentView: View {
    @Environment(\.horizontalSizeClass) private var horizontalSizeClass
    @Environment(\.verticalSizeClass) private var verticalSizeClass

    var body: some View {
        Group {
            #if os(macOS)
            MacOSLayout()
            #elseif os(iOS)
            if horizontalSizeClass == .compact {
                PhoneLayout()
            } else {
                TabletLayout()
            }
            #elseif os(watchOS)
            WatchLayout()
            #elseif os(tvOS)
            TVLayout()
            #endif
        }
        .glassEffect() // 适用于所有平台
    }
}

// 平台特定实现
struct MacOSLayout: View {
    var body: some View {
        NavigationSplitView {
            SidebarView()
        } detail: {
            DetailView()
        }
        .navigationSplitViewStyle(.balanced)
    }
}

struct PhoneLayout: View {
    var body: some View {
        NavigationStack {
            ContentListView()
        }
    }
}
共享业务逻辑:
// 在所有平台间共享
@Observable
class AppState {
    var selectedItem: Item?
    var items: [Item] = []
    var isLoading = false

    func loadItems() async {
        isLoading = true
        defer { isLoading = false }

        do {
            // 使用 Foundation Models 进行智能排序
            let aiSortedItems = try await FoundationModel.shared.enhanceItems(items)
            await MainActor.run {
                self.items = aiSortedItems
            }
        } catch {
            // 处理错误
        }
    }
}

// 平台特定 UI
struct ItemListView: View {
    @State private var appState = AppState()

    var body: some View {
        Group {
            #if os(macOS)
            Table(appState.items) {
                TableColumn("名称", value: \.name)
                TableColumn("日期", value: \.date) { item in
                    Text(item.date, style: .date)
                }
            }
            #else
            List(appState.items) { item in
                ItemRowView(item: item)
            }
            #endif
        }
        .task {
            await appState.loadItems()
        }
    }
}
共享资源和资产:
// 跨平台的资产管理
extension Image {
    static func platformIcon(_ name: String) -> Image {
        #if os(macOS)
        return Image(systemName: "\(name).circle")
        #elseif os(iOS)
        return Image(systemName: "\(name).fill")
        #elseif os(watchOS)
        return Image(systemName: name)
        #endif
    }
}

// 适用于跨平台的颜色方案
extension Color {
    static let platformPrimary: Color = {
        #if os(macOS)
        return .blue
        #elseif os(iOS)
        return .accentColor
        #elseif os(watchOS)
        return .green
        #endif
    }()
}
平台特定优化
macOS 特定功能:
#if os(macOS)
import AppKit

class MacOSSpecificManager: NSObject {
    func setupMenuBar() {
        let statusItem = NSStatusBar.system.statusItem(withLength: NSStatusItem.variableLength)
        statusItem.button?.title = "应用"

        let menu = NSMenu()
        menu.addItem(NSMenuItem(title: "显示主窗口", action: #selector(showMainWindow), keyEquivalent: ""))
        statusItem.menu = menu
    }

    @objc func showMainWindow() {
        NSApp.activate(ignoringOtherApps: true)
        NSApp.windows.first?.makeKeyAndOrderFront(nil)
    }

    func setupDockMenu() -> NSMenu {
        let dockMenu = NSMenu()
        dockMenu.addItem(NSMenuItem(title: "新建文档", action: #selector(newDocument), keyEquivalent: ""))
        return dockMenu
    }

    @objc func newDocument() {
        // 创建新文档
    }
}

// 与 SwiftUI 集成
struct MacOSContentView: View {
    @State private var macManager = MacOSSpecificManager()

    var body: some View {
        ContentView()
            .onAppear {
                macManager.setupMenuBar()
            }
    }
}
#endif
iOS 特定功能:
#if os(iOS)
import UIKit

struct iOSSpecificView: UIViewRepresentable {
    func makeUIView(context: Context) -> UIView {
        let view = UIView()

        // iOS 特定手势和交互
        let longPress = UILongPressGestureRecognizer(
            target: context.coordinator,
            action: #selector(Coordinator.handleLongPress)
        )
        view.addGestureRecognizer(longPress)

        return view
    }

    func updateUIView(_ uiView: UIView, context: Context) {
        // 根据需要更新 UI
    }

    func makeCoordinator() -> Coordinator {
        Coordinator()
    }

    class Coordinator: NSObject {
        @objc func handleLongPress(_ gesture: UILongPressGestureRecognizer) {
            // 处理 iOS 特定的长按
        }
    }
}
#endif
性能优化和最佳实践
内存管理和优化
SwiftUI 性能优化:
struct OptimizedListView: View {
    @State private var items: [Item] = []

    var body: some View {
        LazyVStack(pinnedViews: .sectionHeaders) {
            ForEach(groupedItems, id: \.key) { group in
                Section {
                    ForEach(group.value) { item in
                        ItemRowView(item: item)
                            .equatable() // 防止不必要的重绘
                    }
                } header: {
                    SectionHeaderView(title: group.key)
                        .glassEffect()
                }
            }
        }
        .scrollIndicators(.hidden)
        .background(.clear)
    }

    private var groupedItems: [(key: String, value: [Item])] {
        Dictionary(grouping: items) { item in
            item.category
        }
        .sorted { $0.key < $1.key }
    }
}

extension ItemRowView: Equatable {
    static func == (lhs: ItemRowView, rhs: ItemRowView) -> Bool {
        lhs.item.id == rhs.item.id
    }
}
内存高效的图像加载:
import SwiftUI

struct OptimizedAsyncImage: View {
    let url: URL?
    let placeholder: Image

    @State private var imageData: Data?
    @State private var isLoading = false

    var body: some View {
        Group {
            if let imageData = imageData,
               let uiImage = UIImage(data: imageData) {
                Image(uiImage: uiImage)
                    .resizable()
                    .aspectRatio(contentMode: .fill)
            } else if isLoading {
                ProgressView()
                    .glassEffect()
            } else {
                placeholder
                    .foregroundColor(.secondary)
            }
        }
        .task(id: url) {
            await loadImage()
        }
    }

    @MainActor
    private func loadImage() async {
        guard let url = url else { return }

        isLoading = true
        defer { isLoading = false }

        do {
            // 使用优化的缓存策略的 URLSession
            let request = URLRequest(
                url: url,
                cachePolicy: .returnCacheDataElseLoad,
                timeoutInterval: 30
            )

            let (data, _) = try await URLSession.shared.data(for: request)

            // 如果图像过大则压缩
            if let image = UIImage(data: data) {
                let compressedData = compressImageIfNeeded(image)
                self.imageData = compressedData
            }
        } catch {
            // 静默处理错误或显示错误状态
        }
    }

    private func compressImageIfNeeded(_ image: UIImage) -> Data? {
        let maxSize: CGFloat = 1024 // 最大尺寸
        let compressionQuality: CGFloat = 0.8

        let size = image.size
        if max(size.width, size.height) > maxSize {
            let scale = maxSize / max(size.width, size.height)
            let newSize = CGSize(
                width: size.width * scale,
                height: size.height * scale
            )

            UIGraphicsBeginImageContextWithOptions(newSize, false, 0)
            image.draw(in: CGRect(origin: .zero, size: newSize))
            let resizedImage = UIGraphicsGetImageFromCurrentImageContext()
            UIGraphicsEndImageContext()

            return resizedImage?.jpegData(compressionQuality: compressionQuality)
        }

        return image.jpegData(compressionQuality: compressionQuality)
    }
}
构建优化和 CI/CD
Xcode 构建设置:
# 最佳性能的 .xcodebuild 设置
SWIFT_COMPILATION_MODE = "wholemodule"
SWIFT_OPTIMIZATION_LEVEL = "-O"
GCC_OPTIMIZATION_LEVEL = "s"

# 启用构建缓存
COMPILER_INDEX_STORE_ENABLE = "YES"
ENABLE_PREVIEWS = "YES"

# 为 Apple Silicon 优化
VALID_ARCHS = "arm64"
EXCLUDED_ARCHS[sdk=iphonesimulator*] = "i386"

# 启用高级优化
SWIFT_ENABLE_INCREMENTAL_COMPILATION = "YES"
SWIFT_ENABLE_BATCH_MODE = "YES"
CI/CD 流水线配置:
# macOS Tahoe 开发的 GitHub Actions
name: 构建和测试

on:
  push:
    branches: [main, develop]
  pull_request:
    branches: [main]

jobs:
  build-and-test:
    runs-on: macos-14

    steps:
    - uses: actions/checkout@v4

    - name: 设置 Xcode
      uses: maxim-lobanov/setup-xcode@v1
      with:
        xcode-version: '16.0'

    - name: 缓存构建产物
      uses: actions/cache@v3
      with:
        path: |
          ~/Library/Developer/Xcode/DerivedData
          ~/Library/Caches/org.swift.swiftpm
        key: ${{ runner.os }}-xcode-${{ hashFiles('**/*.xcodeproj') }}

    - name: 构建
      run: |
        xcodebuild clean build \
          -project YourApp.xcodeproj \
          -scheme YourApp \
          -destination 'platform=macOS' \
          -configuration Release \
          CODE_SIGNING_ALLOWED=NO

    - name: 测试
      run: |
        xcodebuild test \
          -project YourApp.xcodeproj \
          -scheme YourApp \
          -destination 'platform=macOS' \
          -enableCodeCoverage YES

    - name: 归档
      if: github.ref == 'refs/heads/main'
      run: |
        xcodebuild archive \
          -project YourApp.xcodeproj \
          -scheme YourApp \
          -destination 'generic/platform=macOS' \
          -archivePath YourApp.xcarchive
安全和隐私实现
安全开发实践
App Transport Security 配置:
<!-- 安全网络的 Info.plist 配置 -->
<key>NSAppTransportSecurity</key>
<dict>
    <key>NSAllowsArbitraryLoads</key>
    <false/>
    <key>NSAllowsLocalNetworking</key>
    <true/>
    <key>NSExceptionDomains</key>
    <dict>
        <key>your-api.com</key>
        <dict>
            <key>NSExceptionRequiresForwardSecrecy</key>
            <false/>
            <key>NSExceptionMinimumTLSVersion</key>
            <string>TLSv1.3</string>
        </dict>
    </dict>
</dict>
钥匙串集成:
import Security
import CryptoKit

class SecureStorage {
    private let service = "com.yourapp.secure"

    func store(data: Data, for key: String) throws {
        let query: [CFString: Any] = [
            kSecClass: kSecClassGenericPassword,
            kSecAttrService: service,
            kSecAttrAccount: key,
            kSecValueData: data,
            kSecAttrAccessible: kSecAttrAccessibleWhenUnlockedThisDeviceOnly
        ]

        let status = SecItemAdd(query as CFDictionary, nil)

        if status == errSecDuplicateItem {
            // 更新现有项目
            let updateQuery: [CFString: Any] = [
                kSecClass: kSecClassGenericPassword,
                kSecAttrService: service,
                kSecAttrAccount: key
            ]

            let updateAttributes: [CFString: Any] = [
                kSecValueData: data
            ]

            let updateStatus = SecItemUpdate(updateQuery as CFDictionary, updateAttributes as CFDictionary)
            guard updateStatus == errSecSuccess else {
                throw KeychainError.updateFailed
            }
        } else if status != errSecSuccess {
            throw KeychainError.storeFailed
        }
    }

    func retrieve(for key: String) throws -> Data {
        let query: [CFString: Any] = [
            kSecClass: kSecClassGenericPassword,
            kSecAttrService: service,
            kSecAttrAccount: key,
            kSecReturnData: true,
            kSecMatchLimit: kSecMatchLimitOne
        ]

        var result: AnyObject?
        let status = SecItemCopyMatching(query as CFDictionary, &result)

        guard status == errSecSuccess else {
            throw KeychainError.retrieveFailed
        }

        guard let data = result as? Data else {
            throw KeychainError.invalidData
        }

        return data
    }
}

enum KeychainError: Error {
    case storeFailed
    case updateFailed
    case retrieveFailed
    case invalidData
}
隐私意识的数据处理:
import FoundationModels

class PrivacyAwareAI {
    private let model = FoundationModel.shared

    func processUserInput(_ input: String) async throws -> String {
        // 清理输入以移除个人信息
        let sanitizedInput = sanitizePersonalData(input)

        // 完全在设备上处理
        let response = try await model.generate(
            prompt: sanitizedInput,
            privacyMode: .strict // 无数据记录
        )

        return response.text
    }

    private func sanitizePersonalData(_ input: String) -> String {
        // 移除电子邮件地址、电话号码等
        var sanitized = input

        // 电子邮件正则表达式
        let emailRegex = try! NSRegularExpression(pattern: #"\b[A-Za-z0-9._%+-]+@[A-Za-z0-9.-]+\.[A-Z|a-z]{2,}\b"#)
        sanitized = emailRegex.stringByReplacingMatches(
            in: sanitized,
            options: [],
            range: NSRange(location: 0, length: sanitized.count),
            withTemplate: "[EMAIL]"
        )

        // 电话号码正则表达式
        let phoneRegex = try! NSRegularExpression(pattern: #"\b\d{3}-\d{3}-\d{4}\b"#)
        sanitized = phoneRegex.stringByReplacingMatches(
            in: sanitized,
            options: [],
            range: NSRange(location: 0, length: sanitized.count),
            withTemplate: "[PHONE]"
        )

        return sanitized
    }
}
面向未来和迁移策略
Intel 到 Apple Silicon 的过渡
通用二进制支持:
# 为过渡期构建通用二进制
xcodebuild -project YourApp.xcodeproj \
  -scheme YourApp \
  -destination 'generic/platform=macOS' \
  -arch arm64 -arch x86_64 \
  archive
功能检测:
import Foundation

struct DeviceCapabilities {
    static let hasAppleSilicon: Bool = {
        var size = 0
        sysctlbyname("hw.optional.arm64", nil, &size, nil, 0)
        return size > 0
    }()

    static let hasNeuralEngine: Bool = {
        hasAppleSilicon && ProcessInfo.processInfo.operatingSystemVersion.majorVersion >= 11
    }()

    static let supportsFoundationModels: Bool = {
        hasNeuralEngine && ProcessInfo.processInfo.operatingSystemVersion.majorVersion >= 26
    }()

    static func optimizeForHardware() {
        if hasAppleSilicon {
            // 启用 Apple Silicon 优化
            enableAdvancedFeatures()
        } else {
            // Intel Mac 的备用方案
            useCompatibilityMode()
        }
    }

    private static func enableAdvancedFeatures() {
        // 启用 Foundation Models、高级图形等
    }

    private static func useCompatibilityMode() {
        // 禁用需要 Apple Silicon 的功能
    }
}
迁移时间线规划:
class MigrationManager {
    enum MigrationPhase {
        case preparation  // Tahoe 前 6 个月
        case transition   // Tahoe 26 发布期
        case optimization // 迁移后优化
        case completion   // 仅 Apple Silicon
    }

    static func getCurrentPhase() -> MigrationPhase {
        let now = Date()
        let tahoeRelease = DateComponents(year: 2025, month: 9, day: 15)
        let tahoeDate = Calendar.current.date(from: tahoeRelease)!

        let monthsFromRelease = Calendar.current.dateComponents([.month], from: tahoeDate, to: now).month ?? 0

        switch monthsFromRelease {
        case ..<0:
            return .preparation
        case 0..<6:
            return .transition
        case 6..<12:
            return .optimization
        default:
            return .completion
        }
    }

    static func recommendedActions() -> [String] {
        switch getCurrentPhase() {
        case .preparation:
            return [
                "在 Apple Silicon 硬件上测试",
                "更新 ARM64 依赖项",
                "规划 Intel 弃用时间线"
            ]
        case .transition:
            return [
                "监控 Intel Mac 用户百分比",
                "提供迁移指导",
                "为 Apple Silicon 优化"
            ]
        case .optimization:
            return [
                "移除 Intel 特定代码路径",
                "实现 Apple Silicon 独有功能",
                "为 M 系列芯片优化性能"
            ]
        case .completion:
            return [
                "完全 Apple Silicon 优化",
                "利用高级硬件功能",
                "规划未来 M 系列功能"
            ]
        }
    }
}
结论:掌握 macOS Tahoe 开发
战略开发路线图
macOS Tahoe 26 代表了 Mac 开发的关键时刻,为快速适应其革命性功能的开发者提供了前所未有的机会。AI 驱动的开发工具、统一设计系统和强大的设备上智能相结合,为应用程序创新创造了新的可能性。
立即行动项目:
- 更新开发环境:迁移到 Xcode 16 并让团队熟悉 AI 辅助编程工作流程
- 实现 Liquid Glass 设计:开始将半透明设计元素集成到应用程序中
- 探索 Foundation Models:使用设备上智能功能原型 AI 功能
- 为 Apple Silicon 优化:确保 M 系列处理器的完全兼容性和性能优化
- 规划 Intel 过渡:为最后支持的 Intel Mac 用户制定迁移策略
长期战略考虑:
平台演进准备:
- macOS 27 准备:预期 Apple Silicon 独有功能和能力
- 跨平台统一:利用统一设计和开发框架
- AI 集成深度:规划所有应用功能中 AI 功能的更深集成
- 性能优化:为下一代 M 系列处理器功能做准备
竞争优势:
- 早期采用:Liquid Glass 设计实现的先发优势
- AI 差异化:由设备上智能驱动的独特功能
- 性能领先:Apple Silicon 功能的最佳利用
- 用户体验卓越:与 macOS Tahoe 革命性界面的无缝集成
技术投资优先级:
- 开发团队培训:新框架和工具的综合教育
- 基础设施现代化:为 Apple Silicon 开发优化的 CI/CD 流水线
- 测试策略:Intel 和 Apple Silicon 配置的综合测试
- 性能监控:高级分析和优化工作流程的实现
面向未来的开发实践
可持续发展方法:
// 面向未来的代码结构示例
protocol PlatformOptimized {
    var supportsAdvancedFeatures: Bool { get }
    func optimizeForCurrentPlatform()
}

extension PlatformOptimized {
    var supportsAdvancedFeatures: Bool {
        DeviceCapabilities.hasAppleSilicon &&
        DeviceCapabilities.supportsFoundationModels
    }

    func optimizeForCurrentPlatform() {
        if supportsAdvancedFeatures {
            enableAIFeatures()
            implementLiquidGlassDesign()
            optimizeForNeuralEngine()
        } else {
            useStandardFeatures()
            implementFallbackDesign()
        }
    }
}
创新机会:
- AI 增强用户界面:基于用户行为的智能界面适应
- 上下文感知应用程序:理解并适应用户上下文的应用
- 无缝跨设备体验:所有苹果平台上的统一体验
- 隐私优先创新:保持用户隐私的高级功能
macOS Tahoe 26 为开发者提供了创建下一代 Mac 应用程序所需的工具和框架。在这个新时代取得成功需要拥抱 AI 驱动的开发工作流程,掌握 Liquid Glass 设计系统,并为 Apple Silicon 的独特功能进行优化。
今天投资理解和实现这些技术的开发者将处于引领 Mac 软件生态系统多年发展的位置。macOS Tahoe 不仅仅是操作系统更新——它是一个将定义 Mac 开发未来的创新平台。