How to Downgrade macOS: Complete 2025 Guide for Sequoia, Sonoma, and Tahoe
Comprehensive guide to safely downgrade your Mac to an earlier macOS version. Learn three proven methods: Time Machine backup, Internet Recovery, and bootable USB installer. Step-by-step instructions for Apple Silicon and Intel Macs.
Upgrading to the latest macOS version doesn't always go as planned. Whether you're experiencing compatibility issues with essential software, facing performance problems, or encountering bugs that affect your workflow, downgrading to a previous macOS version might be your best solution. This comprehensive guide covers everything you need to know about safely reverting to an earlier macOS version on both Apple Silicon and Intel Macs.
Why Would You Need to Downgrade macOS?
Before diving into the downgrade process, let's understand the common scenarios that lead users to seek this solution:
Software Compatibility Issues
Professional Applications:
- Adobe Creative Suite plugins not compatible with newer macOS versions
- Audio production software (Pro Tools, Logic Pro plugins) requiring specific macOS versions
- Legacy business software that hasn't been updated
- Development tools and SDK dependencies
Hardware Compatibility:
- Older peripherals (printers, scanners, MIDI devices) losing driver support
- Professional audio interfaces with outdated drivers
- Specialized medical or scientific equipment
Performance Degradation
Common Performance Issues:
- Excessive battery drain on MacBooks (especially older models)
- System slowdowns and lag after upgrading
- Increased memory usage affecting multitasking
- Graphics performance issues with Liquid Glass on older hardware
Stability Concerns
Bugs and Issues:
- Wi-Fi connectivity problems
- Bluetooth device disconnections
- App crashes and freezes
- Sleep/wake issues
Understanding Your Options: Three Downgrade Methods
There are three primary methods to downgrade macOS, each with its own advantages and requirements:
| Method | Data Preservation | Time Required | Technical Level | Best For |
|---|---|---|---|---|
| Time Machine | ✅ Full restore | 1-4 hours | Beginner | Users with backups |
| Internet Recovery | ❌ Clean install | 2-6 hours | Intermediate | Quick restoration |
| USB Installer | ❌ Clean install | 1-3 hours | Intermediate | Offline installation |

Method 1: Time Machine Backup Restore
The easiest and safest method if you have a Time Machine backup from before your upgrade.
Prerequisites
- Time Machine backup created before the macOS upgrade
- Backup drive connected to your Mac
- Sufficient battery (or connected to power for MacBooks)
Step-by-Step Process
Step 1: Enter Recovery Mode
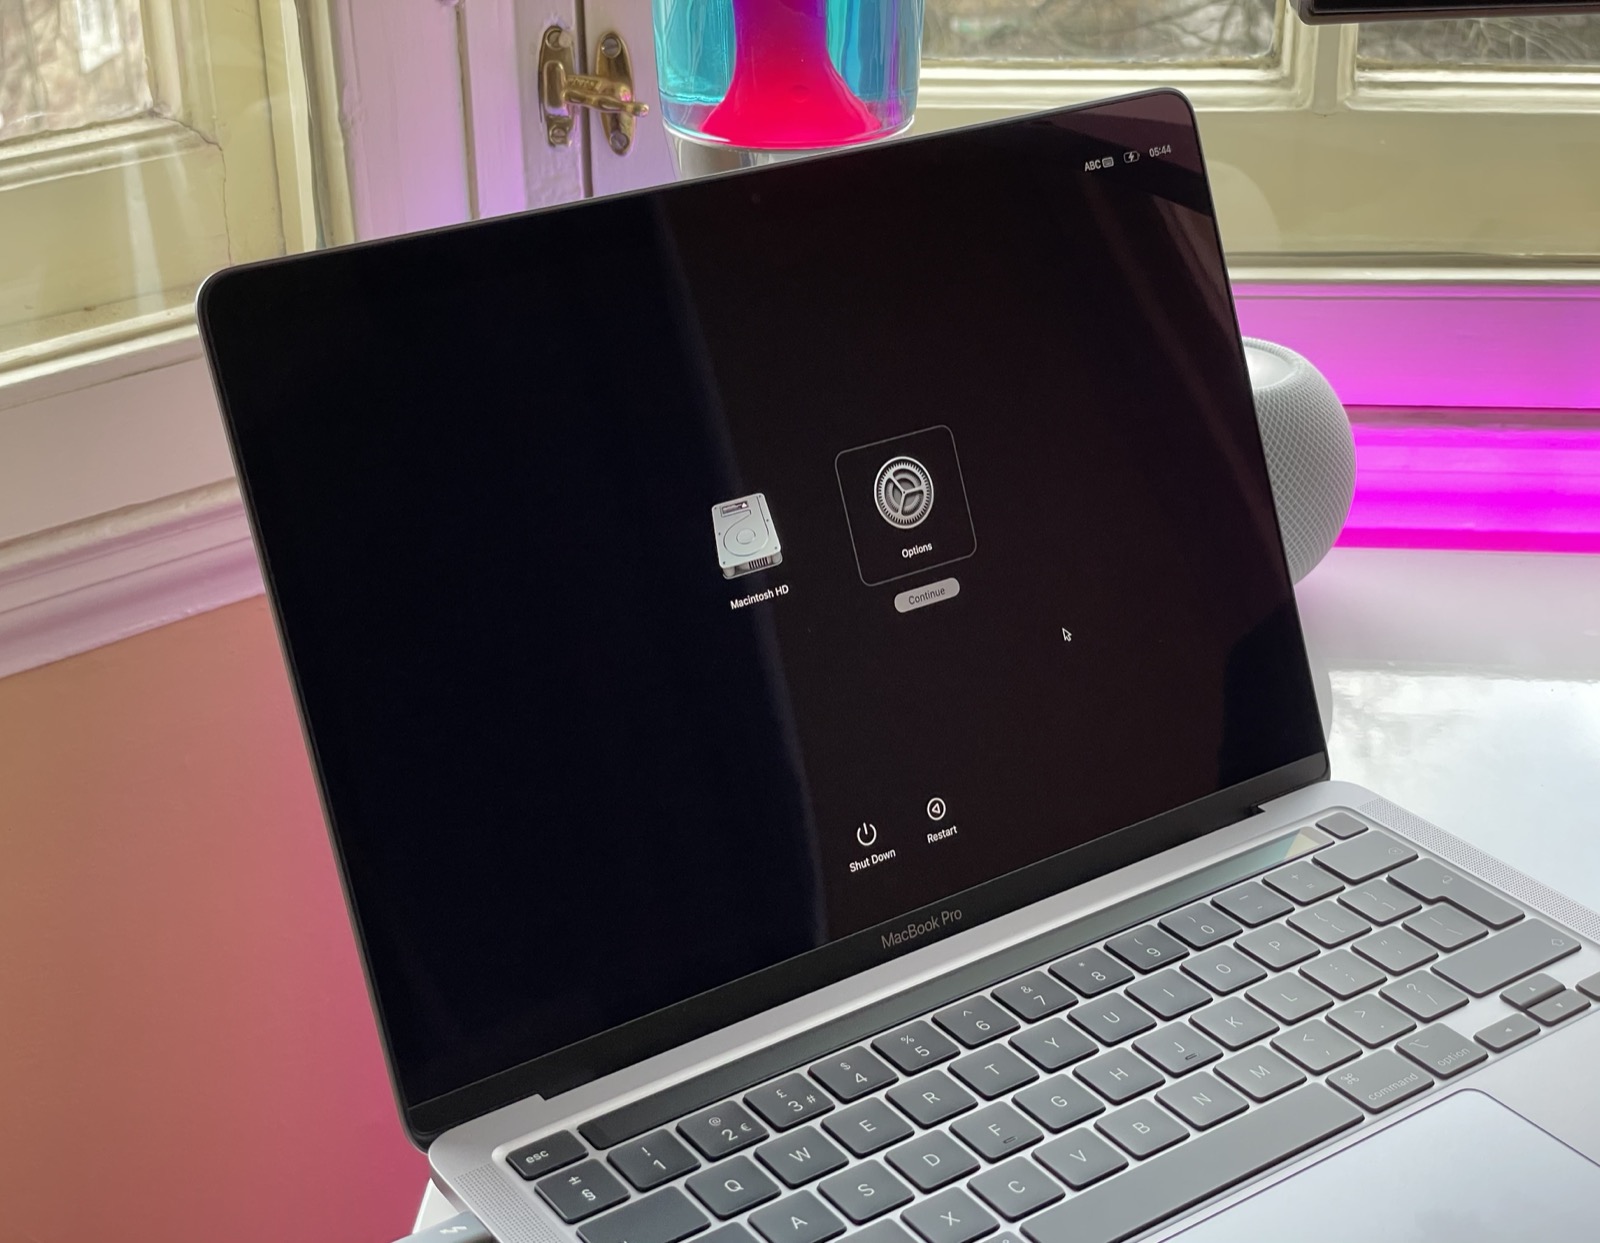
For Apple Silicon Macs (M1/M2/M3/M4):
- Shut down your Mac completely
- Press and hold the Power button
- Continue holding until you see "Loading startup options"
- Select Options and click Continue
For Intel Macs:
- Restart your Mac
- Immediately press and hold Command (⌘) + R
- Hold until you see the Apple logo or spinning globe
- Release when Recovery Mode loads
Step 2: Restore from Time Machine
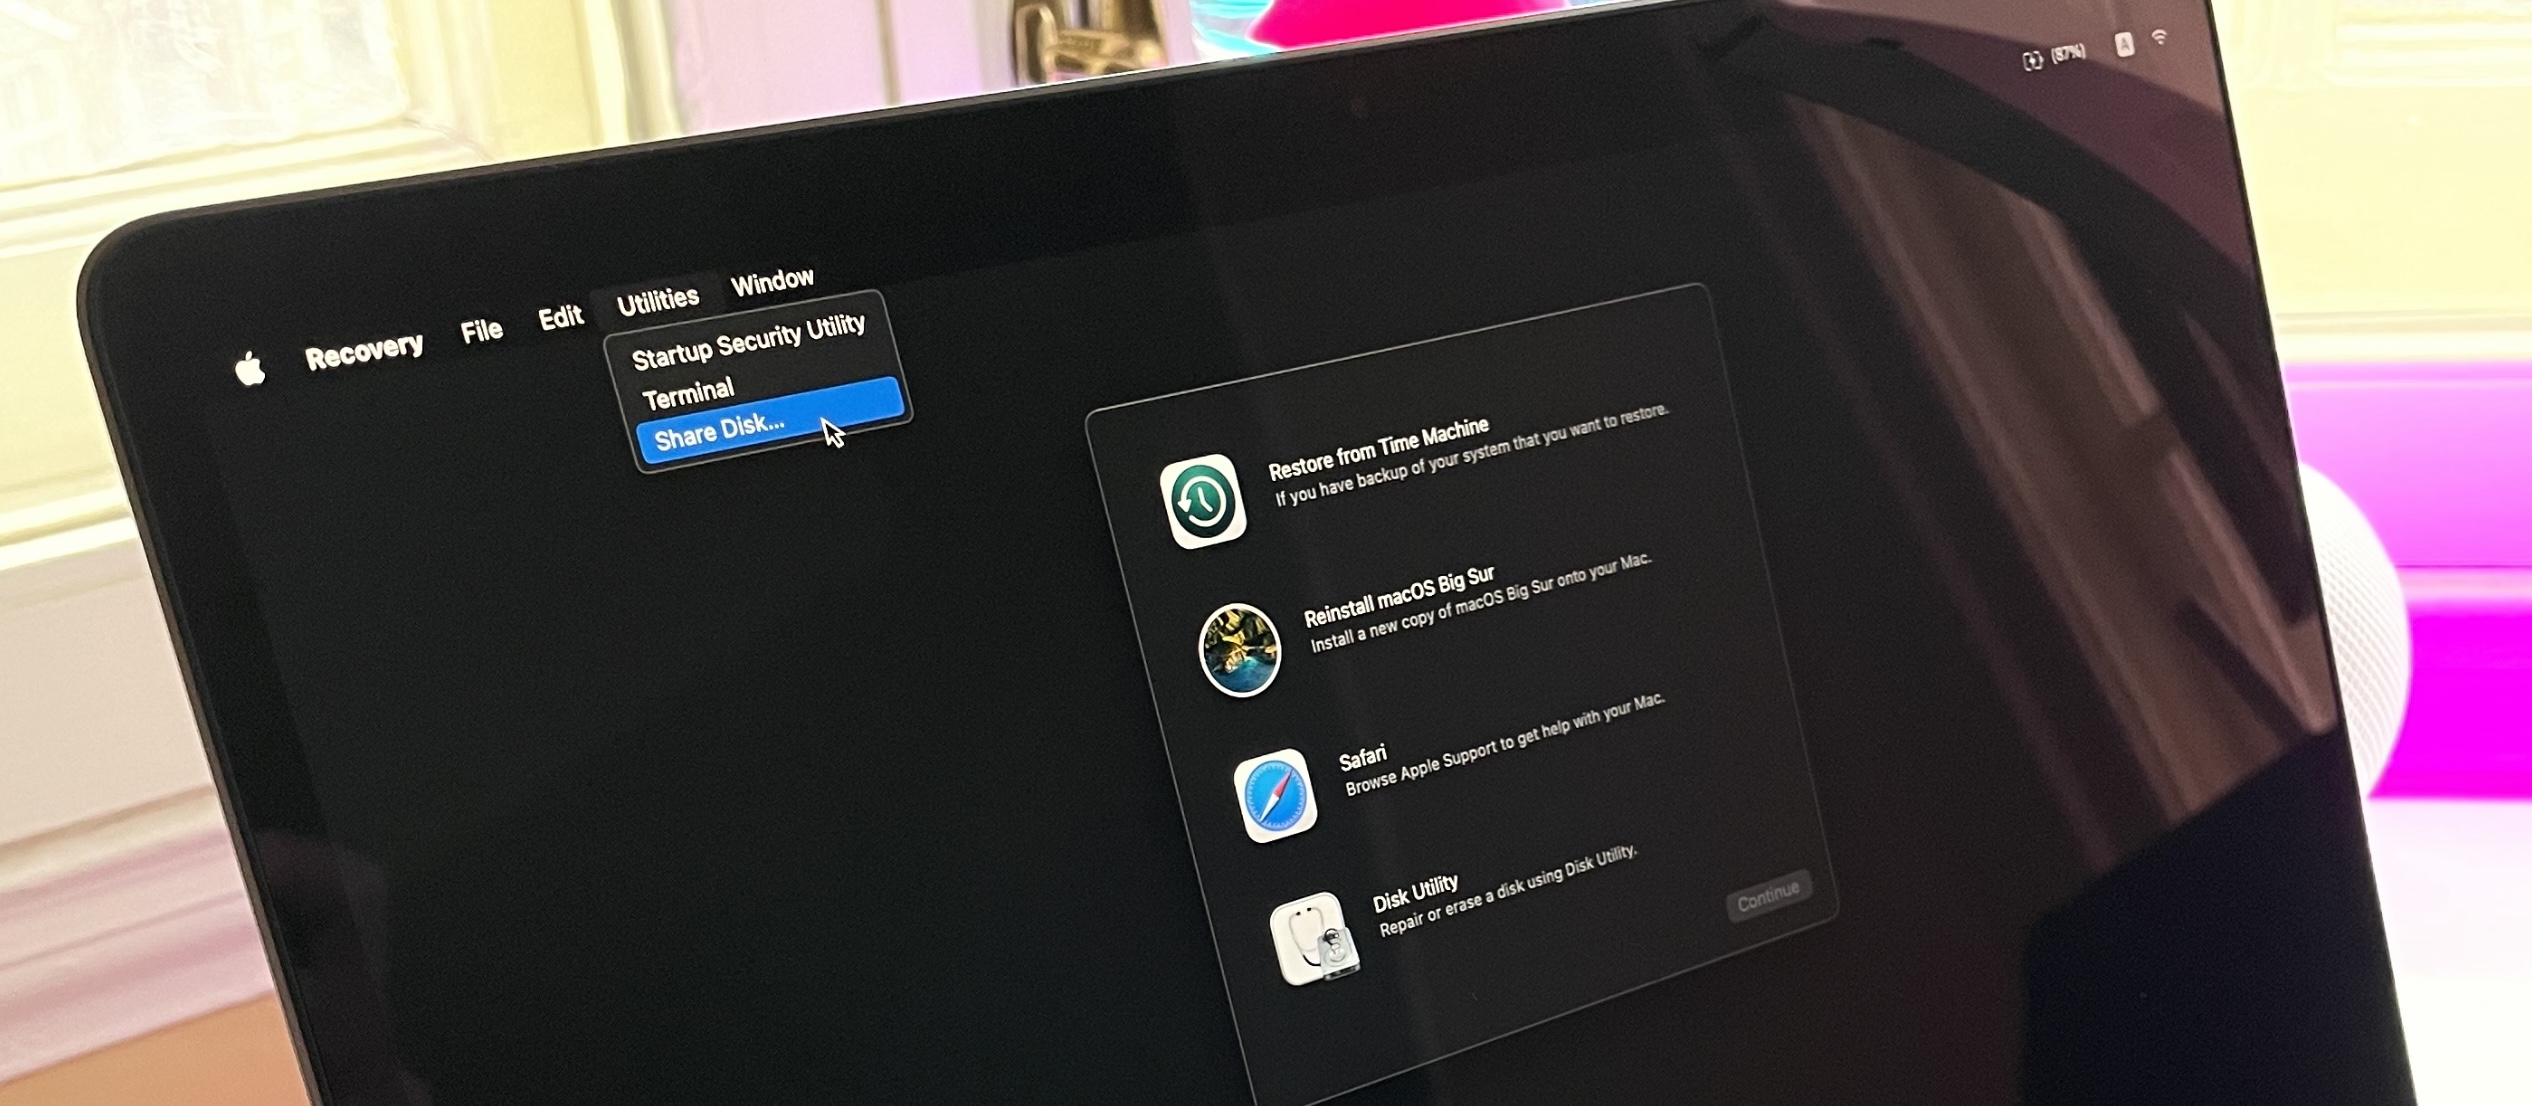
- In Recovery Mode, select Restore from Time Machine Backup
- Click Continue
- Select your Time Machine backup drive
- Choose a backup from before your macOS upgrade
- Select the destination disk (usually "Macintosh HD")
- Click Restore and confirm
Step 3: Wait for Completion
- The restore process can take 1-4 hours depending on backup size
- Your Mac will restart automatically when complete
- Sign in and verify your applications and data
Important Notes
- This method overwrites everything on your Mac with the backup contents
- Any files created after the backup will be lost
- Make sure to copy important recent files to external storage first
Method 2: Internet Recovery
Internet Recovery downloads and installs macOS directly from Apple's servers. This method provides a clean installation.
Prerequisites
- Stable internet connection (wired ethernet recommended)
- Apple ID (may be required for activation)
- Time for download (varies by internet speed)
Understanding Internet Recovery Options
| Key Combination | Result |
|---|---|
| Command + R | Reinstalls current macOS version |
| Option + Command + R | Installs latest compatible macOS |
| Shift + Option + Command + R | Installs original shipped macOS |
Step-by-Step Process
Step 1: Enter Internet Recovery
For Apple Silicon Macs:
- Shut down your Mac
- Press and hold Power button until startup options appear
- Select Options → Continue
- Choose your Wi-Fi network if not connected via Ethernet
For Intel Macs:
- Restart your Mac
- Immediately hold Shift + Option + Command + R (for original macOS)
- Or hold Option + Command + R (for latest compatible)
- Connect to Wi-Fi when prompted
Step 2: Erase the Disk (Optional but Recommended)
- Select Disk Utility from the menu
- Select your internal drive (usually "Macintosh HD")
- Click Erase
- Name: "Macintosh HD"
- Format: APFS (or Mac OS Extended for older systems)
- Click Erase and confirm
Step 3: Install macOS
- Return to the main Recovery menu
- Select Reinstall macOS [Version]
- Follow the on-screen instructions
- Select your erased disk as the destination
- Wait for download and installation
Limitations
- Cannot choose a specific macOS version with Internet Recovery
- Shift + Option + Command + R only works on Intel Macs
- Apple Silicon Macs may require additional steps (see below)
Method 3: Bootable USB Installer
Creating a bootable USB installer gives you the most control over which macOS version to install.
Prerequisites
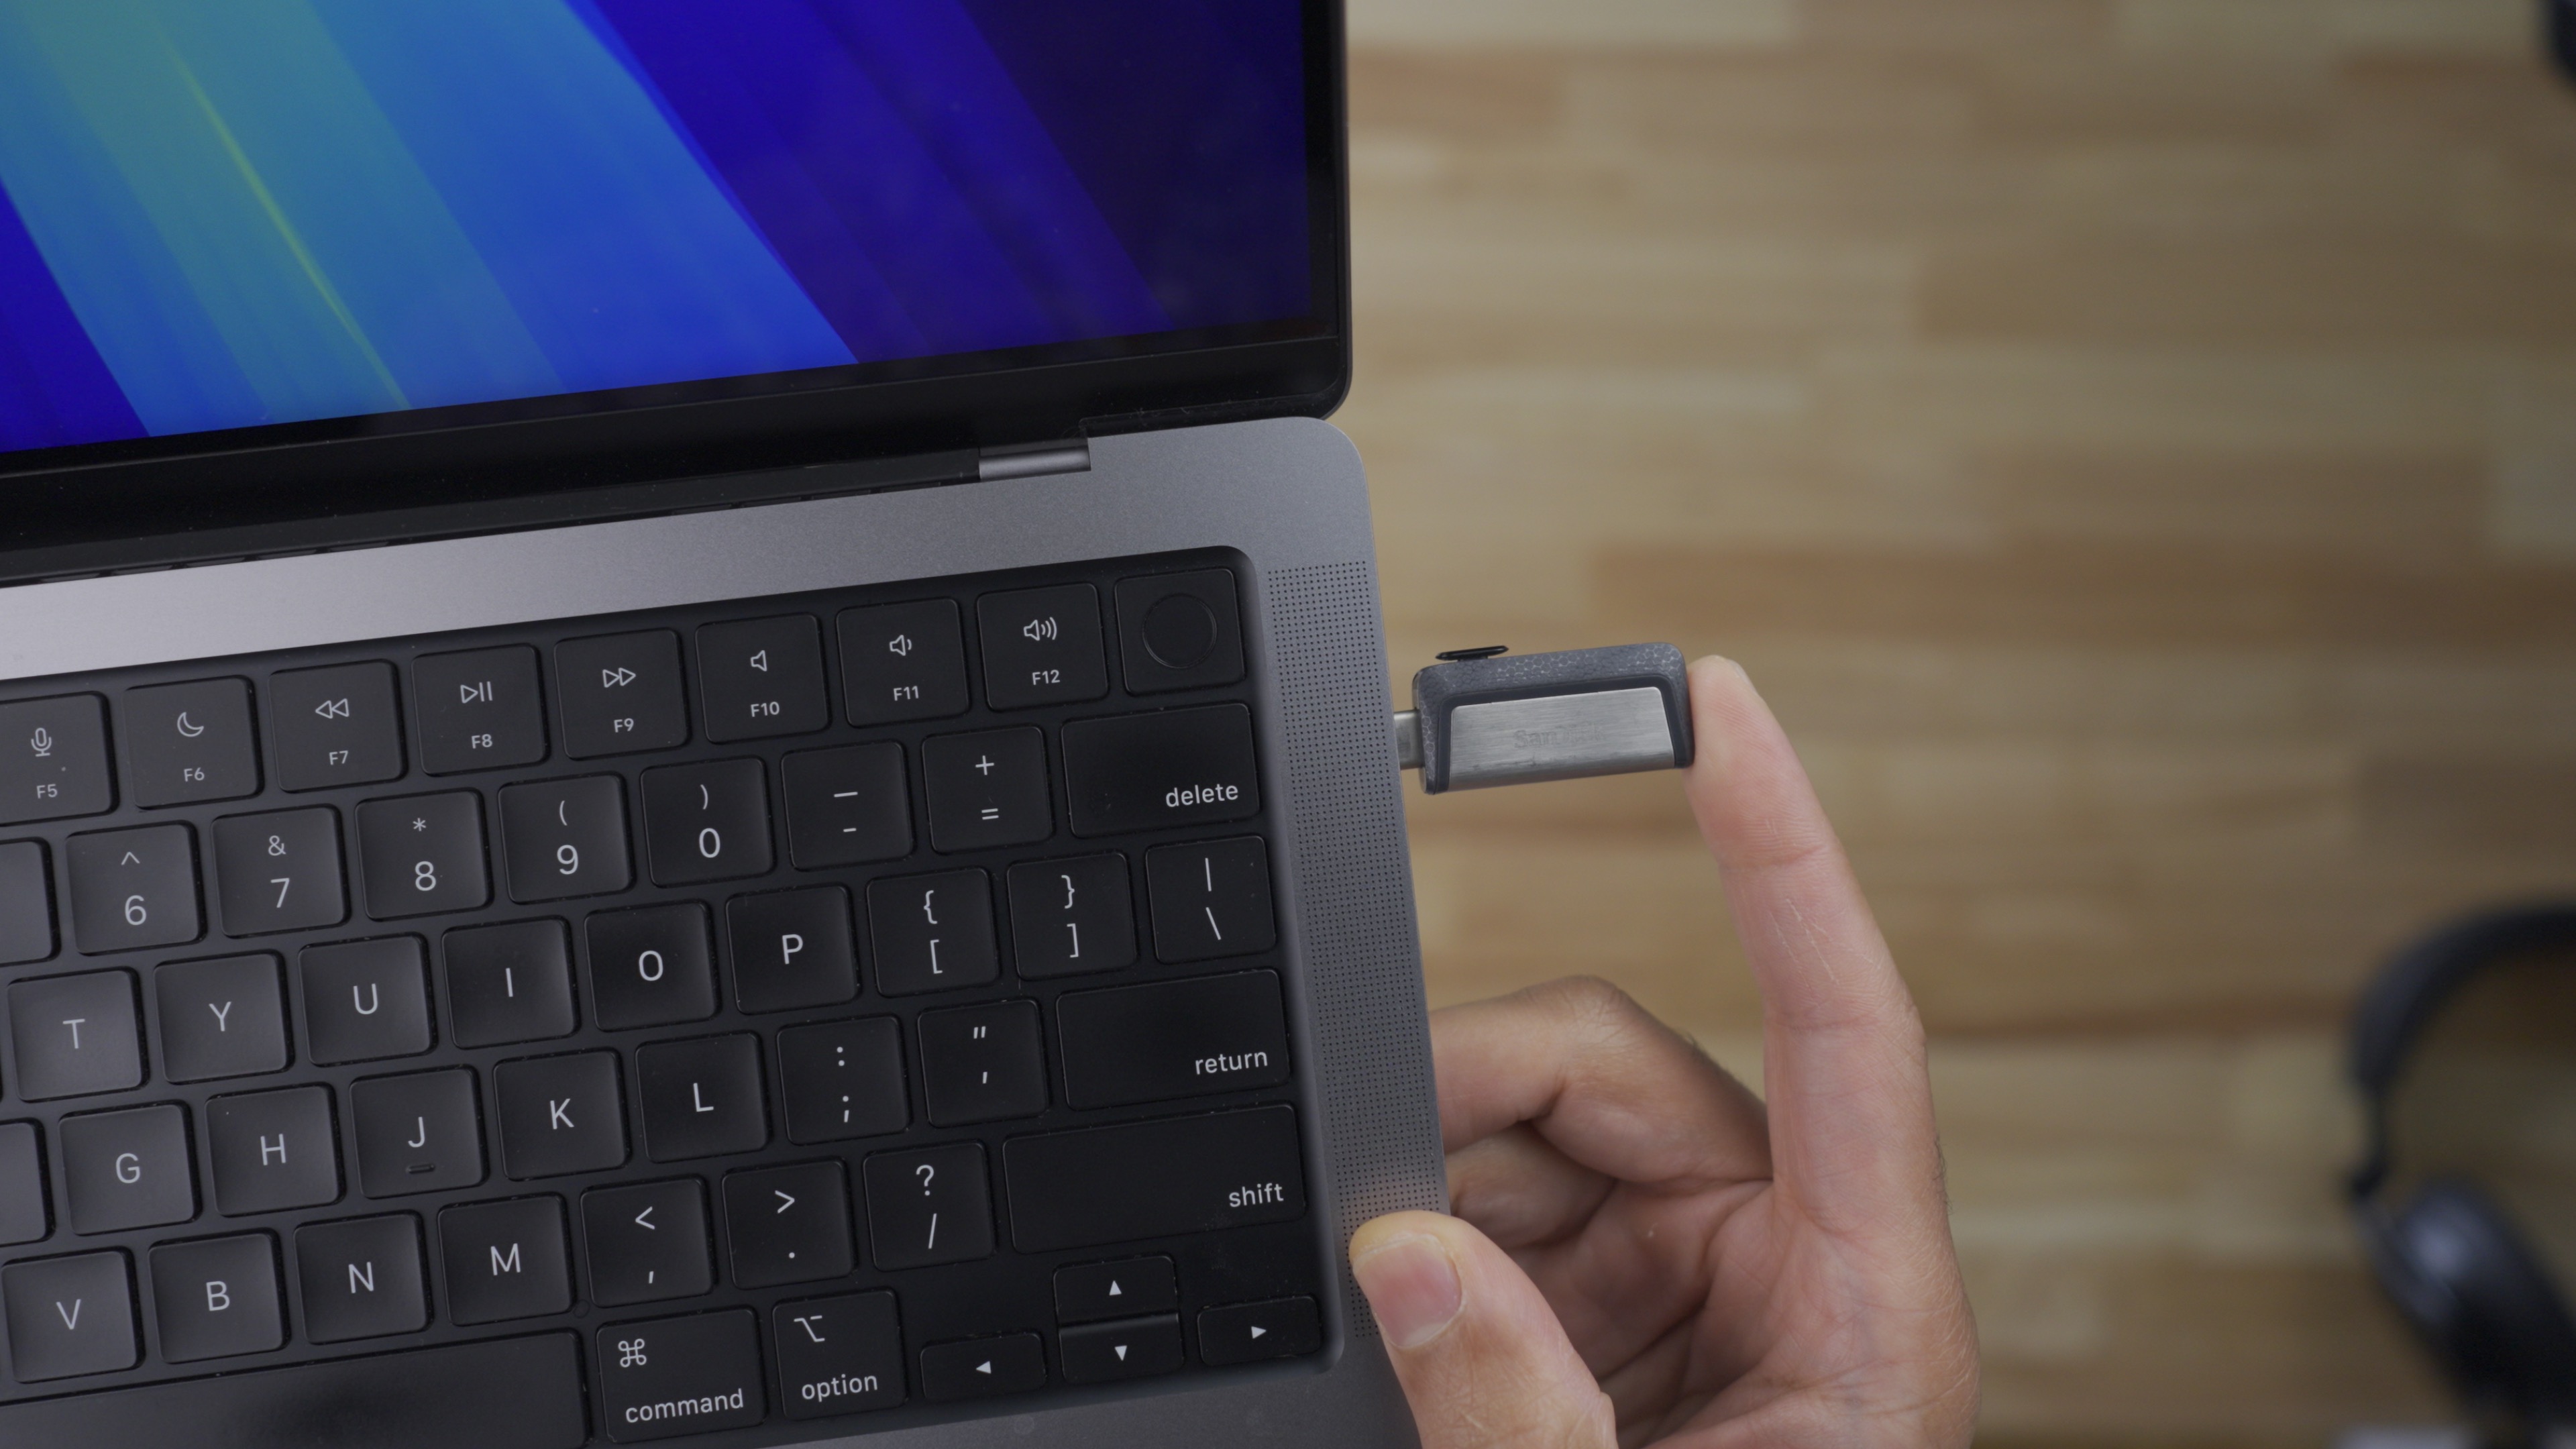
- USB flash drive (16GB minimum, 32GB recommended)
- macOS installer file downloaded from Apple
- Another Mac to create the installer (if your current Mac is unusable)
Step 1: Download the macOS Installer
You can download older macOS versions from these sources:
From the Mac App Store:
- macOS Sonoma
- macOS Ventura
- macOS Monterey
- macOS Big Sur
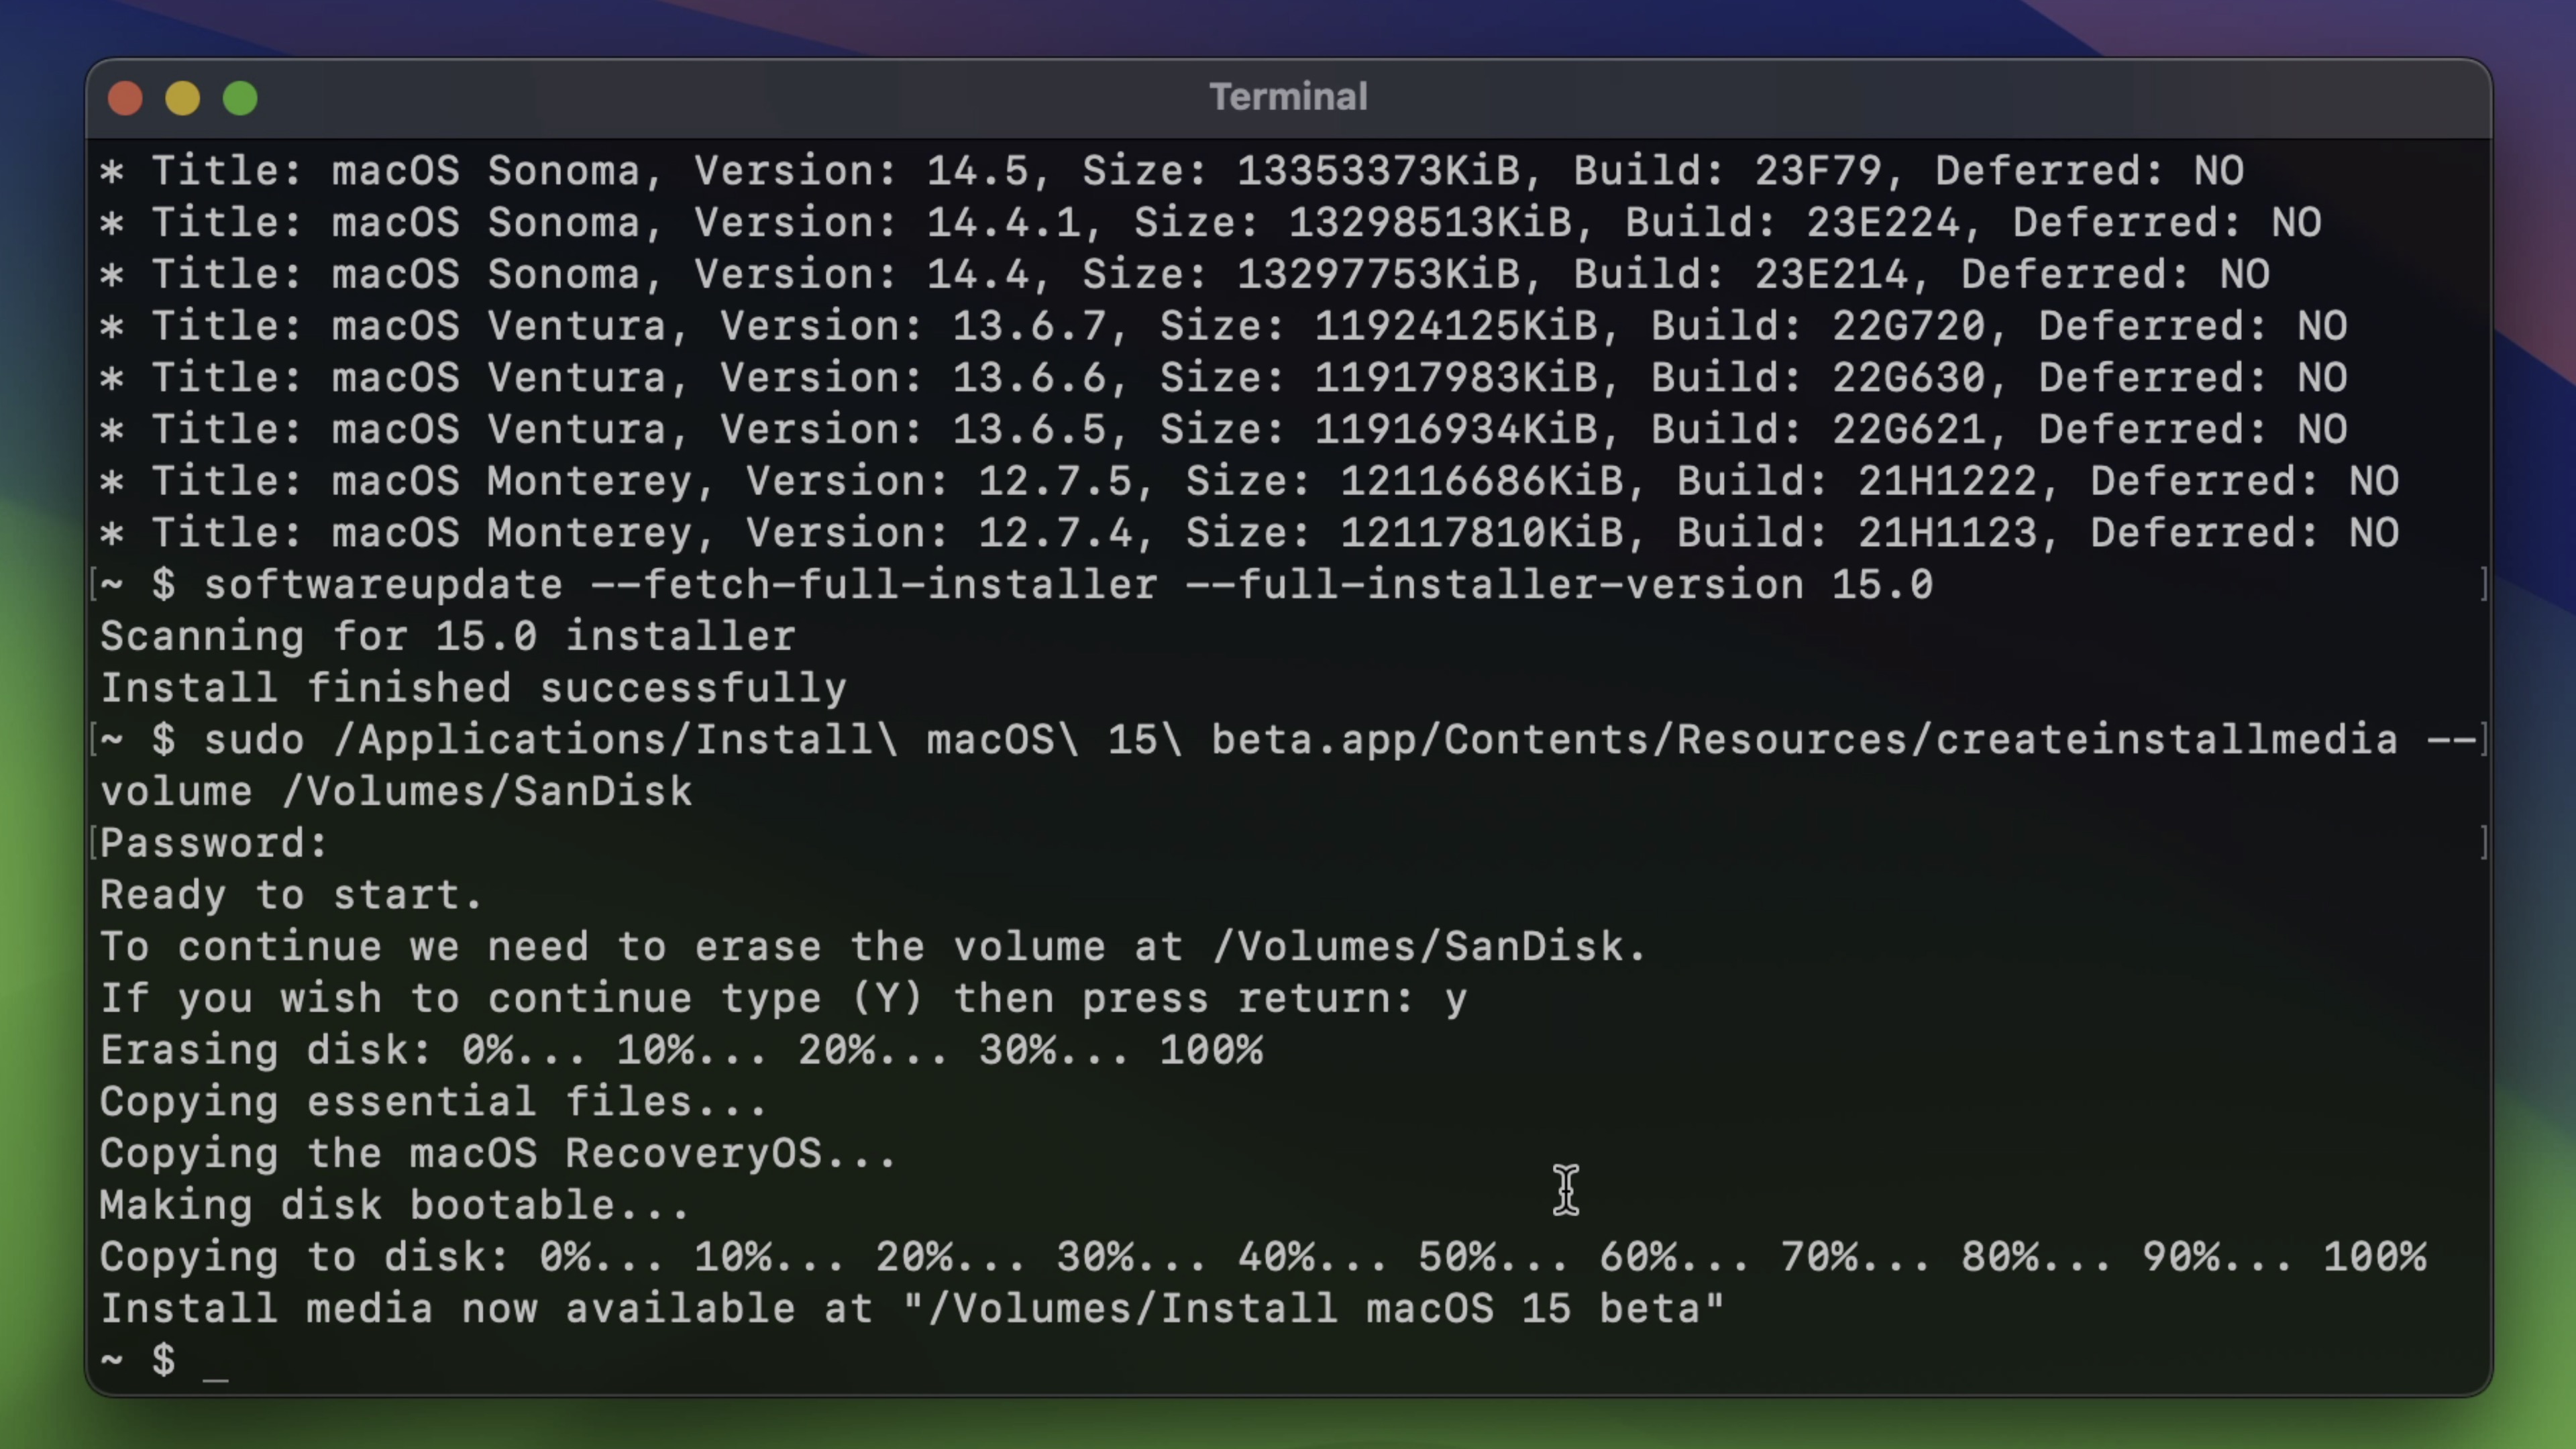
Using Terminal (for older versions):
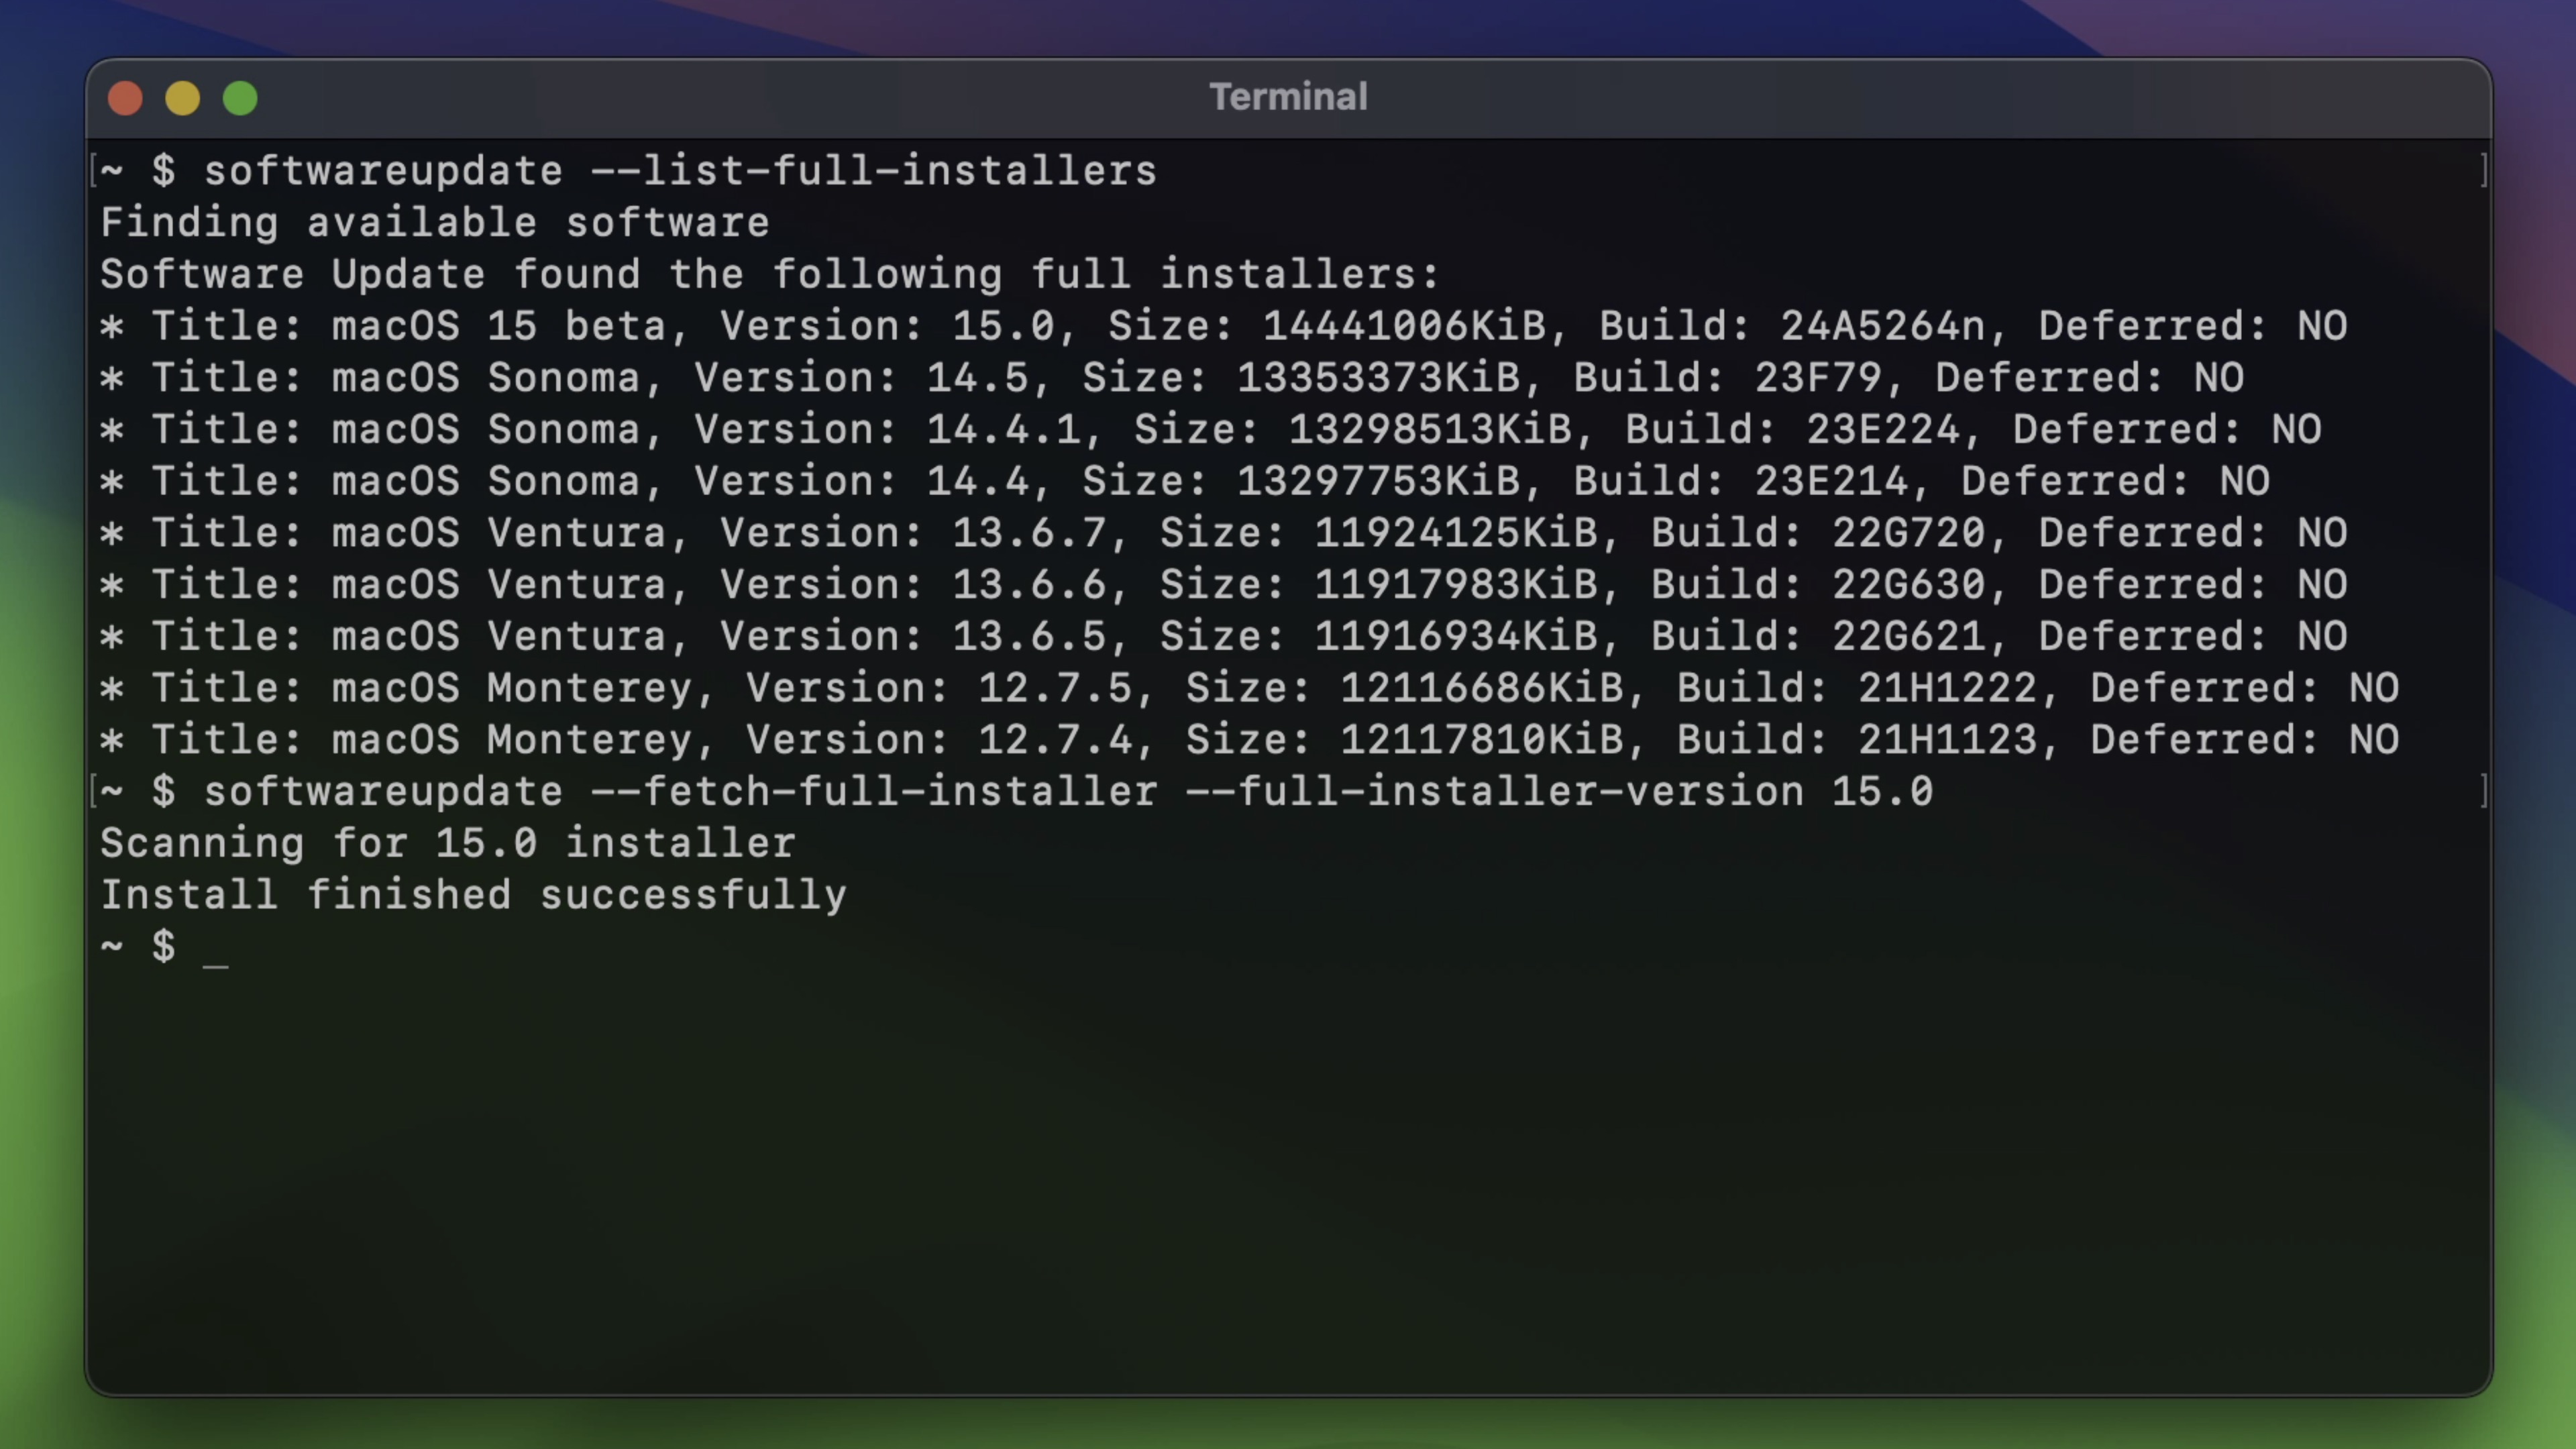
# Download macOS Sonoma
softwareupdate --fetch-full-installer --full-installer-version 14.7

# Download macOS Ventura
softwareupdate --fetch-full-installer --full-installer-version 13.7

# Download macOS Monterey
softwareupdate --fetch-full-installer --full-installer-version 12.7
Direct Apple Links:
- Search "macOS [Version Name]" in the App Store
- Or visit Apple's support page for download links
Step 2: Format the USB Drive
- Insert your USB drive
- Open Disk Utility
- Select the USB drive in the sidebar
- Click Erase
- Configure:
- Name: "MyVolume" (or any name without spaces)
- Format: Mac OS Extended (Journaled)
- Scheme: GUID Partition Map
- Click Erase
Step 3: Create the Bootable Installer
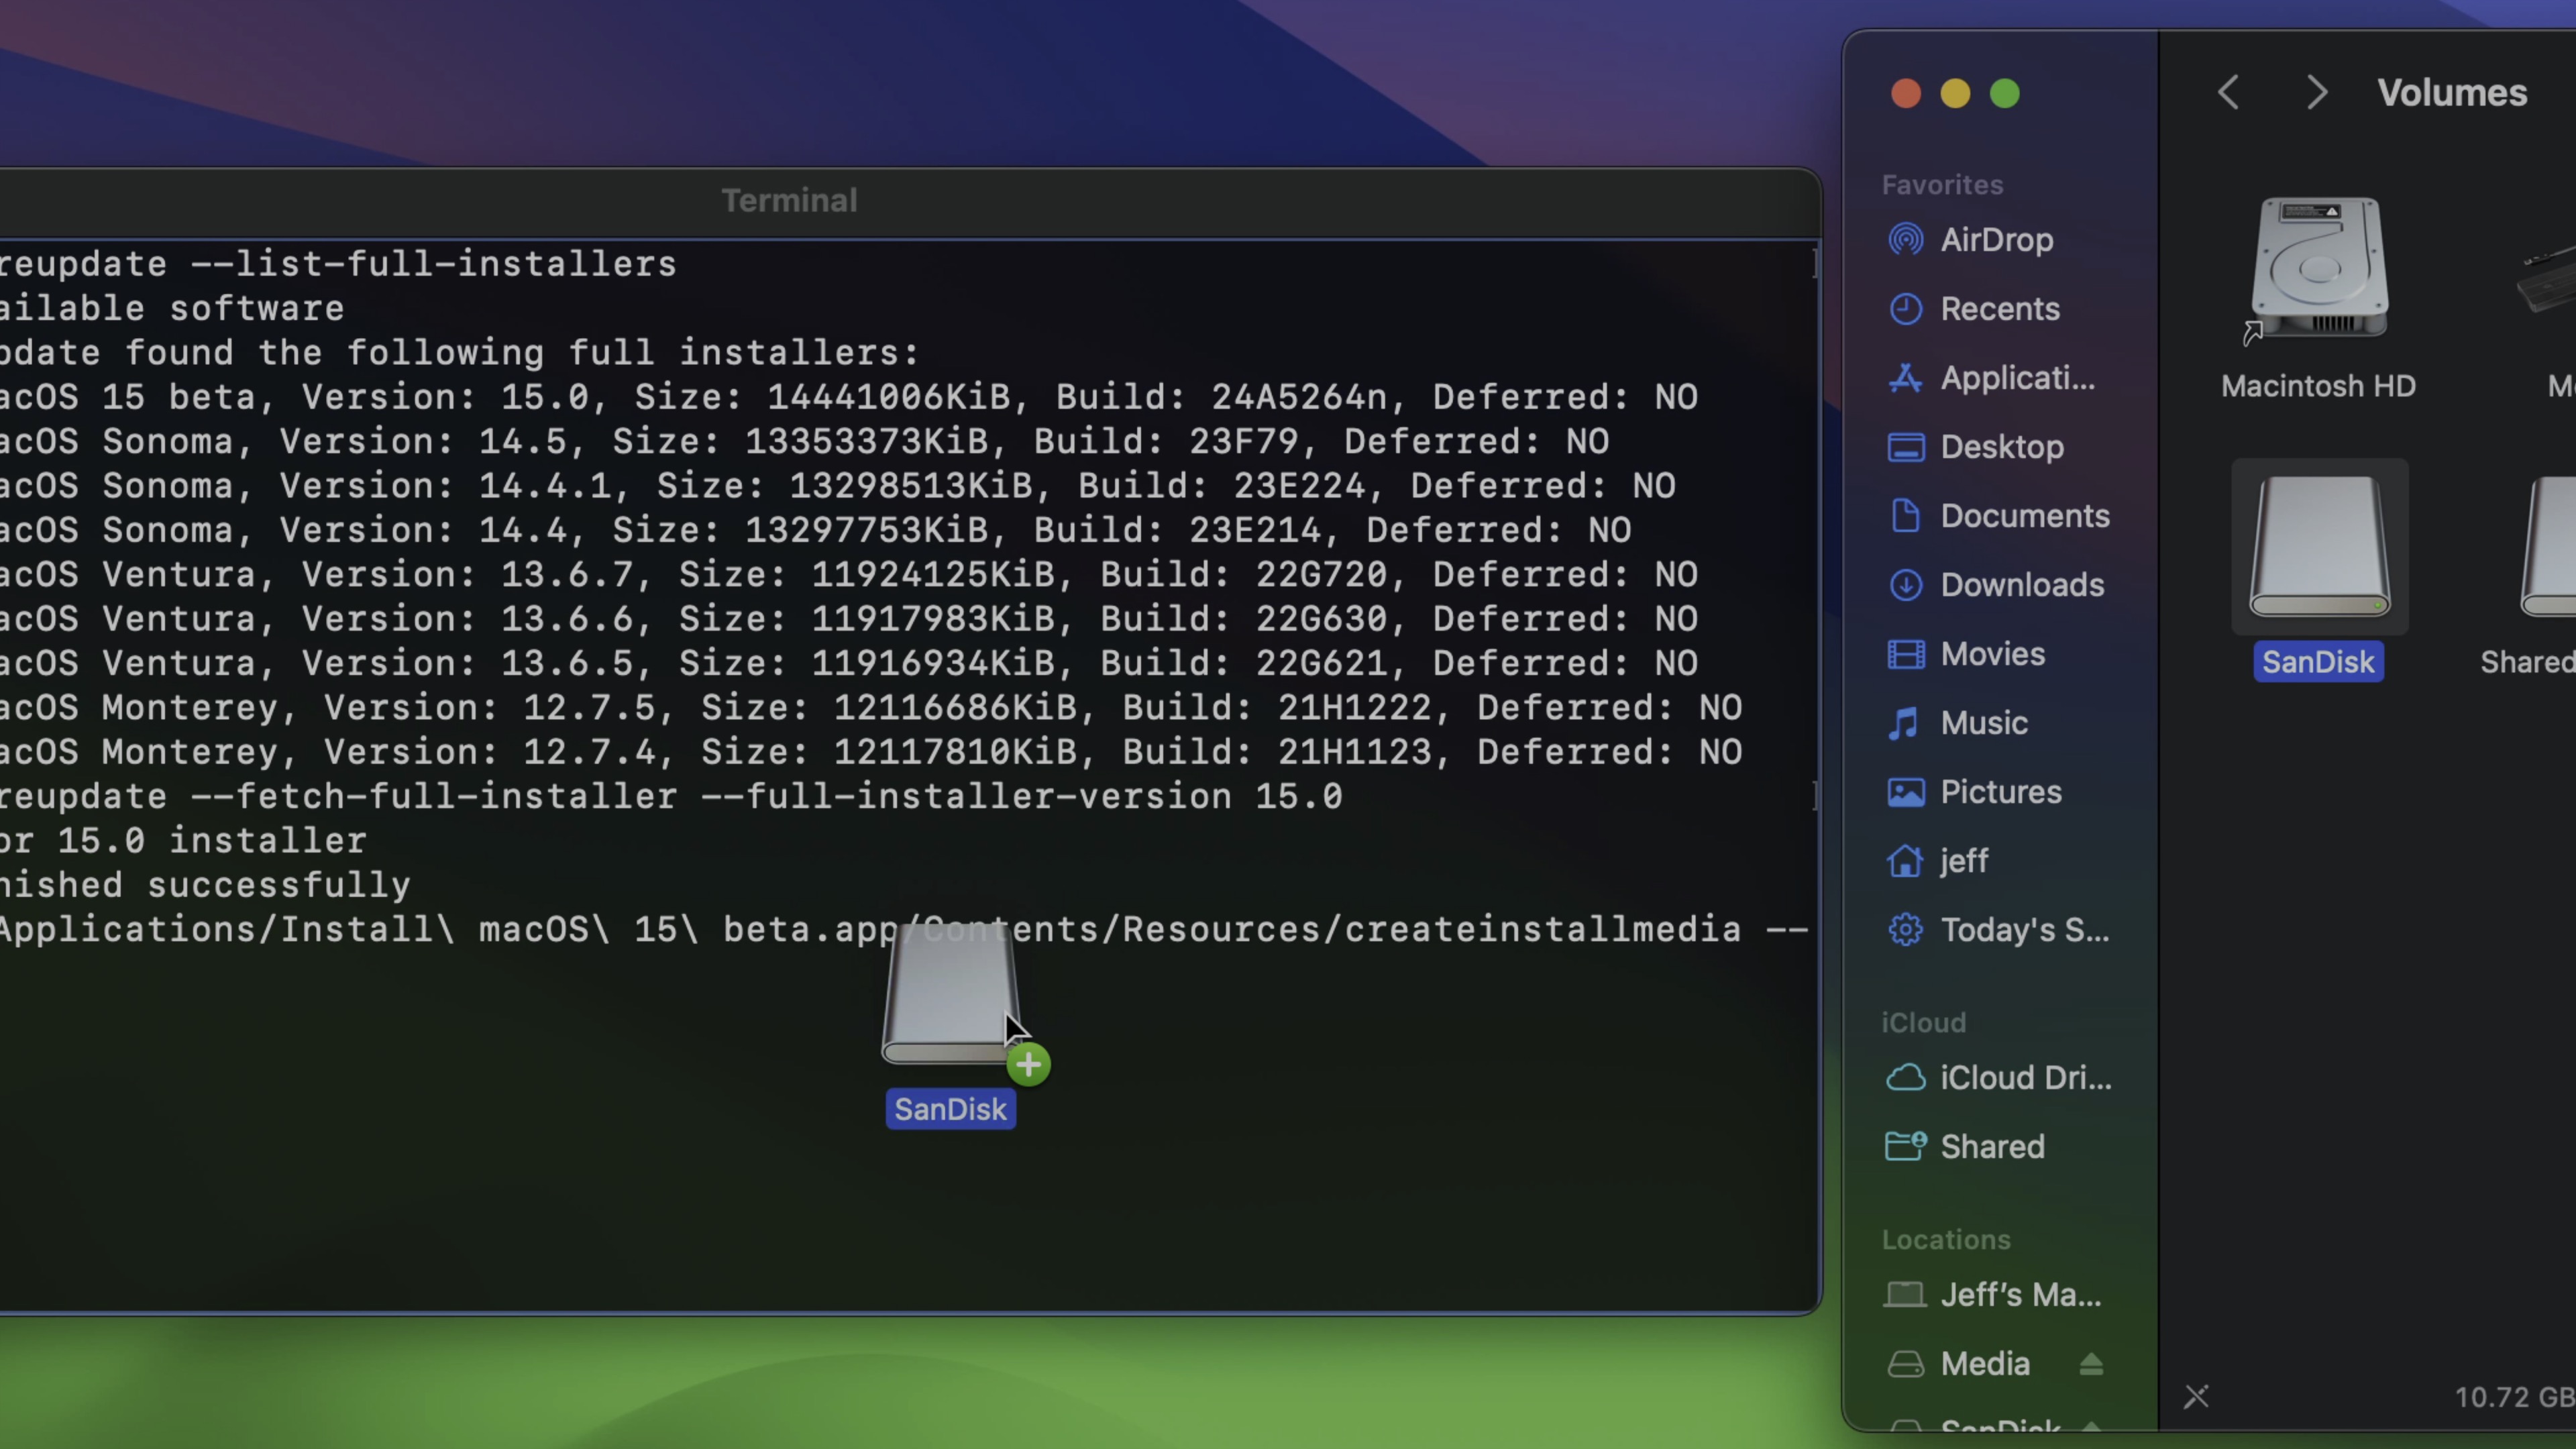
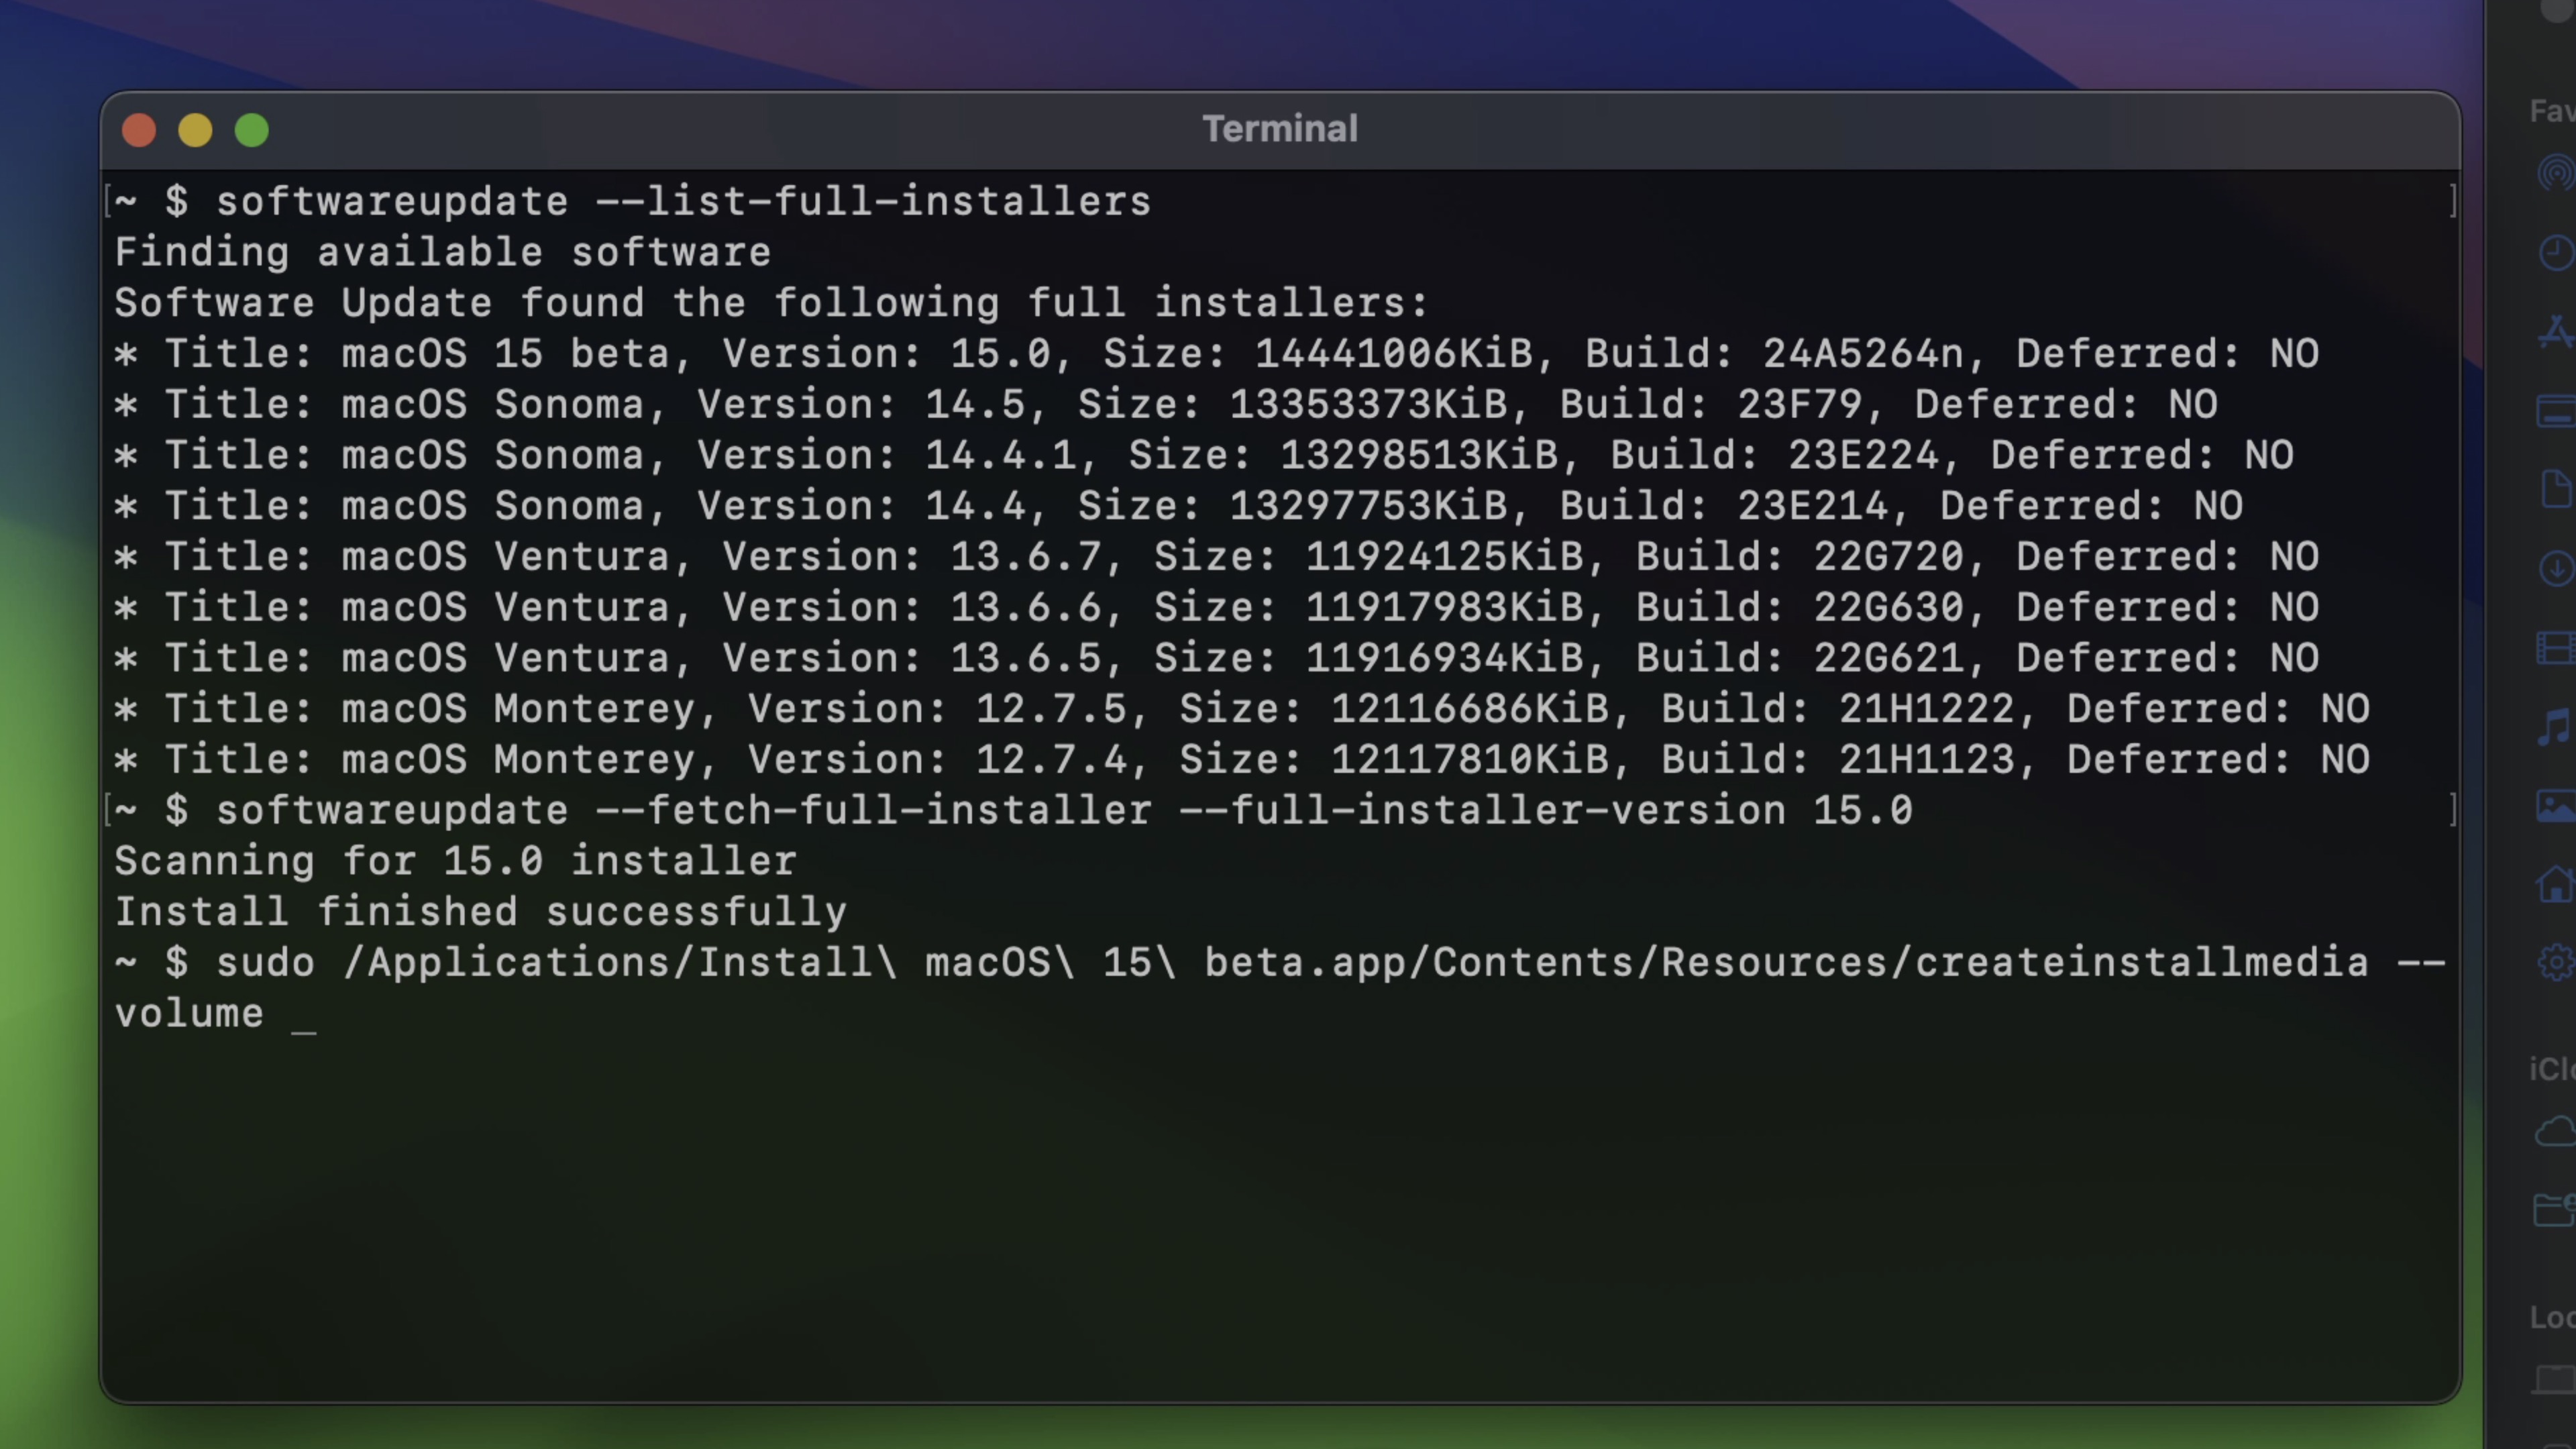
Open Terminal and run the appropriate command for your desired macOS version:
macOS Sonoma (14):
sudo /Applications/Install\ macOS\ Sonoma.app/Contents/Resources/createinstallmedia --volume /Volumes/MyVolumemacOS Ventura (13):
sudo /Applications/Install\ macOS\ Ventura.app/Contents/Resources/createinstallmedia --volume /Volumes/MyVolumemacOS Monterey (12):
sudo /Applications/Install\ macOS\ Monterey.app/Contents/Resources/createinstallmedia --volume /Volumes/MyVolumemacOS Big Sur (11):
sudo /Applications/Install\ macOS\ Big\ Sur.app/Contents/Resources/createinstallmedia --volume /Volumes/MyVolumeEnter your administrator password when prompted. The process takes 20-30 minutes.
Step 4: Boot from the USB Installer
For Apple Silicon Macs:
- Shut down your Mac
- Press and hold Power button
- Select the Install macOS [Version] volume
- Click Continue
For Intel Macs:
- Restart your Mac
- Immediately hold the Option (⌥) key
- Select the Install macOS [Version] volume
- Press Enter
Step 5: Install macOS
- From the installer menu, select Disk Utility if you want to erase first
- Return to the menu and select Install macOS [Version]
- Choose your destination disk
- Follow the on-screen instructions
Special Considerations for Apple Silicon Macs
Apple Silicon Macs (M1, M2, M3, M4) have some important limitations and requirements:

Minimum Supported macOS Versions
| Mac Model | Minimum macOS Version |
|---|---|
| M1 Macs (2020) | macOS Big Sur 11.0 |
| M2 Macs (2022) | macOS Ventura 13.0 |
| M3 Macs (2023) | macOS Sonoma 14.0 |
| M4 Macs (2024) | macOS Sequoia 15.0 |
You cannot downgrade below your Mac's minimum supported version.
Security Policy Considerations
Apple Silicon Macs have a security policy that may need adjustment:
- Enter Recovery Mode (Power button hold)
- Select Options → Continue
- From the menu bar: Utilities → Startup Security Utility
- Select Reduced Security if needed for older macOS versions
Activation Lock
- Ensure you sign out of iCloud before downgrading
- Have your Apple ID credentials ready
- Activation Lock may trigger during reinstallation
Preparing Before Downgrade: Essential Checklist
Data Backup
Create Multiple Backups:
- Time Machine: Full system backup
- iCloud: Documents, Photos, Desktop sync
- Manual Copy: Critical files to external drive
Export Application Data:
- Browser bookmarks (Safari, Chrome, Firefox)
- Email accounts and settings
- Application preferences and licenses
- Password manager export
Document Your Setup
System Information to Record:
- List of installed applications
- System Preferences/Settings configurations
- Network settings (Wi-Fi passwords, VPN configs)
- Printer and peripheral configurations
Verify Software Availability
Before downgrading, confirm:
- You have installers for needed applications
- License keys are accessible
- Cloud-synced data is up to date
Using Our Downgrade Assistant Tool
To make this process easier, we've created an interactive Downgrade Assistant tool that:
- Helps you choose the right downgrade method for your situation
- Provides step-by-step instructions tailored to your Mac
- Generates the correct
createinstallmediacommands - Guides you through Apple Silicon-specific requirements
Troubleshooting Common Issues
Problem: "This version of macOS cannot be installed on this computer"
Causes:
- macOS version not compatible with your hardware
- NVRAM/PRAM needs reset
- Secure Boot preventing installation
Solutions:
- Verify compatibility on Apple's support website
- Reset NVRAM: Restart + hold Option + Command + P + R for 20 seconds
- Adjust Startup Security Utility settings (Apple Silicon)
Problem: Installation Stuck or Fails
Quick Fixes:
- Verify installer integrity (re-download if needed)
- Use a different USB port
- Try a wired internet connection for Internet Recovery
- Boot into Safe Mode first: Hold Shift during startup
Problem: Data Loss After Downgrade
Recovery Options:
- Restore from Time Machine backup
- Check iCloud for synced files
- Use data recovery software as last resort
Post-Downgrade Steps

After Successfully Downgrading
- Run Software Update to get the latest security patches for your version
- Reinstall Applications from verified sources
- Restore Data from backups
- Reconfigure Settings (accounts, preferences, accessibility)
- Test Critical Workflows before resuming normal use
Preventing Future Issues
- Wait before upgrading: Let others test new macOS versions first
- Check compatibility: Verify software support before upgrading
- Maintain backups: Keep Time Machine running continuously
- Read release notes: Understand what changes each update brings
Frequently Asked Questions
Can I downgrade from macOS Tahoe to Sonoma?
Yes, you can downgrade from macOS Tahoe (macOS 26) to Sonoma (macOS 15) using any of the three methods described above. The USB installer method is often the most reliable for this scenario.
Will downgrading erase my files?
It depends on the method:
- Time Machine restore: Replaces everything with backup contents
- Internet Recovery/USB: Clean install erases the disk (backup first!)
How long does downgrading take?
- Time Machine: 1-4 hours (depends on backup size)
- Internet Recovery: 2-6 hours (depends on internet speed)
- USB Installer: 1-3 hours (fastest method)
Can I keep some files while downgrading?
Not directly. Always back up files you want to keep before downgrading, then restore them after the installation completes.
Is downgrading safe?
Yes, when done correctly. The key is having good backups before starting and following the steps carefully.
Conclusion

Downgrading macOS is a viable solution when a new version causes more problems than it solves. Whether you choose Time Machine restore, Internet Recovery, or a bootable USB installer, the process is straightforward when you follow the proper steps.
Remember:
- Always backup your data before attempting any downgrade
- Verify compatibility to ensure the target macOS version works with your Mac
- Use our Downgrade Assistant for personalized guidance
- Take your time – rushing increases the risk of mistakes
With the right preparation and methodology, you can safely return to a previous macOS version and restore your Mac's stability and compatibility.
Need help choosing the right downgrade method for your specific Mac? Use our interactive Downgrade Assistant to get step-by-step instructions tailored to your hardware and situation.